WaterBoss Water Softener Maintenance & Repair - Replace Piston and/or Drive End Cap Assembly
WaterBoss Water Softener Maintenance & Repair - Replace Piston and/or Drive End Cap Assembly
Order Drive End Cap assembly here https://thewaterestore.com/products/aquamaster-drive-end-cap-assembly-54520
Please share this video https://youtu.be/gconWJRDAJM
For more great information about water treatment, subscribe! https://www.youtube.com/user/WaterStoreMidland
Check out our Ultraviolet Playlist here https://www.youtube.com/playlist?list=PLmnBltD77jBVz_-FCj7WCapqTU55k2GTO
Follow me
https://www.facebook.com/TheWaterEstore/
https://twitter.com/FilterEstore
https://www.linkedin.com/company/the-water-filter-estore/
or email info@TheWaterEstore.com or info@TheWaterStoreMidland.com
Check out our online store at https//www.TheWaterEstore.com or our full service store in Midland, Ontario at https//www.TheWaterStoreMidland.com
Although these Water Boss High Efficiency water softeners rarely need service or repair, today I'm looking at how to replace the Piston or the Drive End Cap Assembly (DECA). This may become necessary if the piston jams inside the valve, check out trouble shooting.
1) Remove the valve cover assembly and initiate a regeneration by holding down the regeneration button for 5 seconds, once you hear water running to drain, bypass and unplug the water softener. Unplug the Computer Control Assembly and remove it by sliding to the right.
2) Remove the screws at each end of the DECA and disconnect the Brine Valve Assembly from the Safety Shut Off. Removing the Hex nut from the Safety Shut off inside the brine well will make it easier to remove from the Brine Valve Assembly. Be careful not to lose the O ring and Brine Piston.
3) Slide out the DECA being careful to keep track of the two O rings at the piston end.
4) If you're just replacing the piston, note that it's slotted into the piston slide. To remove it, rotate Piston 90° counter clockwise. To replace, rotate the piston 90° clockwise until you hear an audible “click.” Then reassemble.
5) If you're replacing the whole DECA you will need to remove the Drive Motor, and Magnet Disk Assembly from the old DECA and install on the new one.
6) Before reassembly, check the O rings, the smaller O-Ring should be placed on the male boss on the End Cap. When assembling the End Cap to the Valve Body, care should be taken to make sure the small O-Ring is aligned with the opening in the Valve Body and that the large O-Ring stays in the groove in the End Cap. If misaligned, the O-Rings can become pinched and leak.
7) Slide the DECA into the valve body wiggling it slightly while sliding it in. Tighten screws.
8) Reattach the Brine Valve Housing Assembly and connect to Safety Float.
9) Secure the safety float, reattach and reconnect the Computer Control Assembly, plug into wall.
10) Once the valve has found home you can slowly open the bypass valve and check for leaks.
11) Regenerate water softener, again checking for leaks throughout the regeneration process.
Please share this video https://youtu.be/gconWJRDAJM
Check out all of our WaterBoss videos here https://www.youtube.com/playlist?list=PLmnBltD77jBVmT2oLo1vCSES7WDRqWx3L
For more great information about water treatment subscribe!https://www.youtube.com/user/WaterStoreMidland
Follow me
https://www.facebook.com/TheWaterEstore/
https://twitter.com/FilterEstore
https://www.linkedin.com/company/the-water-filter-estore
or email info@TheWaterEstore.com or info@TheWaterStoreMidland.com
Check out our online store at TheWaterEstore.com or our full service store in Midland, Ontario at TheWaterStoreMidland.com
Please comment or ask questions below.
Видео WaterBoss Water Softener Maintenance & Repair - Replace Piston and/or Drive End Cap Assembly канала Gary the Water Guy
Показать
Комментарии отсутствуют
Информация о видео
Другие видео канала
 WaterBoss 900 Water Softener Error code E1 and HO Repair
 WaterBoss ProPlus Installation
 GE Water Softener ep1 Venturi Cleaning
 How To Replace Media Resin Beads In Water Softeners
 Making A New Fiberglass Hatch From A Mold
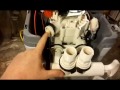 GE 40k grain water softener unboxing/ assembly/ review (GXSH40V)
 How to Replace Piston and Seal Pack Clack WS1 Water Softener
 How to Install a Whole-House Water Filter | Ask This Old House
 WaterBoss Water Softener Clean Flow Control & Brine Piston 9 Easy Steps
 Drive End Cap Removal
 Removing Water Softener Valve from Tank ( standard threaded tank )
 Water Softener Troubleshooting Too much Water in Brine Tank
 Water Boss Water Softener Maintenance & Repair - Clean or Replace Injector 5 Easy Steps
 Get Rid of Water Softener Salt Clog Once and for All in 3 Quick and Easy Steps
 Water Boss 380 repair by an average joe. Pt. 1
 How to Remove a Salt Clog from Your Water Softener
 Water Softener Installation 2A WaterBoss Plumbing Connections
 Water Softener Installation 4A WaterBoss Basic Programming in 5 Easy Steps
 How to Repair a Water Softener | This Old House
 Give me 2 1/2 Minutes and I'll Show You How to Set Waterboss Water Softener Power Clean Cycle