Making a River Table - Start to Finish
This is a river table tutorial that covers everything from selecting your slab of wood to how to get a flawless epoxy finish.
This description contains affiliate links. An affiliate link means I may earn commissions for items you purchase through links in this post (at no additional cost to you). As an Amazon Associate I earn from qualifying purchases.
Some of the products used in making this table:
Epoxy we used (heat and yellowing resistant) for the seal coats and top final flood coat https://amzn.to/3c5iz2n
Super Cast Epoxy (designed to be poured over 3/4" and up to 2" in a single pour) used on the river https://amzn.to/3pgtGJN
Metallic powder additive used with the super cast epoxy https://amzn.to/3oec7sy
Router bit used for planing the slab https://amzn.to/3sSV2Yv
Quality brush used to chop out the epoxy flood coat https://amzn.to/39cfNGM
or if you are planning on doing a couple epoxy projects or working with bark on, I suggest this bulk pack of 12 (you save over $1 per brush) https://amzn.to/3qMgegR
Burn in wax sticks used to fill stubborn pinholes between seal coats of epoxy https://amzn.to/3a1GQny and https://amzn.to/3c6f7Vp
You can keep reusing your trowel by simply letting the epoxy drain off the square notches. This 1/8 x 1/8 x 1/8 square notch trowel is the size you need for the flood coat https://amzn.to/2M0SiYv
In this video I use this 2-1/4 hp Dewalt Router with a fixed base - this link is to kit I bought (it includes the same router with the fixed base and an additional plunging base - which has many applications) https://amzn.to/36bMjqy
When using a 1:1 ratio epoxy, measuring your amounts is extremely important. Here is the brand of mixing cup I trust and has never let me down https://amzn.to/3iGUHU0
I use Diablo 5" random orbital sanding discs (I use different grits, working my way up to 220 - there is no need to go beyond 220 grit when using epoxy) https://amzn.to/2MizlAv
With the exception of a little hand sanding, I use this Dewalt Random Orbital Sander https://amzn.to/3iJVxzx
This is an epoxy cleaner which I use before delivering any epoxy product to a client. It also contains an epoxy polish to help maintain your finish. https://amzn.to/3iHRYd6
These are the metal sanding disks I use on my 4 1/2 grinder with the grinder conversion attachment. I use 50 grit. https://amzn.to/3jTTB89
To remove router lines, excess epoxy, and/or hardened epoxy drips, I use this conversion grinder attachment on my 4 1/2 grinder and attach low grit metal sanding disks. https://amzn.to/3pueJ5Y
Видео Making a River Table - Start to Finish канала Woods and Workshop - Northern Ridge Designs
Показать
Комментарии отсутствуют
Информация о видео
2 ноября 2020 г. 2:21:19
00:17:41
Другие видео канала
 LED River Table | FREE Master Class | Stone Coat Epoxy
 Epoxy Resin river Table. Стол из слэбов с эпоксидной смолой.
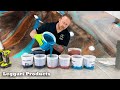 Use Epoxy To Coat Existing Countertops To Make Them Look Like Real Stone Step By Step Explained
 Walnut coffee table
 How to Make Epoxy Cutting Boards
 13 OF THE MOST AMAZING EPOXY RESIN AND WOOD RIVER TABLES
 HUGE 60L Epoxy Live Edge River Table!
 стол с газоном
 The Yew Epoxy Resin coffee table no.1 - River table
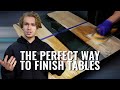 How to Finish a Wood and Epoxy Table Like a Pro
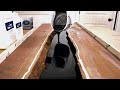 Trash Wood to Treasure - DIY Kitchen Island w/ Epoxy River top
 Coffee table with epoxy resin Homemade
 Modern Desk Build - Epoxy Table - How To Woodworking - DIY Projects
 $10,000 Dining Table Build - Slab Epoxy Table - How to Woodworking
 The SECRET to a Bubble Free Epoxy Finish
 DIY Farmhouse Dining Table w/ Epoxy Inlays Using Reclaimed Barnwood
 Calculating Epoxy Volume--How to Epoxy Woodworking
 LED EPOXY RESIN RIVER TABLE #2
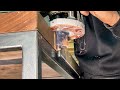 Standing Desk Build - How To Make an Epoxy Table
 How to Make Epoxy Coffee Table | Resin Art | Manta Ray in Resin