Mercedes-Benz - How to remove / install the front module | W117, W156, W176, W242, W246
W117, W156, W176, W242, W246
CLA-Class, GLA-Class, A-Class, B-Class
===========================================================
Engine removal.
Preparation: Remove front module.
Space is needed in the engine compartment.
Remove engine hood and support.
Remove attached air intake hose.
The engine hood lock is behind it.
Remove 3 screws, place lock to one side.
Remove upper 5 screws on bumper.
Raise vehicle.
Remove front wheels.
Remove screw from bottom on inside of wheel arch.
Remove 3 clips from trim.
Remove upper left screw.
Detach cover.
Disconnect daytime running lamp connector.
Disconnect Parktronic connector.
Remove 2 screws from upper bracket of bumper.
On the other side: Disconnect daytime running lamp connector.
Remove the upper screws.
Loosen and remove underfloor paneling.
Obtain assistance from a second person.
Remove front skirt.
Remove headlamps incl. spray nozzles on both sides.
Remove upper 2 fixings on radiator.
Detach wiring harness.
Disconnect connectors for horn, ...
... crash sensor and DISTRONIC.
Here: The front module is attached to the absorber with these bolts.
Remove the 3 large bolts and the 1 small bolt at a 90° angle.
Remove 1 bolt at the top left of the front end.
On the other side: remove washer fluid ...
... reservoir with connectors.
Remove bolts on front module.
The front module is fully detached.
Obtain assistance from a second person.
Take out front module.
Removal is complete.
Install front module:
First attach front module, lights, washer fluid nozzles and bumper.
Fit front module with bolts and wiring harness, ...
... connectors and both brackets to radiator.
Do not tighten the bolts.
Fit headlamps including spray nozzles.
Fit bumper.
Fit engine hood with lock.
Check gap dimensions:
Between fender and A-pillar 3 mm.
Between engine hood and fender 4 mm.
Between engine hood and headlamp 4 mm.
Between engine hood and bumper 4 mm.
Between bumper and headlamp 4 mm.
Between fender and headlamp 4 mm.
If dimension is +/- 1 mm, correct gap dimension.
Remove bumper again.
Tighten bolts on front module.
Tighten to 120 Nm and protect with wax.
Tighten bolt on upper longitudinal member.
Torque 20 Nm.
Protect bolt with wax.
Install air intake hose and washer fluid reservoir.
Attach bumper and mount wheels.
Attach underfloor paneling.
Calibrate DISTRONIC.
Adjust the headlamps.
Erase fault memory.
--------------------------------------------------------------------------------------
instagram:
https://www.instagram.com/mbownersclub/
twitter:
https://twitter.com/MB_Owners
Видео Mercedes-Benz - How to remove / install the front module | W117, W156, W176, W242, W246 канала MBOwnersClub
Показать
Комментарии отсутствуют
Информация о видео
Другие видео канала
 Mercedes a class: How to remove front bumper (w176)
 Should You Buy a Used MERCEDES B-CLASS? (TEST DRIVE AND REVIEW B180CDI)
 Mercedes-Benz Production in Germany
 HOW TO REMOVE/INSTALL THE 2017 GLC (DIAMOND) GRILLE IN 9 STEPS! | MERCEDES-BENZ
 How does an Electric Car work ? | Tesla Model S
 How to install Sequential Dynamic Turn Signal LED Panel for your MERCEDES BENZ W204 W176 W212
 Changer pare choc et optiques Mercedes classe B
 Installation Mercedes Benz screen 10.25" - class A - B - C - CLA - GLA - G - Servitronic Torrent
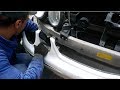 Removing Front Bumper on Mercedes W211 / How to Remove the front Bumper for Mercedes W211
 Mercedes A-Class Production
 2014 Mercedes CLA 250 4Matic Rear Differential Noise Fix
 Mercedes Benz Grill Emblem Removal A-Class, C-Class, E-Class, CLS, CLA
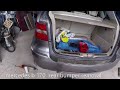 Mercedes-Benz Β 170 rear bumper removal
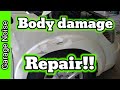 How to repair body damage on your car.
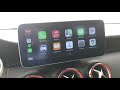 INSTALACIÓN PANTALLA 10,25’ MERCEDES CLASE A W176 / @liveandcars
 Problems with my GLA45 AMG Panamericana Grill Install
 How to unlock a car door (without a key)
 Mercedes A-Klasse B-Klasse W176 W246 Werk Rastatt FOOTAGE Production Plant
 MB Mercedes A180 W176 maintenance service fuel filter air filter pollen filter Wannabe Mechanic
 Mercedes-Benz - How to remove / install the oil separator | W117, W156, W176, W242, W246 engine M270