DIY Acoustic Panel Build + Mounting and Placement Tips
In this video you will learn how to construct, place, and mount acoustic panels for your home studio.
0:00 Intro
The materials listed are for: 8 2’x4’ panels of 4 inch depth.
Let’s jump right into and get started on the
0:20 Frame.
4 - 4’x8’ sheets of 3/4” plywood
Cut into 4 inch pieces with a table saw.
You could easily substitute 8 foot long 1x4s for this project.
24 - 4 foot pieces.
Next cut 8 of these boards in half for the top and bottom of the Frame.
Once all 8 have been cut to length, drill pilot holes on each side of the short boards.
Measure 1/2 the width of your board to ensure the pilot hole lines up centre to form a clean joint.
Assemble the frame and use the existing guide holes to extend the guide into the vertical board. This is necessary to prevent such a thin board from splitting. Repeat these guide holes on all four sides.
Next, finger twist screws into each guide hole on both the top and bottom boards. Use a drill to have the screws just peeking thru the other side of the board. Line the screws up with the next guide holes and screws them in. Go Slowly, and make sure your joint is lining up smoothly, This was one of the trickier parts of the process. And that is your frame.
Next we’ll prepare the wrap. Any Basic cloth will do. This material was about 11$ a metre I ended up using about 12m for the outer wraps.
1:37 Outer Fabric Wrap: 59’ x 34’
For a 4 foot high panel, Cut across the fabric 59”. Length + 10”
That’ll be enough to wrap around the 4” board and an extra inch so you can have a bit to fold around to get a better hold.Honestly you could cut a lot of corners with this but I wanna stretch this fabric as far as it’ll go, and I’ll be using some reclaimed pieces for the back cloth panel.
Measure down the length of the fabric 34” for the Width of the Fabric.Again this is 24” of the width of the panel +10” for wrap and fold.Once your fabric is cut, give it a quick iron if you like to smooth out any creases, and its ready to wrap.
2:28 Fold N Wrap
Start from the long sides, fold the fabric and staple it to the back of the frame, leave a few inches between staples so you have room to staple the back fabric. Stretch and pull the fabric taunt on the other side, as you staple. For the top and bottom, fold and staple the corners around, then work from one side to the other.
Make sure to pull the fabric tight again on the last side. 3:03 One quick mounting step.
Drill a guide hole 11” from the top and 1/2” from the outer edge. Then twist a 1” eyehole into both sides.
Wrap some picture wire around the first eyehole and measure the length so that the wire will not show over the edge of the panel.
Cut the wire and loop the other side around to find your length, then tie it up.This is what will hold your panels up to the wall. Next let’s fill the panel with some insulation.
3:48 Filling
I chose Rockwool 24” Safe and Sound the Fluffy stuff. Open it before you construct the panels cuz it’ll expand overnight. After about an hour the panels are just about 3” thick and they will continue to expand a bit. This is great because The lower density Rockwool will increase R value because of air resistance. The extra air gap increases low mid frequency absorption. This will space your panels off the wall to catch longer waves at a greater velocity. In addition, the space allows the wave to reflect off of the smooth hard walls surface and be absorbed again through the panel.
4:49 Back Cloth Panel 52” x 27”
Next lay another sheet of fabric over the back of the panel and thru the picture wire so it’s exposed. Fold the edges and pull tight as you staple like the front wrap. For this piece of fabric I measured the Width + 3” to provide 1.5” to fold under to get a better hold on the edge.. Give it a quick cleaning with a shop vac and you panel is ready to hang!
6:52 Mounting
The first thing to decide is whether you’ll mount on one hook or two.For 2 hooks, stretch your fingers across the wire to the distance between 2 stud, likely 16”. This is when your panel will sit on the hooks.
Measure how far the wire will sit below the top of the panel. It’s likely 6” When deciding how low from the ceiling to place you panel, ADD this length to your wall measurement to place the top of the panel in the right spot.
use 30lb picture hanging hooks for this project. They need to be big enough to fit a 1 1/2” nail to dig into the studs. Find your studs, Measure your distance from the ceiling, remembering to add the length of your wire from the top.Then place your hooks with the BOTTOM of the hook at your pencil mark.
8:52 Sound Test
►► Use my VIP link to get 7% off your first year at DistroKid:
http://distrokid.com/vip/learnaudioengineering
► Home Studio Mix Academy
https://homestudiomixacademy.com
►How to Record Anything eBOOK DOWNLOAD:
http://learnaudioengineering.com/
► PATREON
https://www.patreon.com/RobertLAE
Видео DIY Acoustic Panel Build + Mounting and Placement Tips канала Learn Audio Engineering
Показать
Комментарии отсутствуют
Информация о видео
Другие видео канала
 Ultimate Cheap DIY Acoustic Panels. Broad Spectrum Damping Panels You Can Make In a Weekend!
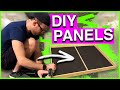 How I Built My Acoustic Panels (Wall, Ceiling, and Cloud Panels) - An In Depth Build Video
 LED Acoustic Foam Panels | DIY Studio lighting NEXT LEVEL.
 Bass Traps: Floor to ceiling, or half the corner good enough? - AcousticsInsider.com
 Pro Acoustic Panels DIY how to make Cheap! + Acoustic Treatment Basics for a Pro or Home Studio
 DIY ACOUSTIC PANELS FOR UNDER US$30!!! - Are they good enough for a professional recording studio?
 DIY Bass Traps and Acoustic Panels | Best Acoustic Treatment
 Building A Professional Recording Studio - Part 12 (insulation and fabric 1 of 2)
 DIY Acoustic Panel for Sound absorption made out of PVC pipes. Cheap. Efficient. Beautiful.
 Effective Acoustic Treatment: Mounting and Placement of Acoustic Treatment
 How To Place DIY Acoustic Panels - Easy Placement Tips
 How To Build A DIY Acoustic Panel Cloud WITH LIGHTS | For A Recording Studio!
 Do It Yourself Acoustic Panels! You Can Do It!
 How To Build Acoustic Panels | DIY Acoustic Panels
 Rockwool OR Fiberglass for DIY sound panels?
 DIY Acoustic Panels Fabric, Towels & Other Questions Answered | QCC#5
 How to Hang Acoustic Panels on Walls and in Corners - Acoustic Panels with an Air Gap
 DIY Bass Traps: Home Studio Room Acoustics
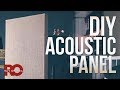 How to Build Your Own Acoustic Panels