Photo Realistic Post Production with 3ds Max and Photoshop : The Quickest Way
Want to learn how to create your first photorealistic render in 5 simple steps? https://pxlme.me/D3vZqmYA
In this video we look at how to use the images we rendered out of 3ds Max using Vray to create photorealistic images in Photoshop.
We will use the V-ray elements in photoshop to finish off the render. Here's how to bring it all together.
TOOLS AND TECH:
💻 Tech and Tools for Remote Digital Artists
https://www.amazon.co.uk/shop/jakedenham-luxuryvisuals
💾 Main Software
3ds Max https://pxlme.me/hQReM_2r
V-Ray https://pxlme.me/wA3IkNh5
Photoshop https://pxlme.me/_Xg6sMGo
Here is an Introduction to 3ds Max video https://youtu.be/zguZC4Fz7W0
and here is a look at the latest version of V-Ray https://youtu.be/UBD7NlmIJwc
⛅ Rendering
I highly recommend using Chaos Cloud to render. Being able to render on remote machines allowed me to pick up my laptop and travel the world. It’s straightforward to use and you can get 20 free credits using this link. https://pxlme.me/a-XJfGea
Here is a video on how to use Chaos Cloud. https://youtu.be/g92mz-qKlsc
📜 Scripts
Copy and Paste between 3ds Max scenes.
Write a quick script that will save you hours of time. https://youtu.be/yM3r034fx4U
Here is the HDRI thumbnail generator script https://www.luxuryvisuals.com/resources
and this video will explain what it does. https://youtu.be/0Vxn9Y2chwg
Tired of hitting the interactive render button?
Create a V-Ray Interactive Render Keyboard Shortcut. https://youtu.be/1YFpx8a84YI
BE MY FRIEND:
💌 Sign up to my email newsletter - https://sendfox.com/luxuryvisuals
🌍 My website / blog - https://www.luxuryvisuals.com/
🐦 Twitter - https://twitter.com/jaked3d
WHO AM I:
Ahoy! I'm Jake, a CGI artist from the UK. I freelance, teach, and travel the world because of Luxury Visuals. I have been lucky enough to work with some of the world's most exciting designers and brands.
🌍 My website / blog - https://www.luxuryvisuals.com/
On this channel I focus on:
→ Improving Your 3d Rendering
→ How To Make Photo Realistic Renders
→ Making 3D Visualizations
→ 3ds Max, Photoshop, V-Ray and Corona Render Engines
→ Achieving Photorealism and How To Make Photo-Realistic Renders
→ Helping You With Your Interior Design and Architectural Rendering
#3dsmax #CGI #Learn3D
PLAYLISTS
3ds Max How-To Tutorials: https://www.youtube.com/playlist?list=PLQmLVe9epBDx2Yko-Y-bYJJ6SEolbD55P
Introduction To 3ds Max: https://www.youtube.com/playlist?list=PLQmLVe9epBDzeMoVMtgyD-rdRrabZNLW_
Exterior 3D Rendering with 3ds Max + Vray: https://www.youtube.com/playlist?list=PLQmLVe9epBDwV_DOxGwAbS1U-ekF8J2HR
3ds Max + Corona Renderer: 5 Tips To Create Your Best Visuals Ever: https://www.youtube.com/playlist?list=PLQmLVe9epBDzJiNQaCN6Rg5onPVNHNKV7
↓↓↓↓↓↓↓↓↓↓↓↓
In this video I talk about the following:
#ImprovingYour3dRendering
#HowToMakePhotoRealisticRenders
#Making3DVisualizations
#3dsMax
#Photoshop
#VRay
#PhotoRealisticRenders
#ArchitecturalRendering
▶STEPS BELOW
Open up the render. RGB_color. First thing I would do is Duplicate the layer with Ctrl J and change it to a smart object. Smart objects are really useful if you need to update your render later.
Color Balance -12 Cyan
Levels 10 0.92 229
Curves S
Drag your Render Mask on next. In view you can turn on snaps to make putting the layers on top easier so they align.
Using the render mask with the magic wand tool we can now select certain areas. Be sure to have contagious off and tolerance to around 8.
Diffuse on soft light at 50% and paint out areas with a mask. Glass etc. RC with brush selected and chose a soft brush. Black will remove. I think this makes the image pop a little.
Next up to add some depth lets add the Vray Extra Tex. On a multiply at 33% and paint out unneeded areas.
Next Vray Lighting with has come in a bit noisy so we can use a reduce noise 10 , 0. Soft Light around 10% and paint out unneeded
Vray Reflection -Soft Light 55%. Paint out
Vray Specular - Screen - 58%
Color Look up filmstock_50 - foggy night 25%, use gradients from the outside
Exposure +0.50 and paint out window.
Sheers, Select and Levels
Looks good drop in and resize, hold shift. Put to back and mask original. Exposure and effect only below. +0.72 Gamma 3.53.
Ctrl J and E
Auto Color at 50% (shift F)
Auto Contrast
Convert to Smart Object
Crop
Filter, Camera Raw Filter
-2, 0 , +10, -8, +6, +9, -10, +4, +19, -3, -5
Down to 70%
One last thing the bed head more blue with a color balance.
Save and Save as .jpg
#3dsmax #LuxuryVisuals #Learn3D
Видео Photo Realistic Post Production with 3ds Max and Photoshop : The Quickest Way канала Jake Denham - Luxury Visuals
Показать
Комментарии отсутствуют
Информация о видео
17 мая 2017 г. 23:25:24
00:12:30
Другие видео канала
 Photoshop 2020 | Fast Post-Production (Amazing Render)
 Architecture Post Production by Photoshop (Step by step) Hậu kỳ Kiến Trúc chi tiết
 5 AWESOME 3ds Max Tools You Don't Use... (But You Should!) | 3ds Max Tips and Tricks
 Photoshop Masterclass: Filters & Effects
 Advanced Color Matching Process in Photoshop
 Postproduction Process of my 3d Visualizations | 3ds max + Photoshop
 How I edit my Raw Renders? | 🔥🔥 | 3ds max + Photoshop
 Interior Design Photography Editing Timelapse - Post-Production Workflow using Adobe Photoshop
 The COMPLETE Guide to Smart Objects in Photoshop
 The Easy Way To Make Beautiful Interiors In Blender
 Realistic Exterior Rendering In 3Ds Max Vray 5 | Photorealistic Rendering Vray 5
 Photoshop Manipulation Tutorial - Adding Light Effects in Photoshop
 3ds Max Tutorial 001 - Making a Classic model for Sofa or Wall
 3Ds Max Living Kitchen Interior Tutorials Modeling Design Vray Photoshop
 Photoshop Tutorial 01 | Architectural Post production Image | 3ds Max Vray Elements Using Photoshop
 How to Repair and Colorize Old Photos (Adobe Photoshop CC Tutorial)
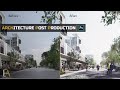 Architecture ((Post Production workshop)) in Photoshop _ ورشة إظهار معمارى على الفوتوشوب
 Exterior Architecture Post-production in Photoshop
 7 Photoshop Tips every Architect must know!
 Furniture Workflow - Part 1 (Modeling in 3DsMax)