DIY: BMW M30 Valve Adjustment and Crush Washer Replacement
Video tutorial on how to adjust the valves on a BMW M30, along with crush washer replacement which is towards the end of the video. Out of adjustment will cause engine ticking, poor performance, poor throttle response, idling issues, and poor fuel economy. This particular vehicle I am working with here today is a 1984 BMW 733i, equipped with a 3.2L inline 6 cylinder. A similar procedure may apply to other BMW engines of this generation as well. Disassembly procedure may vary between vehicles, as I know this engine was found in the 5 and 6 series as well.
Amazon links for various products used in the video for both USA and Canada:
USA:
Metric feeler gages: https://amzn.to/3wpCdhj
Imperial feeler gages: https://amzn.to/2Orx33q
Magnetic base: https://amzn.to/3dD3Nz0
Dial indicator: https://amzn.to/3mohIwT
Canada:
Metric feeler gages: https://amzn.to/3cPyYbp
Imperial feeler gages: https://amzn.to/31JLYcf
Magnetic base: https://amzn.to/2PDpRBD
Dial indicator: https://amzn.to/3dx6AtL
Website: http://4diyers.com
Patreon: https://www.patreon.com/4diyers
Facebook: https://www.facebook.com/4diyers
Google Plus: https://plus.google.com/+4DIYers
Twitter: https://twitter.com/4DIYers
Instagram: https://www.instagram.com/4diyers/
Tumblr: http://4diyers.tumblr.com
Pintrest: https://www.pinterest.com/4diyers/
Tools/Supplies Needed:
-feeler gauges
-ratchet and socket set
-valve cover gasket
-4 aluminum crush washers (#11421252343 )
-10mm wrench
-allen keys
Procedure:
-remove the air box cover and air filter
-remove the rubber intake tube between the throttle body and air flow meter
-next remove the air flow meter with mounting bracket that is fastened to the air box
-to remove the bottom portion of the air box, you’ll have to unbolt the washer fluid tank to access the lower bolt for the air box base
-pull back the fresh air intake accordion breather tube for the air box, then lift it out
-unbolt the plastic case for the spark plug wires
-remove the faster which holds on a wiring harness clamp
-unbolt the brackets that braces the upper intake to the valve cover
-remove the valve cover, there will be various fasteners around the outside of the valve cover
-all the fasteners use a 10mm socket, you may need a mix between a shallow and deep socket, with the use of a 3” extension, all 3/8” drive
-I removed the spark plugs
-I used a dial indicator with a soft plastic tube stuck on the plunger, then the magnetic base is stuck on the exhaust manifold or whatever other steel components there is
-the valves must be closed in order to check their adjustment, we want the rockers sitting on the base circle or also known as heel of the lobe
-you can turn the engine over by the crank
-so instead I used the alternator pulley, using a socket on the pulley nut, make sure the belt is tight and then the engine can be turned over and select top dead center for cylinder number one
-using a feeler gauge, when the engine is cold or 95F or 35C or below, the clearance spec is 0.30mm or 0.012”
-if the engine is warm, 176F or 80C or above the clearance spec is 0.35mm or 0.014”, this is the same for both intake and exhaust valves
-to adjust the eccentric on the rocker, loosen the 10mm nut that locks it into place with a wrench
-BMW does have a specific tool, but you can use a 3/32” allen key, stick that in the hole and rotate accordingly
-keep the gauge leaf in place, then tighten the lock nut and recheck
-moving onto the next cylinder, again turn over the engine, there is no need to do extra work and go to the second cylinder back, instead go by the firing order which is 1-5-3-6-2-4 starting from the radiator
-therefore we’re going with the second last cylinder. Setup the dial indicator again so we can see top dead center
-these bolts are known to loosen up, then oil pressure is lost on the oil rail and some of the valve train will not get lubrication
-remove the banjo bolts and old crush washers
-the old crush washers, they cannot be reused
-I’m doing something a little different here to prevent these bolts from loosening, I’m using thread locker
-oil must be cleaned from the threads so the threadlocker sticks
-in the threaded holes I used the degreaser sprayed on q-tips
-install a crush washer under the oil rail, then another on the banjo bolt
-apply a medium grade thread locker to the banjo bolts, just enough to cover the threads
-the torque spec is 8 to 10 foot pounds, for this I am using an inch pound torque wrench because it’s such a low value, to convert this, it’s 96 to 120 inch pounds
Thank you to all those who watch my videos and support my content. Don't forget to subscribe to my channel for future tutorial videos and like my video if you found it helpful. New videos are always being uploaded every week!
© 4DIYers 2013
All Rights Reserved
No part of this video or any of its contents may be reproduced, copied, modified or adapted, without the prior written consent of the author.
Видео DIY: BMW M30 Valve Adjustment and Crush Washer Replacement канала 4DIYers
Показать
Комментарии отсутствуют
Информация о видео
Другие видео канала
 BMW e34 535i M30 Valve Clearance Adjustment
 Straight Six Valve Adjustment How-To! BMW M20
 DIY: BMW Air Flow Meter Refurbishment
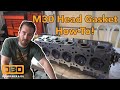 BMW m30 Head Gasket Replacement How-To!
 Copper's Surprising Reaction to Strong Magnets | Force Field Motion Dampening
 How to Change the Oil and Filter in an E28 BMW M30 533i 535i 535is
 BMW M30 Engine Intake Manifold Overview: Vacuum Hoses & Components - E32 735i & E34 535i
 BMW V12 Leichtmetall Motor M70
 BMW e28 Surging Idle Problem Solved! ProgRama Rebuilt Fuel Injection Idle Control Module Replacement
 Установка распредвала, рокеров и коромыслы - Двигатель М30 BMW
 BMW 730i M30 E32 vlog | Adam Kunc
 How To Adjust Valve Shim Clearance on a BMW M3 E36
 BMW E30 323i Zylinderkopfüberholung/Zylinderkopfdichtung wechseln/ Zahnriemen/ Ventile einstellen,
 bmw rocker arm resurface
 How to Fix BMW E28 533i 633csi 733i Surging Idle Control Valve Module
 E34 530i V8 Winterauto - Fahrwerk & Bremsen - Teil3 | by Lofo Performance
 BMW M30 Rebuild
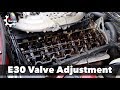 E30 Valve Adjustment
 DIY: BMW Throttle Position Sensor Testing
 Hydraulic valve adjustment made easy - Your Engine Guy