Switch Box Part Three The Last Part!
In this video I'll show the end of the project on my end. -D
Aaand I will be finishing up the project with the LED diodes. They were a little tough to get in there because not much room was left after the design was finished. But I had just enough to squeeze the diodes in the holes and finish off the rest. For the LED's I wired them in parallel with a resistor branching off towards each LED. Then I wired the negative end of the diode directly into the negative port on the switch so that they would only turn on when the switch was closed and off when the switch was open. I used a 470 Ohm resistor as that's the minimum required for these LEDs, but eventually I upped it to a 1000 Ohm resistor so that the lights wouldn't pulsate. All said and done though, the set up worked perfectly for a while. Then the LEDs stopped working so well. I think it's due to the solder ball I ended up making out of the positive end. This will be fixed later. Heat shrink will also hopefully be replacing the red electrical tape soon as well. (Keep in mind that the duct tape is only to hold down the wires also.) All considered, we're very happy with how the project turned out! Everything works as intended, and it gives us something to do for fun later when the heat shrink gets here...
Enjoy!
-The GirlFriend
Видео Switch Box Part Three The Last Part! канала Peterman Builds
Показать
Комментарии отсутствуют
Информация о видео
Другие видео канала
 PS4 Full Button Replacement
 Anemone Eating
 Creating Your Own CO2 Supply: Freshwater Aquarium
 Switch Box Part Four: Circuit Board Time
 Floating Shelves
 Chill Hip Hop Beat
 Oscillating Belt Sander Unboxing
 Building a simple fish tank stand for cheap
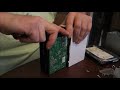 My Cloud Home Disassembly
 Dyson Disassemby and Reassembling
 Dyson Fan Noise
 Replacing Power Beats Battery
 PS4 Trigger Replacement
 How to open a box!
 Switch Box Part Two
 Funky beat
 Switch Box Part One
 How to make Drawers
 Funky Bass Beat
 How to install a homemade drawer