How to Clean a Severely Clogged Epson Desktop Print Head – Freehand Graphics™
This is a third party advisory solution and constitutes no responsibility by Freehand Graphics, Inc. Use of Freehand's Amaze-Ink is strongly advised. Use of untested cleaners may lead to undesirable results. In this video we walk you through the process of clearing a severe clog in the print head of an Epson 4900 inkjet printer. The process is very similar for any model of wide format Epson inkjet printer. www.softwareforscreenprinters.com Music: "Montauk Point" Kevin MacLeod (incompetech.com) Licensed under Creative Commons: By Attribution 3.0 http://creativecommons.org/licenses/b... Opening sound effect: cvp85A_zen_jingle.wav by Jackie4Ever (http://www.freesound.org/people/Jacki...)
Transcript: In this video I will walk you through the process of manually cleaning the printhead of an Epson desktop printer. This should be done in the event of a clog. Done regularly, this will avoid clogging while extending the life of your printer.
For this example, we will use an Epson 1430 but this process will be very similar for any of these Epson desktop printers. We will be using Freehand’s Amaze-Ink Liquid Clog Buster Kit that can be purchased from solutionsforscreenprinters.com. You should be sure to have an ample ink supply, have already printed a nozzle pattern test print, know the printer is clogged and tried using Epson’s method of cleaning. The supplies you’ll need to clean the printhead are Freehand’s Amaze-Ink Liquid Clog Buster Kit and paper towels. Let’s begin.
First, let’s free the printhead from the docking station. Open the cover, then press the ink button to free the printhead. Remove power from the printer or the wall. Open the ink cartridge cover, remove the ink cartridges then set them aside on a paper towel. Close the ink cartridge cover then gently slide the printhead out of the way to the left. Take a sheet of paper towel and fold it until it will fit under the printhead path. Gently slide the printhead over the paper towel to the ink replacement position. Be careful not to rip or fold up the paper towel. Gently place the Amaze-Ink cartridge slot adapter into a cartridge slot as you would a normal ink cartridge. Be sure that the ink spigot is properly inserted into the cartridge slot adapter. Inject approximately one milliliter of Freehand’s Amaze-Ink Clog Buster into the cartridge slot adapter. Repeat for each ink cartridge location.
[Music]
Gently scrub the printhead on the paper towel. Leave the printhead on the paper towel for 45 minutes or more.
[Music}
Gently scrub the printhead again. Then gently push it out of the way to the left. Remove the paper towel then gently move the printhead back to the ink replacement position. Open the cartridge cover, receipt to the ink cartridges. Plug in the printer’s power cord, then press the power button to start the printer. Let’s print another nozzle pattern test print.
[Music]
It should be clean, or much cleaner than before. If the nozzle pattern is still showing clogs, clean the printhead again using Epson’s utility. Still clogged? Repeat this manual cleaning process. Still having an issue or need some advice? Submit a tech support ticket from softwareforscreenprinters.com.
Видео How to Clean a Severely Clogged Epson Desktop Print Head – Freehand Graphics™ канала Freehand Graphics
Показать
Комментарии отсутствуют
Информация о видео
Другие видео канала
 Giving up on a dead printer? Try my way to unclog inkjet printer port
 Your Epson Print Head May Not Be Clogged !
 Print Head Clogs What to do!
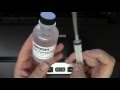 How to Clean a clogged Epson Printer Printhead
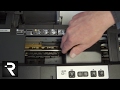 How to Manually Clean Your Epson 1430 Printer Printheads
 DIY Inkjet printer head cleaner,simple,cheap,effective
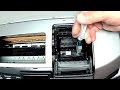 Do you Have a really stubborn Nozzle Clog on your Non Stationary Cart Type Printers?
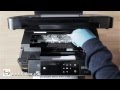 How to clean clogged or blocked Epson print head nozzles the easy way.
 Is Your Epson 1430 Printer Clogged or Streaking? How to Remove, Clean, and Calibrate the Print Head
 How To Remove The Printhead On A Epson 9890 Wide Format Printer for Cleaning - Part 1
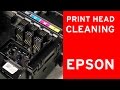 Epson print head cleaner, nozzle cleaning - flushing clogged nozzles
 How to clean printhead manually using hot water
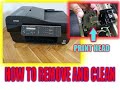 Epson BX 300F removing print head
 How to perform Basic Maintenance on the Epson R2000 and 3800
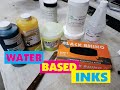 HOW TO MIX WATER BASED INKS
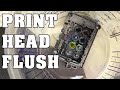 PRINT HEAD FLUSH - WATERFALL - REVERSE FLUSH - DTG / EPSON PRINTERS
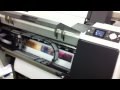 Epson Stylus Pro 7900
 Unclogging an Epson L1800 DTF print head and SEE results clearing a White Ink Clog
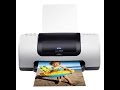 How to Clean an Epson Inkjet Printer Print-Head
 #1 Easy Printhead Change for Epson Artisan 1430 Detailed Guide - Cartridge T079