How to make a POV display with the Arduino | With PCB | Simple POV display with Arduino
In this video, we will learn how to make a POV display with Arduino. For that, I have used the Arduino Nano board. Because it’s most suitable for this project. Also, I have designed the PCB for this project. For that, I used the PCBway Company.
Create your dream electronic hobby project step by step. SriTu Hobby guides you to that. Stay with us.
How to make a POV display with the Arduino | With PCB | Simple POV display with Arduino
https://youtu.be/eTMeK3s0xd0
***Names of components.
*** Step by step.
***Make it easy.
Bluetooth control remote -- https://bit.ly/3GWcmmD
Subscribe for more videos --- https://www.youtube.com/@sritu_hobby
Website for more tutorials --- https://www.srituhobby.com
Android app for more tutorials --- https://bit.ly/3GWcmmD
Our store with the best prices
========================================
https://srituhobby.com/shop
========================================
( Source code and circuit diagram )
=================================
Website -- https://bit.ly/3PnpVlG
Android app -- https://bit.ly/3GWcmmD
=================================
Components list (Our store -- SriTu Hobby)
=================================
1.Arduino Nano board x 1 -- https://bit.ly/41yelHy
2.LED bulb x 10 -- https://bit.ly/4567ffD
3.100 ohm Resistor x 10 -- https://bit.ly/3o6GJSC
4.Female header x 1 -- https://bit.ly/3OTZRhi
5.Two-pin terminal x 1 -- https://bit.ly/3Qz7c7j
6.9v Battery x 1 --
7.9v Battery clip x 1 -- https://bit.ly/45lTPLC
8.DC motor and Toy wheel x 1
=================================
Components list (Amazon)
=================================
1.Arduino Nano board x 1 -- https://amzn.to/3mbKYqc
2.LED bulb x 10 -- https://amzn.to/3hmJ9TV
3.100 ohm Resistor x 10 -- https://amzn.to/35v5GLH
4.Female header x 1 -- https://amzn.to/2Md4uoO
5.Two-pin terminal x 1 -- https://amzn.to/3rQ4ACF
6.9v Battery x 1 -- https://amzn.to/2KMj9XO
7.9v Battery clip x 1 -- https://amzn.to/3p6q1Ox
8.DC motor and Toy wheel x 1
=================================
( Social media links )
==========================================
Facebook--------https://www.facebook.com/srituhobby
Twitter-------------https://www.twitter.com/sritu_hobby
Instagram-------https://www.instagram.com/sritu_hobby
Pinterest---------https://www.pinterest.com/sritu_hobby
Tiktok-------------https://www.tiktok.com/@sritu_hobby
Reddit-------------https://www.reddit.com/user/SriTu_Tech
Linkedin-----------https://www.linkedin.com/in/sritu-hobby
Snapchat--------https://www.snapchat.com/add/srituhobby
Threads---------https://www.threads.net/sritu_hobby
==========================================
Thanks for watching.
If you learned something from this video,
**Like.
**Share.
**Subscribe.
#SriTu_Hobby #arduinoproject #pov #display @sritu_hobby
Видео How to make a POV display with the Arduino | With PCB | Simple POV display with Arduino канала SriTu Hobby
Показать
Комментарии отсутствуют
Информация о видео
Другие видео канала
 Top 5 Raspberry Pi projects from SriTu Hobby #sritu_hobby #raspberrypi
 Raindrop sensor with ESP32 board and Blynk app #sritu_hobby #esp32project #diy@sritu_hobby
 First RC LEGO car experience #sritu_hobby #lego @sritu_hobby
 How to assemble a remote controlled Lego car step-by-step | Lego experience #sritu_hobby #lego
 CNC Shield with GRBL controller | Arduino with CNC shield #sritu_hobby #arduinoproject @sritu_hobby
 Arduino UNO R4 WIFI board with Arduino cloud | How to blink an LED bulb using Arduino cloud #arduino
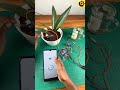 Smart irrigation system with Arduino UNO R4 WIFI board #sritu_hobby #sritu_hobby @sritu_hobby
 POV display with Arduino Nano | Arduino Nano projects #sritu_hobby #arduinoproject @sritu_hobby
 Package unboxing Episode 15 #sritu_hobby #arduinoproject #unboxing @sritu_hobby
 Package unboxing Episode 14 #sritu_hobby #unboxing @sritu_hobby
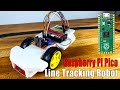 How to make a Line Tracking robot with Raspberry Pi Pico board | Line following robot #sritu_hobby
 Plant watering system with ESP32 board | ESP32 projects #sritu_hobby #esp32project @sritu_hobby
 How to Assemble a Raspberry Pi Robot Tank Step by Step | Raspberry Pi Robot #raspberrypi
 Package unboxing Episode 11 #sritu_hobby #unboxing @sritu_hobby
 How to blink an LED bulb using Arduino UNO R4 MINIMA board | New Arduino UNO board @sritu_hobby
 Package unboxing Episode 10 #sritu_hobby #unboxing #arduinoproject @sritu_hobby
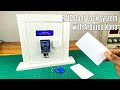 How to make an RFID door lock system using an Arduino Nano board #sritu_hobby #arduinoproject
 Different types of propeller thrust test #sritu_hobby #rc #arduinoproject @sritu_hobby
 4WD Omni-directional Mecanum Wheels Robotic Car Kit with Raspberry Pi Pico @sritu_hobby
 BOYA BY-M1 Lavalier Microphone Unboxing #sritu_hobby #boya #mic @sritu_hobby