How to make a DIY babydoll top with tassels refashion
http://www.cottonandcurls.com/ for more pictures and DIYs!
Visit https://www.instagram.com/cottonandcurls/ for glimpses of my life.
Check out more pictures on my blog here -
Supplies/Instructions:
start out with a top that fits you will in the shoulders and chest, something to repurpose, pins, scissors, measuring tape, a few yards of tassels, thread and sewing machine
1.Cut off anything extra from your to-refashion piece, like an elastic waist band and fold in half.
2.lay the top folded in half down on the maxi skirt, both fold touching.
3.Cut out the top of the shirt, following the curve of the shoulders to an inch or so past the shoulder seams, then straight down toward and inch outward from the armpit and and inch and a half below. then cut straight across an inch and half below the armpit.
4.Sew the shoulder seams shut.
5.then measure how long you want your top to be by finding the length from an inch and a half under your armpit on your top to the bottom hem.
6.the bottom of the fabric will be about at the smallest 56” wide which was my measurement. The wider you make this the more gathered it will be. For more bustier women definitely add more width here. I cut mine on the fold here too making it a easier and straighter cut
7.Sew up the side seam to make it into a tube, then add a basting stitch to the very top .
8.Gather the top of the tube to be as wide as the top half of the shirt.
9.Set that aside. Now lets add the tassels. With the top half right side out, place the front of the tassel trim down onto fabric RST with tassels pointing toward the neckline and shoulder seams. Pin
10.Sew the trim just before the scalloped edge about 1/4” in, so you can see a little bit of the trim edge and the tassel once sewn
11.Pin the bottom tube half front to the trim of the top half, sew it 1/4” in from the scalloped trim edge as well but on the other side of the trim.
12.Sew together leaving the armpit area unsewn. Just the front and backs of the top and bottom are sewn together.
13 .Sew up the side seams into the armpit helping to conceal the edge of the armpit trim and making a nice side seam.
14.Trim off any extra tassels of bulky trim from inside if you need.
15.Cut out the neckline and sew it under 1/8” twice
16.Topstitch the edge of the fabric 1/16” or 1/8” off from the tassel trim on the top half of the shirt to make it look more finished.
Видео How to make a DIY babydoll top with tassels refashion канала Elizabeth Bryson
Показать
Комментарии отсутствуют
Информация о видео
Другие видео канала
 DIY triple ruffle top from dress refashion
 HOW TO MAKE TWO LAYERED PLEATED DRESS
 DIY wide leg Jumpsuit from Men's suit refashion video
 My first runway show as a designer
 DIY very EASY dress to jumpsuit or romper refashion
 How To Sew a Dress with Just 2 Seams and a Hem | Mennonite Dress Tutorial
 DIY Shirring top (refashioned from old kaftan pajamas)
 DIY tie-back babydoll dress using $15 Hobby Lobby Fabric!! Sewing Tutorial
 DIY: $5 VINTAGE DRESS REFASHION | How to Transform Old Clothes
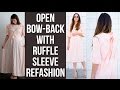 How to make a DIY ruffle sleeve dress with open bow back (DIY bridesmaid dress idea!)
 How to Sew With Decorative Trims
 BABYDOLL TIERED DRESS Sewing Tutorial + Pattern // beginner-friendly diy puff sleeve summer dress!
 DIY // Tiered Flowy Dress (with tie straps)
 DIY Babydoll Lingerie | Night Lingerie बनाना सीखें
 DIY Puff Sleeve Top | Sewing Cute Blouse From Scratch | (A lot of Hand Sews!) 🌻🌞
 Sewing for beginners: How to to make a boxy top
 HOSE IN WICKELOPTIK selber nähen - ohne Schnittmuster 👖
 DIY Tiered Babydoll Dress / 手作り服 + ファッション / 手作教學 / Costura / Sewing Tutorialㅣmadebyaya
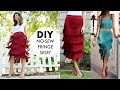 DIY: How To Make a NO-SEW Fringe Skirt! (DESIGNER HACK) -By Orly Shani