Shooting Cars: Episode 7 How to Shoot and Edit *double* Polarized Car Photos in Photoshop
Click "See More" below. Use this link to be a Polarizer: https://goo.gl/qhZ8EE
**update 3/23/17**
The video did not reach 100 likes within the week so the giveaway is unfortunately not happening. May try again in a few weeks!
To enter for the polarizer:
1) comment your filter thread size. I.e 52mm, 67mm, etc.
2) Thumbs up this video
3) subscribe.
If this video passes 100 likes by next weeks episode, then I will announce the winner in episode 8.
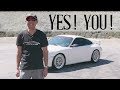
In this episode of Shooting Cars we'll be learning how to remove almost all reflections from a car by combining two polarized images. This way we can cut reflections from the front and the side of the car. We do this by taking two exposures with different turns of the circular polarizer filter on our DSLR lens.
We also will learn how to blend a third exposure with a slower shutter speed to brighten the wheels (rims) and tires.
This is all done with minor edits in Lightroom, then merging the exposures together as layers in Photoshop CC with layer masks and blend modes.
This is the Easiest Way To Blend Polarizer Car Photos.
Видео Shooting Cars: Episode 7 How to Shoot and Edit *double* Polarized Car Photos in Photoshop канала Should I Get It Reviews
**update 3/23/17**
The video did not reach 100 likes within the week so the giveaway is unfortunately not happening. May try again in a few weeks!
To enter for the polarizer:
1) comment your filter thread size. I.e 52mm, 67mm, etc.
2) Thumbs up this video
3) subscribe.
If this video passes 100 likes by next weeks episode, then I will announce the winner in episode 8.
In this episode of Shooting Cars we'll be learning how to remove almost all reflections from a car by combining two polarized images. This way we can cut reflections from the front and the side of the car. We do this by taking two exposures with different turns of the circular polarizer filter on our DSLR lens.
We also will learn how to blend a third exposure with a slower shutter speed to brighten the wheels (rims) and tires.
This is all done with minor edits in Lightroom, then merging the exposures together as layers in Photoshop CC with layer masks and blend modes.
This is the Easiest Way To Blend Polarizer Car Photos.
Видео Shooting Cars: Episode 7 How to Shoot and Edit *double* Polarized Car Photos in Photoshop канала Should I Get It Reviews
Показать
Комментарии отсутствуют
Информация о видео
Другие видео канала
 I want to film you and your car for ANSWRD
 I sold my MK6 GTI and all my cars
 Volkswagen Atlas Review - Practical as a Minivan
 Ferrari 458 Italia Gets Driven Hard
 Most beautiful Sakhir Orange BMW M4 in the World - 1NE BUILT
 Lexus RX 450h POV Review
 BMW M4 Owner Interview - DCT or 6-Speed? Waffles or Pancakes? Did you go to college?
 Volkswagen Taos Review - The VW SUV You don't know about!
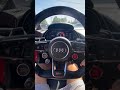 Audi R8 V10 cold start POV
 Lexus RC F. V8 Acceleration
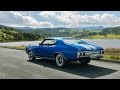 ANSWRD - 1972 Chevelle SS. An American Dream Reviewed by Owner
 Lamborghini start up for dummies
 Shooting Cars:Ep.9 Lightroom Presets (Overall Style) + editing Rolling Shots
 Own a Hardtop Convertible? Get This (Looking at you Miata owner!)
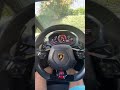 Lamborghini Huracan Startup POV
 2023 Miata As a Daily Driver - Great Idea!
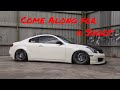 Shooting Cars: Ep.20 - A Full Car Photoshoot (VLOG style) - G35 Bagged
 1600hp Twin Turbo Sheepey Racing Lamborghini Huracan ride along
 Surprising Roommate with Lamborghini delivery
 McLaren Senna HyperCar