DIY Macrame Tutorial: How To Make A Large Macrame Feather/Leaf
DIY Macrame Tutorial: How To Make A Macrame Feather/Leaf! Please see below for materials and written instructions.
Shop my book, Mixed Fiber Macrame, and Fiber Art Supplies (string, rope roving, ribbons, velvet and more) on my website or in my Etsy Shop:
Website: https://www.lotsofknots.ca
Etsy Shop: https://www.etsy.com/ca/shop/LotsofKnotsCanada
Support me directly: https://ko-fi.com/lotsofknotscanada
Materials :
- 3mm Single Strand Twisted Cotton String
2mm and 3mm Twisted Cotton String are available for purchase in my Etsy Shop: https://www.etsy.com/ca/shop/LotsofKnotsCa
- Fabric Glue (I’ve used E6000 Industrial Strength Adhesive - purchased at Michaels)
- Pet Brush and Comb (purchased at Walmart)
- Scissors
- Felt (purchased at Michaels)
*Please note: I use Cow Hitch knots to create the feather/leaf. This knot is the reverse of the Lark’s Head knot (if you were to flip the Lark’s Head knot around you would see the Cow Hitch Knot).
If you would like a more in-depth tutorial on how to tie this knot please click here: https://www.youtube.com/watch?v=HPMe3nggRIk&t=953s
We will start by cutting the felt. The felt will be used as a backing for your feather. It hold’s the feather’s shape when you hang it on the wall. Cut your felt to your desired size. If you are interested in creating several feathers I would recommend cutting yourself a template that can be used to measure out your felt.
My template is 13 inches (33 cm) long and 7 1/4 inches (19 cm) wide at its widest point. This creates a finished feather that is 15 inches (38 cm) long and 8 inches (21 cm) wide.
During this video I will speed up a few sections such as when I cut the felt and brush out the string . If you would like to view these sections in real time please click the settings option at the bottom right of the screen, click speed and click 0.25.
Next we will cut the twisted string to create the feather. Cut a piece of string that is 36 inches (92 cm) long. This piece of rope will run along the centre of your feather. Fold it in half and tie a double knot at the top.
Cut 32 pieces of rope - each piece is 17 inches (43 cm) long. Attach these pieces of rope to your centre piece using Cow Hitch knots. A Cow Hitch knot is the reverse of the Lark’s Head Knot. If you were to create a Lark’s Head knot and then flip your work over you would see a Cow Hitch knot.
Attach one piece on the left, one piece on the right, and so on. Repeat this process until you attached all 32 pieces of rope.
Here is what it will look like overtop of the felt. I like to leave an inch or so of string on each side so that you cannot see the felt from the front.
With the two middle strands tie a double knot at the bottom of your work.
Remove the felt from the back and brush out your string. I am going to change to another board behind my work so that I don’t scratch up this board when I brush out my string.
Using your pet brush, brush out your string.
I like to go back over the string with a fine comb afterwards to make sure the string is completely brushed out and does not curl.
You might find some extra cotton on your brush - that is normal just get rid of it before you start brushing again.
Flip your work around and brush out the other side.
Decide which side of the feather you want to be the front of your work. We will add felt to the other side of your work. I will use this side as the front of my work.
Grab your glue and add glue to the centre piece of your feather. Add glue to your felt as well.
Flip your work over and add a little extra glue to the top.
Flip your work back over and cut along the sides of your work. Follow your felt template.
My regular scissors are a bit dull so I used my sewing scissors. I would recommend a sharp pair of regular scissors but sewing scissors will work as well.
Cut the other side and then flip over for final trimmings.
Comb the front strands to make sure it is all straight and then cut where necessary.
I like to fluff my feather up a little bit to give it a little more depth.
Thanks so much for watching! If you like this video please hit the thumbs up below and if you have any feedback please feel free to leave a comment. Don't forget to subscribe for more video tutorials!
Видео DIY Macrame Tutorial: How To Make A Large Macrame Feather/Leaf канала Lots of Knots Canada
Показать
Комментарии отсутствуют
Информация о видео
Другие видео канала
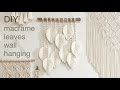 DIY | macrame leaves wall hanging | 마크라메 나뭇잎 월 행잉
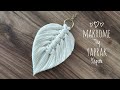 Makrome Tüy Yaprak Yapımı / Makrome Anahtarlık Yapımı
 DIY como hacer HOJAS o PLUMAS en MACRAME | DIY Macrame Feathers/Leaf
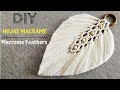
 How To Make Macrame Feathers (3 Ways!) | Macrame Leaf Tutorial
 DIY Room Decor Ideas with Jute | Chalk Paint Home Decor
 HOW TO USE YARN TO DIY A FEATHER LAMP| DIY FLOOR LAMP
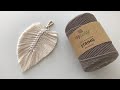 DIY MACRAME FEATHER - Macrame for Beginners
 🌿 Macrame Feathers (DIY) 🌿
 BASIC MACRAME KNOTS BEGINNER TUTORIAL
 DIY | macrame tassel key chain | 마크라메 태슬 키 체인
 Woven Macrame Basket DIY
 PLUMA MACRAMÉ | MACRAME FEATHERS DIY
 HOW TO - MAKE MACRAME LEAVES & FEATHERS WITH YARN
 DIY Macrame Feathers Tutorial | NEW PATTERN | Keychain | Wall Hanging
 DIY Macrame Tutorial: 3 Feather Wall Hanging!
 Makramowe piórko na 3 sposoby (dla początkujących)
 HOW TO MAKE A JUTE FEATHER | DIY Pampas Grass | Home Decor
 DIY como hacer una HOJA en MACRAME (paso a paso) | DIY Macrame Leaf Tutorial
 How To Make a Macrame Leaf with Fabric Stiffener