How to Make a Pom Pom - How to Master Pom Poms & Tassels Pt. 1
Learn how to make the perfect pom...every time!
Our best tips for how to make perfect pom poms every time in our DIY pom pom tutorial using the Loome pom pom & tassel tool.
Step 1: Find both tails of your yarn skein, place both tails in a notch. Wrap yarn around the tool the number of times indicated on the pom pom revolution count guide. Leave a space below the wrapped yarn. When you’re done wrapping, place yarn in any notch to secure it, then cut yarn off the skein.
Step 2: Unwind roughly an arms-length of embroidery floss and thread it into the U-shaped space below the yarn. Wrap embroidery floss around the center of the wrapped yarn once and then a second time. Place on a flat surface so both ends of the embroidery floss are pointing upwards and perfectly centered on the yarn.
Step 3: Tie a surgeon’s knot with your embroidery floss to ensure tension when you pull tightly. A surgeon’s knot: loop one embroidery floss end around the other (like the first step of tying your shoes), wrap it around a second time the same way. Pull knot to the surface of your yarn but don’t pull tight yet!
Step 4: Carefully remove the yarn from your tool, then pull the knot as tight as possible without breaking the string. Use a spare finger to anchor the knot in place, secure with a single regular knot. (Again: like the first step of tying your shoes!) You now have a “pom pom pancake!”
Step 5: To ensure it’s tied tightly, bring strings to other side & tie again. Spread the loops of the pom pancake, bring both strings around to the other flat side, tie a surgeon’s knot as tightly as possible followed by regular knot. Trim excess floss close to knot. (Keep floss hanging long if you'd like to tie/sew your pom on.)
Step 6: Trim open all the loops of your pom pom pancake, keeping the pom pom flat as you do. Pull up on the loops for an even cut. Be sure to cut all loops including the ones on the interior of your pom pom pancake!
Step 7: Place trim guide in the center of your pom pom pancake, press down and trim, cutting along the edge of your trim guide and turning your pom pom as you go. Bring trim guide to the back and trim again. Fluff pom with your fingers - it should be a football shape. Place trim guide in the center once more, press down & trim again.
Step 8: Gently fluff out your pom pom by rolling it around gently in your hands and trim off any remaining stragglers until you have a beautiful round pom!
Step 9: Your pom is now ready to be attached to anything you please!! Learn how to securely attach pom poms a number of different ways in our lesson How to Attach Pom Poms & Tassels!
Видео How to Make a Pom Pom - How to Master Pom Poms & Tassels Pt. 1 канала The Neon Tea Party
Показать
Комментарии отсутствуют
Информация о видео
Другие видео канала
 How To DIY Paper Pom Tutorial | Decorations that impress
 How to Make a Pom Pom That Won't Fall Apart!
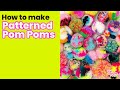 How to Make Patterned Pom Poms - How to Master Pom Poms & Tassels Pt. 2
 How to make yarn Pom Poms. Easy!
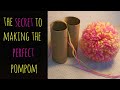 The Secret to Making the Perfect Pom Pom
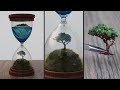 How to Make Hourglass Diorama | Resin Art | Wire Tree
 How I make Pom Poms that don't fall apart
 How to Make a PERFECT POM POM Every Time
 How To Make a Tassel
 Awesome Cement Craft Tips - Flower pots Making Technique with Gloves, Watermelon, Towels and Cement
 Make Your Own Faux Fur Pom Poms
 Learn how to make Pom-Poms with Red Heart Yarns
 Purse Pom Poms with OmegaCryl
 How to Tie Dye Symmetrical Shapes: Heart & Rainbow
 How to Attach Pom Poms and Tassels - How to Master Pom Poms & Tassels Pt. 4
 Making Good Pom Poms with Loome Tools: Tips & Tricks
 Crochet 101: Striped Bookmark! // How to Hold Yarn & Hook, Chain, Single Crochet & Change Colors
 How to Crochet a Classic Granny Square
 How to make a tulle pom pom
 How to Make a Tissue Paper Tassel Garland