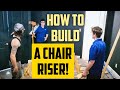
Home Theater Seat Riser with lighting - DIY
I am turning this play room into a media room. Before I started my project, I raised the outlets by 17" which is the hight of the proposed riser. Then I ran a circuit from one of the outlets for the new wall and step LED lights. I used a motion sensor for that circuit and I set it to only work when it is dark. I snaked the rear speaker wires and Coax (Subwoofer) cable through the wall and tucked them into the bottom edge of the wall, which then will be concealed with the baseboard.
To determine the dimensions of the riser, I took into consideration:
1. For depth: (a) The window location, I did not want it to go beyond that point. (b) The space needed for my theater seat to recline all the way without touching the wall nor the head of the person sitting in the front chair.
2. For Height: The head of the person seated in the back, needs at least 20-24" clearance from the head of the person sitting in the front, to be able to see the whole TV screen. This was achieved by making my riser 17" high. I am using untreated lumber 2x8", 2x4" for the framing, and 1/2 inch 4x8' Strand boards to create the 1" platform. I have no previous experience with building, but I drew a diagram with my measurements, and I was able to make accurate cuts with minimal mistakes. I strongly encourage you to find an electrician if you decide to add the lights and check with your local city for laws pertaining permits.
Affiliated links of items used in video:
Magnepull: https://amzn.to/37vUdtn
Magnepull With Magnespot: https://amzn.to/2thThK7 (optional)
LED 120 volt step light: https://amzn.to/37nmd26
Видео Home Theater Seat Riser with lighting - DIY канала Good Faith Home DIY
Показать
Комментарии отсутствуют
Информация о видео
Другие видео канала
 DIY Home Theater Riser Platform! How to build a media room platform!
 DIY 4K HOME THEATER MAKEOVER REMODEL 🎬 Smart & Stealth Media Room
 How to Build a Theater Seating Riser: The Burke Home Theater Project
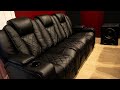 Best Home Theater Seating? | Valencia Oxford Seats
 I Wish I Knew This Before Building My Home Theater Setup | Home Cinema 4K
 Basement Home Theater / Game Room / Man Cave / Arcade / Video Game - 7.2.4 (old setup)
 8 Steps To Designing A Successful Home Theater
![The Beast, Unleashed [Episode 7]: The Soffit and the Beast-Riser](https://i.ytimg.com/vi/qXa3ifnmCGQ/default.jpg) The Beast, Unleashed [Episode 7]: The Soffit and the Beast-Riser
The Beast, Unleashed [Episode 7]: The Soffit and the Beast-Riser Home Theater Tour
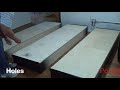 HT Design Home Theater Seating Riser System
 How to Build a Platform
 Majestechs Home Theater Tour 2018 - 4K Dolby Atmos Home Cinema Overview
 How to Build and Hang a Projector Screen
 NEW 4K HOME THEATER TOUR (2019) !!
 DIY HOME THEATER RISER | Build your own Movie Room Seating Platform Cheap and Easy!
 Home Theater Chair Riser - DIY (Part 1)
 DIY Movie Theater Chairs for $300 total - Full Video from "How to Make Awesome Stuff Cheap"
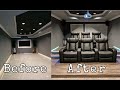 Home Theater Room Platform Buildout
 Day 32
 My diy basement home theater/Movie Room - Building seating/theater riser