How to create basic shapes in Adobe Illustrator
Welcome Guys to one more tutorial.
Today i will be showing you: how to create basic shapes in Adobe Illustrator
First, let's open a rectangle.
Click and hold the left click and with the mouse draw a squire.
Make sure to hold Shift so you can create that perfect square shape.
Now with the Selection tool, click on the square.
And drag it a bit on the right with holding alt and shift.
Alt is for creating a copy and Shift is for moving it in a straight line.
Now just hit CTRL+D to paste it 4 times in the same order.
Let's paint the square in a different color.
I already had saved swatches but you can choose a color manually by clicking on the square and click twice on the fill box and choose a color.
Paint the first square blue
Second square Pink
Third Green
Fourth Yellow
And the fifth Purple.
First, let's build shape using the rounded corners.
With the direct selection tool, select the top right corner
You will see a small double dot icon, just click on it and pull it down.
For the pink square let's select the top corners.
And also pull them down.
For the green one, select the top left corner, hold shift and select the bottom right corner
And pull them up.
Now we got a leaf shape.
For the Yellow square let's select all corners
And with holding shift unselect the bottom right corner.
Then pull all of them into the center.
And for the purple square, lets select all the corners.
And pull them into the center as well.
Now if you like to scale the objects, you will notice they will lose there original shape.
To avoid that, we must select them one by one and hit unite on the pathfinder.
Now let's try and scale it and you will see they won't lose there shape.
Alright now let's create inverted rounded corners.
But let's not delete the current shape we made.
Select them all and hit CTRL+G to group them
Then hit CTRL+C To copy them.
Hold CTRL+ Z till you get back to the square shapes
Then hit CTRL+F to paste the rounded shapes.
Let's move them down with holding shift.
And now we can start creating inverted rounded corners.
Select the top left corner, and move it to the center.
Now with the direct selection tool click twice on the dot icon
And choose inverted rounded corners.
For the pink square let's select the top corners.
Instead of double-clicking with the direct selection tool.
You can hold alt and click on the double dots.
So it can turn into inverted rounded corners.
For the green square let's select the top left corner.
And with holding shift select the bottom right corner.
Pull it to the center and whit holding alt, click on the dot.
For the yellow let's do the same, select all the corners.
And whit holding shift unselect the bottom right corner.
Pull it to the center and whit holding alt, click on the dot.
For the purple square, select every corner.
And pull it to the center.
Again with holding alt, click on the double dots.
Now let's use the unite on the pathfinder.
So when we scale the object we will keep the original shape.
Select all the inverted rounded objects, group them and copy them.
Then hold CTRL+Z, till you get back to the square objects.
Paste them and move them up with holding shift.
Now let's create chamfer corners.
Select the top left corner of the blue square and pull it down.
To create a chamfer corner, hold alt and with the direct selection tool click twice on the corner dot.
If you click three times, you will get back to the rounded corners.
Or with the direct selection tool, without holding alt.
you can double click on the dot, then the corner option will pop up.
Then choose chamfer corners.
Let's make the rest of the shapes in chamfer corners as well.
For the pink square, select the top corners and move it to the center.
Green, select the top left corner and the bottom right then pull it into the center.
Yellow square, select all the corners and unselect the bottom right corner.
Then pull it into the center.
And for the purple select all corners, and also pull them to the center.
And here you go guys, this is how we can create basic shapes, using only the corner option and the direct selection tool.
Feel free to mix the objects, you can do rounded corners, with inverted rounded or chamfer corners.
The only thing is bugging me here, i can't make the inverted rounded corners into rounded edges.
If we draw this exact shape using the pen tool, we will be able to do the inverted corners into rounded edges.
I hope in the next version of Adobe Illustrator we will be able to turn inverted rounded corners into rounded edges.
This will give us a lot more freedom with drawing with the corner option.
Alright, guys, this was it for this tutorial.
And if you found this tutorial useful, make sure to subscribe to my channel.
And also you can follow me on my Instagram page @Niko_Dola.
I wish you happy designing.
Cheers
Видео How to create basic shapes in Adobe Illustrator канала Niko Dola
Показать
Комментарии отсутствуют
Информация о видео
Другие видео канала
 CelestialSnax rebranding
 Create a color palette shade using the blend tool in Adobe illustrator.
 From one design I made 5 more versions in 5 minutes! Adobe Illustrator tutorial, Warp option effect
 3 easy methods on how to create vector heart shapes using adobe illustrator. Basic Beginner tutorial
 Adding holes into Brick texture.
 Adding Shadows and Highlights on a wall brick texture.
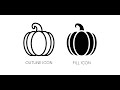 How to create a pumpkin Icons
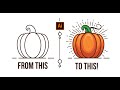 How to create a vector cartoon Pumpkin Using adobe Illustrator
 Just working live.
 Working live ( more info description)
 How to design Glowing and shadow text effect using Adobe Illustrator tutorial (Black Friday poster)
 How to make a pixeled artwork from regular illustration (Adobe Illustrator)
 Just working live
 How to create Egg illustration with Adobe illustrator
 Creative beach illustration Process (Adobe Illustrator)
 From idea to final Logo Design
 Full Pizza Illustration Tutorial using Adobe Illustrator (No drawing skills needed)
 Adobe illustrator basic tutorial for beginners.
 How to design a Vintage Badge logo in Adobe Illustrator (No drawing skills need it!)
 Create a badge sticker Lemon logo with Adobe Illustrator
 How to make a minimal Deer logo using only circles, in Adobe Illustrator