Modern Outdoor Lounge Chair // How To | I Like To Make Stuff
I made a wood & metal outdoor lounge chair just in time for summer!
Get your first KiwiCo box free by clicking here! https://KiwiCo.com/makestuff
TOOLS & SUPPLIES (affiliate links):
https://kit.co/iliketomakestuff/my-metalworking-tools
https://kit.co/iliketomakestuff/my-woodworking-tools
https://kit.co/iliketomakestuff/shop-safety-gear
Now that summer is finally here, my family is spending a lot of time outside. And I can't transform into full-on dad mode without a proper outdoor lounge chair, so let's make one.
I didn't use any traditional plans or furniture geometry when making this lounge chair. I just eye-balled the angles until the chair looked appropriately comfortable. Here's how I made it.
This chair is going to be a combination of wood and metal, so I picked up some 3/4" steel square tubing from the home store. I had rough dimensions based on a gracious seat pan width and, what I thought, was adequate back and neck support. So I started cutting all of the seat components; the legs, the seat frame, and the arm supports on the metal-cutting miter saw.
In the video, you can see me cutting steel tubing on a miter saw. This particular saw, the Evolution Miter Saw, is designed to cut both wood and steel, so please do not try to cut steel on a normal miter saw.
Before I start welding the frame together, I used my belt sander to add a slight bevel to the ends of each tube. By doing this, you are making a channel that the weld can fill in, creating a stronger bond.
I don't claim to be a welder, I don't professionally claim to be anything, but the point is that you don't have to go to a specialized school to fuse metal together. That being said, I have limited welding skills and they will only improve with practice. Like anything, you should continually practice any talent that you hope to improve upon and like my welding table says, "Get Better Every Time."
I tacked all of the corners of the seat frame together to get a rough idea of how the chair will look. Once I bent and tweaked the frame to my liking, I went over each seam with a full weld line. Be sure to continually check that the steel tubing is parallel and the frame hasn't warped from being moved around. Once I had all of the full welds in place, I used my angle grinder to blend the joints together. Not only does this eliminate any noticeable seam, it highlights where your horrible welds didn't completely cover the channels. So, I went back and welded the missing sections and had to re-grind them as well. After this second round of grinding, I had a completed chair frame!
I cut down some 1"x4" cedar boards to match the lengths of the seat pan and the back frame. We totally lucked out because five of those boards fit perfectly spaced inside the chair frame. The arm rests were cut from the same material and a notch was added so they would fit along the back supports. Because I wanted the wood to sit flush with the metal, I had to add a strip of flat steel to the back and bottom of the chair to hold the cedar slats. The strips were welded on and predrilled so that I could screw the boards directly to the updated metal frame. Now that the metal and wooden components were all ready, it as time for paint.
Even though this lounge chair would live outside, I chose to paint the frame a flat black using enamel paint. Your skin would only really touch the frame at very limited areas, so I didn't have a problem with it. The black metal next to the bright and vibrant cedar looked amazing! Now, it's time to put it all together.
Using some stainless steel screws that shouldn't rust, I attached the cedar planks to the seat pan and the back rest. To further protect the durable cedar, I added some tong oil which really brought out the cedar's golden color. This chair absolutely beautiful and surprisingly comfortable. Again, I didn't use any standard furniture geometry, so I was very happy that this chair actually pretty loungy. I put the chair in the back yard where my family hangs out and just relaxed for a bit. I'm really proud of this chair that I threw together, if you liked it, check out more of my work. MUSIC: http://share.epidemicsound.com/iltms
Subscribe: http://bit.ly/ILikeToMakestuffSubscribe
Check out my TopVideos!: http://bit.ly/ILikeToMakeStuffTopVideos
Learn 3d modeling, get digital plans, and cool merch at
https://iliketomakestuff.com
Want to support ILTMS? Get exclusive content and more...
http://www.iliketomakestuff.com/patreon
FOLLOW:
http://instagram.com/iliketomakestuff
http://twitter.com/iliketomakestuff
http://facebook.com/iltms
#ILikeToMakeStuff
About I Like To Make Stuff:
We have lots of projects including woodworking, metalworking, electronics, 3D printing, prop making and more!
These videos are our attempt inspire and empower others to make the stuff that they want to have. Hopefully you'll see something here that will inspire you to make something that you're passionate about!
Видео Modern Outdoor Lounge Chair // How To | I Like To Make Stuff канала I Like To Make Stuff
Показать
Комментарии отсутствуют
Информация о видео
Другие видео канала
 How to Make a Modular Outdoor Table | I Like To Make Stuff
 Modern Outdoor Bench |steel & wood|
 How to Make a Giant (100ft) Slip N Slide | I Like To Make Stuff
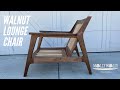 Mid Century Modern Lounge Chair ***UPDATED PLANS AVAILABLE*** follow link!
 MAKING GRAVITY Chair. ГРАВИТАЦИОННОЕ КРЕСЛО.
 How to Make an Adjustable Silverware Tray | I Like To Make Stuff
 How to make an Ocean Table // Concrete and Epoxy Resin | I Like To Make Stuff
 DIY Modern Outdoor Sofa
 DIY Steel and walnut wood patio chair // MakeON
 Easy Double Bunk Beds // Woodworking How To | I Like To Make Stuff
 How to make a log bench with HIDDEN storage! | I Like To Make Stuff
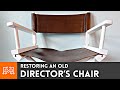 Restoring an Old Director's Chair // Leather Working | I Like To Make Stuff
 Fire + Epoxy
 Modern Style Metal Chair Built, Welded DIY Upholstery Project
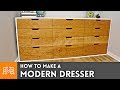 How to Make a Modern Dresser // Woodworking | I Like To Make Stuff
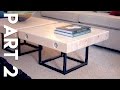 Modern Maple and Steel Coffee Table Part 2 | How To Build - Welding
 How to build a modern Adirondack chair // Outdoor Woodworking Plans
 Woodworking Large Extremely Dangerous | Giant Woodturning | Skills Working With Giant RED Wood Lathe
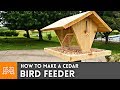 How to Make a Bird Feeder // Woodworking | I Like To Make Stuff