- Популярные видео
- Авто
- Видео-блоги
- ДТП, аварии
- Для маленьких
- Еда, напитки
- Животные
- Закон и право
- Знаменитости
- Игры
- Искусство
- Комедии
- Красота, мода
- Кулинария, рецепты
- Люди
- Мото
- Музыка
- Мультфильмы
- Наука, технологии
- Новости
- Образование
- Политика
- Праздники
- Приколы
- Природа
- Происшествия
- Путешествия
- Развлечения
- Ржач
- Семья
- Сериалы
- Спорт
- Стиль жизни
- ТВ передачи
- Танцы
- Технологии
- Товары
- Ужасы
- Фильмы
- Шоу-бизнес
- Юмор
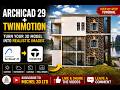
ARCHICAD 29 , DOOR &WINDOW BASIC SETTING
In this tutorial, you will learn how to correctly set up doors and windows in your project using Archicad 29. This is very important for creating accurate architectural drawings and realistic 3D models.
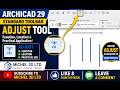
🔹 Step 1: Select the Tool
• Open Archicad 29
• Go to the Toolbox
• Choose:
o Door Tool for doors
o Window Tool for windows
🔹 Step 2: Open Settings
• Double-click the selected tool
• The Settings Dialog Box will open
Here is where you control everything about your door or window.
🔹 Step 3: Adjust Basic Dimensions
Set the main sizes:
• Width
• Height
👉 Example:
• Window: 1500mm × 1500mm
• Door: 900mm × 2100mm
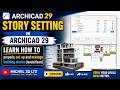
🔹 Step 4: Set Position
• Adjust Sill Height (for windows)
• Choose placement:
o From floor level
o From story level
🔹 Step 5: Choose Type & Style
• Select:
o Sliding, Casement, Fixed (Windows)
o Single, Double, Sliding (Doors)
👉 Pick a style that matches your design.
🔹 Step 6: Frame & Materials
• Set:
o Frame thickness
o Materials (wood, aluminum, glass)
👉 This affects both 2D drawings and 3D appearance.
🔹 Step 7: Orientation & Opening
• Use Flip option to change direction
• Adjust:
o Opening side
o Inside or outside swing
🔹 Step 8: Place the Element
• Click on a wall to place the door or window
• Move cursor to adjust position
• Click again to confirm
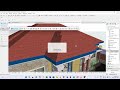
🔹 Step 9: View in 3D
• Press F3 or go to 3D View
• Check if everything looks correct
If you found it helpful:
👉 Subscribe to Michel 3D Ltd so you don’t miss more tutorials
👍 Like this video if you enjoyed it
🔁 Share it with others so they can learn too
Видео ARCHICAD 29 , DOOR &WINDOW BASIC SETTING канала MICHEL 3D Ltd . BY ENG. FELIX
🔹 Step 1: Select the Tool
• Open Archicad 29
• Go to the Toolbox
• Choose:
o Door Tool for doors
o Window Tool for windows
🔹 Step 2: Open Settings
• Double-click the selected tool
• The Settings Dialog Box will open
Here is where you control everything about your door or window.
🔹 Step 3: Adjust Basic Dimensions
Set the main sizes:
• Width
• Height
👉 Example:
• Window: 1500mm × 1500mm
• Door: 900mm × 2100mm
🔹 Step 4: Set Position
• Adjust Sill Height (for windows)
• Choose placement:
o From floor level
o From story level
🔹 Step 5: Choose Type & Style
• Select:
o Sliding, Casement, Fixed (Windows)
o Single, Double, Sliding (Doors)
👉 Pick a style that matches your design.
🔹 Step 6: Frame & Materials
• Set:
o Frame thickness
o Materials (wood, aluminum, glass)
👉 This affects both 2D drawings and 3D appearance.
🔹 Step 7: Orientation & Opening
• Use Flip option to change direction
• Adjust:
o Opening side
o Inside or outside swing
🔹 Step 8: Place the Element
• Click on a wall to place the door or window
• Move cursor to adjust position
• Click again to confirm
🔹 Step 9: View in 3D
• Press F3 or go to 3D View
• Check if everything looks correct
If you found it helpful:
👉 Subscribe to Michel 3D Ltd so you don’t miss more tutorials
👍 Like this video if you enjoyed it
🔁 Share it with others so they can learn too
Видео ARCHICAD 29 , DOOR &WINDOW BASIC SETTING канала MICHEL 3D Ltd . BY ENG. FELIX
Комментарии отсутствуют
Информация о видео
23 апреля 2026 г. 15:15:06
00:24:26
Другие видео канала