etrailer | Rhino-Rack SRB Leg Kit Installation - 2014 Hyundai Santa Fe
Click for more info and reviews of this Rhino Rack Roof Rack:
https://www.etrailer.com/Roof-Rack/Rhino-Rack/rrsx032.html
Check out some similar Roof Rack options:
https://www.etrailer.com/fitguideroof.htm
Search for other popular Hyundai Santa Fe parts and accessories:
https://www.etrailer.com/vehicle/2014/Hyundai/Santa+Fe
https://www.etrailer.com
Don’t forget to subscribe!
https://www.youtube.com/user/etrailertv
Full transcript: https://www.etrailer.com/tv-install-rhino-rack-leg-kit-2014-hyundai-santa-fe-rrsx032.aspx
Today on our 2014 Hyundai Santa Fe Sport were going to be installing the Rhino Rack Vortex Aero Crossbars in Aluminum in the black color. These are 54 inch long as well as the Rhino Rack SRV leg kit for the Vortex Aero Crossbars in flush factory rails. The crossbars are part number RRVA137B-2. The SRV leg kit is part number RRSX032. These are sold as a kit. Weve gone and already installed the rear crossbar and the foot pack to show you what it looks like on the vehicle. Now youll notice that there are three holes drilled into the roof bar. Now on our particular application here today we chose to put it in the center mounting location.
You want to make sure that you put it in the same hole on both sides of the vehicle. Now you can chose to put it in the rear, the middle or the forward hole depending on your accessories that youll be adding to the roof bars.Now youll notice up here in the front theres again three holes so you have three options for where youre going to mount the crossbars. Now were going to go ahead and chose to mount it in the middle location again because we dont really know what the customers on this particular car is actually going to use the roof rack for.Depending on the accessory you may need to adjust the bars to one of the other two holes. Just keep in mind you want to make sure if you go in the center hole you go in the center hole over on the other side of the vehicle as well. Now before we can install the front crossbar were going to need to do a couple things.First off well go ahead pull the end off.
If for some reason it is locked on, theres a little tab here that twists the locks. Just simply put this key that comes with the kit and just turn it so that it unlocks it. Next were going to need to take the rubber strips just line them up and you can actually push them down into place.They go in real easy. Just go ahead and work in all the rubber strips that go all the way across. There will be three long strips and one shorter strip.
Now depending on the accessory that you chose to use with your Vortex Aero Bars you will need to remove some sections of these rubber strips or possibly even trim a section out for your accessory to fit in the top channel here.There is the shorter strip and you will need to trim the shorter strip down to length. Youll have to cut off about an inch and a half to two inches. Next heres the foot pack and its specifically for this vehicle. Youll notice that theres a little tab right here on the metal portion.Thats what hooks into one of those three holes at each of the mounting locations. It also has a nice rubber foot area so that it doesnt scratch anything.
Then slide the foot onto the bar and then put our end cap back in place. Take the key turn it to the lock position.Well go ahead and repeat that same process over here on the other end of the bar. Next were ready to go ahead and set the crossbar with the foot packs up into the forward mounting location here on this vehicle. Now that we have the bar up in position we need to go ahead and make sure that its centered.We have equal distance from the edge of our foot pack to the edge of the bar. One easy way to do it is you take this strip here, it has numbers on it. Well measure from right here to the end of the bar. We want to make sure were the same distance on both sides.Go ahead and measure here then we can go ahead and go over to the other side. We look like were good weve got the same distance on both sides. Now if it was not even you would just simply slide the bar back and forth to get it so that you have the same distance sticking out past the edge of the foot pack.Once we have our bars set we need to go ahead and flip this lever out right here, go ahead and tighten it down making sure that the pin is in the hole here on the rail. So we have it tightened down well go ahead and fold it back into position. Next well go ahead and take our key well turn it left to turn it lock securing the foot pad to the rails on the vehicle.Go ahead and repeat this process over on the passenger side as well. Next were going to take our same strips that we used to help measure the center of the bars and were going to cut them so that they fill in underneath here in the grove, out there, on the inside here as well as on the outside.Looks like on this one if we cut it just under the hundred mark itll fit in there nice. Youll also notice here on the underside it has an arrow a
Видео etrailer | Rhino-Rack SRB Leg Kit Installation - 2014 Hyundai Santa Fe канала etrailer.com
Показать
Комментарии отсутствуют
Информация о видео
Другие видео канала
 Rhino-Rack | How to fit Factory Rail Roof Rack Systems
 etrailer | Rhino Rack Roof Rack Review - 2015 Hyundai Santa Fe
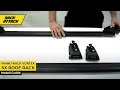 How to Install Rhino-Rack Vortex SX Roof Rack Presented by Rack Outfitters
 How To Install Yakima Roof Racks On A 2019 Hyundai Santa Fe
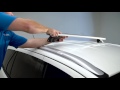 Rhino-Rack | Ford Everest SX Leg Installation
 etrailer | Thule Roof Rack Review - 2016 Hyundai Santa Fe
 Rhino-Rack BatWing Driverside 8.2 Foot 270 Degree Awning Deploy and Stowing
 Rhino Rack S512 J Style Kayak Carrier Instruction Video
 Thule EVO Flush Rail Roof Rack Overview and Installation
 Rhino-Rack s512 Folding J Style Kayak Carrier Rack and Paddle Carrier
 Rhino Rack Assembly & Installation
 Rhino-Rack COMPACT BatWing 270 Degree Awning Deployed
 How To Load Your Kayak | Car Top and SUVs
 ROOFTOP CARGO BOX PROS AND CONS
 GM Factory Crossbars for 2021+ Chevrolet Tahoe, Suburban, GMC Yukon and Cadillac Escalade
 etrailer | Rhino-Rack RSP Roof Rack Installation - 2016 Honda CR-V
 Diecast Unboxing-2014 Hyundai Santa FE 1/18 Paudi Models
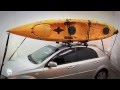 Rhino-Rack | How to fit J Style Kayak Carriers
 Hyundai Santa Fe 2014 Test Drive
 Rhino-Rack BatWing Roof Rack Mounted Awning Demonstration by Rack Outfitters