Extremely Corroded Mauser K98 Bayonet Scabbard Restoration
In this video, I'm restoring "Incredible restoration of a vintage scabbard"
Hello everyone and again I was delayed with the release of the new video. There were some small problems, but I hope in the near future I will release new videos more often and delight my fans with new projects.
So let's get down to our project, in the previous video I restored a bayonet from a Mauser rifle https://www.youtube.com/watch?v=of52o6zSJ8M
I decided to put together a complete kit. I was lucky to find a scabbard for my bayonet. Unfortunately, the condition was deplorable for these scabbards. But that didn't stop me. There was no paint on the scabbard, there were deep rotten areas of the metal, the attachment of the scabbard was broken off, the spring fixing of the bayonet was rotten. I have been tasked with restoring this scabbard as much as possible.
Description of the sequence of works on the restoration of the scabbard.
Initially, I visually inspect the scabbard for defects and damage. In this project, I use Oxalic acid to detect paint on the scabbard. Then I use a good proven method of cleaning metal, electrolysis. After electrolysis cleaning, use a wire brush. I dismantle the internal parts of the scabbard. As you can see, the retainer, screw and spring fixing of the bayonet have become unusable. I clean the inside of the scabbard with a metal bristle brush. As you can see, there is a lot of dirt and rust. The next step is to prepare the scabbard for soldering. To do this, we fill the inside of the scabbard with plaster mortar. Let the gypsum solution dry for 24 hours.
The plaster mass is dry, and you can start soldering the scabbard. For this I need my gasoline burner. I will solder with high-temperature solder. Approximate operating temperature is approximately 950 degrees Celsius. At the end of the soldering of all defects on the scabbard, I remove the plaster mass. Using a file, I remove the beads from the scabbard and level the soldering points.
Soldering a new mount to the scabbard. I will make new fixing springs, and on a lathe I will make a new bolt for the scabbard. I will fasten the retaining spring with rivets in its place. I will harden the screw and springs. I like the result of metal hardening.
Now you can start painting the scabbard in the original color. For this I used a special paint that dries for about two days.
After the paint has dried on the scabbard, we proceed to the assembly.
Everything turned out just perfect, the retaining springs hold very well. And the scabbard looks very authentic.
My camera:
SONY DSC-HX300
YouTube Channel - https://www.youtube.com/c/AnDIYHandmadeRestoration
YouTube Subscription: https://www.youtube.com/c/AnDIYHandmadeRestoration/featured
Like, Comment & Share this video with Friends who may be interested
Sincerely
Subscribe to see more interesting videos.
Hope you Enjoyed the Video.
Thanks for watching
See you Soon
Sincerely
AnDIY Handmade Restoration
#AnDIYHandmadeRestoration
#restoration
#rusty
#restoring
#scabbard
Видео Extremely Corroded Mauser K98 Bayonet Scabbard Restoration канала AnDIY Handmade Restoration
Показать
Комментарии отсутствуют
Информация о видео
17 октября 2021 г. 16:28:33
00:14:25
Другие видео канала
 Knife repair for Alex Stahlhelm #shorts #andiy_handmade_restoration #knife
 Forging Fire: Crafting a Lighter from a Brass Key Blank #lighter #crafting #shorts
 Wardrobe for firewood / Brennholzschrank. THE END
 Restoration of a lighter of the II WW AnDIY Handmade Restoration
 Old Key Lighter - I make a special Lighter
 Metro 2033 Bullet Lighter / Lighter Metro Exodus
 Old Pocket Knife Restoration, Old Timer Mariner's Knife
 Винтажный походный топор ГДР Restoration
 Vintage Screwdriver Restoration AnDIY Handmade Restoration
 Restoration of an old Othello knife. Pilot version.
 Консольный столик DIY Rustic X Консольный стол в фермерском стиле
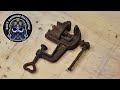 Vintage Vise Restoration
 Lamp per million \ Лампа на миллион
 Vintage iron - Restoration
 Lamp made of trash
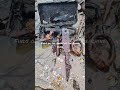 Finds on the banks of the Rhine river #Shorts
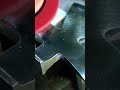 Incredible restoration of a very rusty old axe with corrosion #shorts #rusty #axe #restoration
 Restoration very old rusty bayonet #shorts
 Hatchet Multitool Restoration
 Stahlhelm Bagger or Lifehack by AnDIY. Палка копалка от Stahlhelm.