LED Strip Installation Guide | 16.4ft & 32ft
How to install 16.4ft or 32ft LED Strips
Shop: https://thewavelights.com/
Guide in Written Form: https://thewavelights.com/pages/led-strip-light-installation-guide
Step 1: Pre-Planning
Make sure to measure the length of the area you want to place the lights on
We recommend having the lights go up your wall, but if you prefer to start the line of lights from the top of your wall, you will need LED strip clips to help hold up the power supply against the wall.
Step 2: Preparing the Surface
Use a dry rag or a dry paper towel to clean the area you'll be applying the lights onto. This will ensure the area is clean so the adhesive can hold on strongly.
Step 3: Revealing the Adhesive
Peel back the plastic on the back of the LED strip to reveal the adhesive.
Only peel about 2 feet ahead to make sure the rest of the LED strip doesn't catch debris
Step 4: Installation
Start applying the beginning of the strip against the wall.
We recommend staying as close to the corner where the wall and ceiling meet to make sure the lights stay in a straight line when applying them.
Having someone else hold the other end of the lights and peel the plastic from the adhesive will help make this process easier
Step 5: Make them Stick
Once fully installed, go back and press flat along the LED strip to make sure the adhesive strongly stays onto the wall
Step 6: Powering your Lights
Connect the Controller Receiver (white box) to the LED strip
The LED Strip and Controller Receiver (white box) both have arrows at the connection point. Make sure those arrows are facing each other so the lights receive the correct signals.
If needed. use a screw or LED strip clips to help hold up the power supply. The adhesive can be slightly pulled down if the power supply end is too heavy
Related image
Step 7: Powering your Lights (2)
Connect a power supply to the Controller Receiver (white box) and plug it into the closest socket
If you need a power supply, there are a couple options which you can use. Click here to view all the powering options for your lights
Step 8: Check your Controller
Make sure you've purchased a battery at your closest retailer. The Remote uses a CR2025 battery.
Once you've installed the battery, check the remote by pointing it at the Remote Receiver.
If nothing happened, please check that the battery was not inserted upside down. Try flipping it over and check if it works
You can check if the controller is working also by using your phone's camera. If you open your camera app, point the controller at your camera. A working controller will have a light when you watch it through your camera
Видео LED Strip Installation Guide | 16.4ft & 32ft канала The Wave Lights
Показать
Комментарии отсутствуют
Информация о видео
Другие видео канала
 7 Common LED Strip FAILS and How To Avoid Them
 How to cut, connect & power LED Strip Lighting
 Unboxing and Installing Dalattin LED Strip Lights 65.6 ft and Starlight Projector!! (2021 Review)
 How To Install LED Light Strips
 Bedroom Upgrade - LED Lights! | Whitney Bjerken
 Install crown molding and LED lighting strips for indirect lighting the easy way! Step by Step!
 Relohas Waterproof LED Strip Light 10M Unboxing and Setup
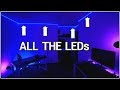 How To Install WHOLE Room RGB LEDs!
 How to BEND your LED Strips around corners I show how on the 5050 RGB and the 3528 IP33 and IP65
 Setting up LED Strip Lights from AMAZON! (Tenmiro 65.6FT)
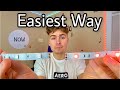 How to Connect LED Lights | No Equipment Needed | No Soldering | Easiest Way!
 How to install LED light strips behind TV (USB LED STRIP FOR TV)
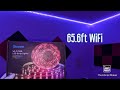 Govee 65.6ft WiFi RGB strips unboxing and setup
 How To Install LED Strip Lights Under Bed Frame (Bedroom RGB lighting) DIY
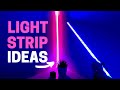 Light Strips in 6 Unexpected Places
 13 COOLEST GADGETS For Your ROOM That Are Worth Buying
 Light Strips Falling Down? Best Solution
 TRANSFORM your GAMING SETUP with RGB Lighting! 🌈 How I light my Gaming Room!
 How to install LED Strip Lights – Under Cabinet Lightstrips for your Smart Home!
 Installing Miheal RGB LED strip lights in crown molding /Review & Install /Basement Remodel Ideas