Farmhouse Style Coffee Table Build (Free plans & dimensions in description)
Coffee tables are one of my favorite pieces to build! Here's a video of another coffee table build, I used some different methods to put this one together.
Materials:
2x8x8 (x2) - for the top
2x8x12 (x1) - for the bottom shelf
4x4x8 (x1) - for the legs
2x4x8 (x3) - for the frame and X pieces
Wood glue
2" construction screws
3/4" red oak for table top buttons
*Tools used in this video (amazon affiliate)*
K4 Kreg Jig: https://amzn.to/3oq5fbt
Dewalt miter saw: https://amzn.to/39oR2Y7
Speed square: https://amzn.to/3oJryJj
Jorgensen clamps: https://amzn.to/3j3FEnO
Central Machinery 2 HP dust collector: https://amzn.to/3tYrbON
Dewalt router: https://amzn.to/3r6eZcI
Doweling jig: https://amzn.to/3aAg2v1
Irwin 48” clamps: https://amzn.to/2Yodiem
Milescraft router edge guide: https://amzn.to/3baDNK6
HomeRight Paint Sprayer: https://amzn.to/2Mw81ii
PONY ¾” pipe clamp: https://amzn.to/37d8UU8
How to build:
Cut the 4x4 into 4 16" sections for the legs. Cut the 2x4 into 4 16" sections (for the X) and 4 24" pieces (for the frame). Drill pocket holes in the 16" sections for attaching to the legs.
Attach the 16" sections to the legs to make a rectangular frame - you will have 2 of these. Overlap this frame on the X piece, and trace the outline to get the miter angle.Trace the middle outline (where the X is) and cut out a half lap joint (I used a radial arm saw). After cutting the angles, fit in the frame and attach with screws.
At this point, I used my router to cut table top button attachment holes in the frame pieces. You could also use screws or table top fasteners for this part. The buttons allow for wood movement.
Next, I made the top from 2 2x8x8 boards - I cut each in half and had 4 2x8x48" sections. I planed them to about 1.25" and ripped/milled them for a flush edge. I used my dowel jig and poplar dowels to line them up and then glued them together. I clamped some scrap 4x4 on each end to help them stay flat while the glue dried.
I made the bottom shelf using 3 2x8x37.75" boards. I assembled them in the same manner as the table top using dowel rods. These were also planed and milled prior for flush edges.
After the bottom shelf was together (glue dried), I drilled pocket holes on the bottom side of the bottom shelf. I used 9 pocket holes on each end, as I wanted this to be super secure. It would have been easier if I did this to the individual boards before assembling the bottom, but it still worked. These pocket holes will attach to the frame with the X pieces using screws.
I then hand planed, sanded, and routed the top for some detail work.
To attach everything together, I used a 2x4x37.75" board (same length as the bottom shelf) to join the two frame pieces together. I used pocket holes and glue to secure this. I then attached the bottom shelf in the same manner using glue and pocket holes. The bottom shelf was a little tricky to get attached, but I finally got it settled.
When this was dry, I painted the frame with Valspar Antique White paint using my HomeRight sprayer. I then stained the top using Minwax Dark Walnut wood stain. Once the stain was dry (48ish hrs later), I attached the top to the frame using screws in the center, and oak table top buttons on the side. This should allow each end to move with wood movement, but keep the middle secure with screws.
Finally, I finished the top with Minwax gloss polyurethane. Farmhouse coffee table finished!!
If you have any questions, please ask in the comments and I'll do my best to answer them. As always, please be careful using saws and power tools, and never attempt a cut you are not comfortable with.
Check out more of my work on my Instagram page @MMCC_Woodshop! Be sure to subscribe for lots more upcoming videos with free plans! Thanks for watching!!
**DISCLAIMER**
The following content is for entertainment purposes only. Woodworking and using power tools can be extremely dangerous if not done properly. YOU (the viewer) are fully responsible for understanding proper use of tools, as well as the safety features of each. I highly suggest reading the owners manual and/or watching how-to videos on the tools. I (MMCC_Woodshop) am not responsible nor liable for any injury, death, or handing of the tools you may use, nor do I assume to display the proper handing of as a demonstration. Please use extreme caution when working with any power tools.
Видео Farmhouse Style Coffee Table Build (Free plans & dimensions in description) канала MMCC_Woodshop
Показать
Комментарии отсутствуют
Информация о видео
Другие видео канала
 Farmhouse Coffee Table
 Ultimate DIY Rustic Farmhouse Table / Weathered and Aged Finish
 DIY Rustic Coffee Table (Tutorial Style Video - Free plans/instructions in video and description)
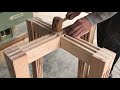 Amazing Simple Woodworking Idea // DIY Unbelievably Beautiful Outdoor Coffee Table...
 DIY Farmhouse Dining Table w/ Epoxy Inlays Using Reclaimed Barnwood
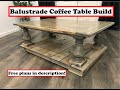 Balustrade Coffee Table Build: Tutorial video with FREE dimensions included
 DIY 8 Board Farmhouse Coffee Table
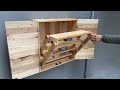 Creative And Unique Woodworking Projects // Build A CabinetThat Combines A Very Smart Folding Table
 DIY Modern Console Table | Easy Woodworking Project
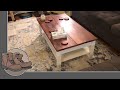 The Making of a Farmhouse Coffee Table with a Lifting Top
 DIY Farmhouse Coffee Table with Storage
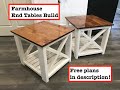 Farmhouse end table build (Free plans in description)
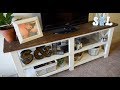 DIY: Farmhouse Style TV Stand
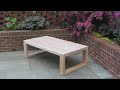 DIY Modern Outdoor Cedar Coffee Table | $50 2x4 Build, Free Plans
 Super EASY DIY Bar | DIY Standing Desk (with woodwork plans)
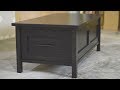 Lets build a coffee table with drawers
 DIY Farmhouse Style Coffee Table | Easy to Follow
 Easy To Build DIY Wood Coffee Table
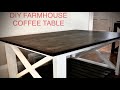 DIY Farmhouse Coffee Table // Start to Finish DIY Coffee Table
 DIY Farmhouse Sofa Table | TV Stand with Build Plans