- Популярные видео
- Авто
- Видео-блоги
- ДТП, аварии
- Для маленьких
- Еда, напитки
- Животные
- Закон и право
- Знаменитости
- Игры
- Искусство
- Комедии
- Красота, мода
- Кулинария, рецепты
- Люди
- Мото
- Музыка
- Мультфильмы
- Наука, технологии
- Новости
- Образование
- Политика
- Праздники
- Приколы
- Природа
- Происшествия
- Путешествия
- Развлечения
- Ржач
- Семья
- Сериалы
- Спорт
- Стиль жизни
- ТВ передачи
- Танцы
- Технологии
- Товары
- Ужасы
- Фильмы
- Шоу-бизнес
- Юмор
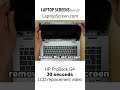
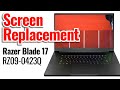
Lenovo ThinkBook 145-IWL screen replacement
https://www.youtube.com/watch?v=U8lsztkIHKw&t=8s
https://www.laptopscreen.com/
https://www.laptopscreen.com/English/model/Lenovo/THINKBOOK~14S-IWL/
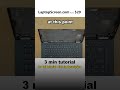
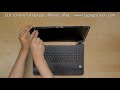
Turn the laptop off and disconnect the power cord.
Start removing the bezel. Insert a plastic pick between the bezel and the LCD.
Move it along the perimeter. Put the bezel aside.
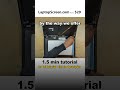
The screen is held in place with adhesive strips with the loose pads in the upper corners.
Using tweezzers pick up the tab at the top right corner. Roll the adhesive strip up on a
screwdriver. Pull it up to releasing the right side of the screen.
The adhesive strip on the left side of the laptop was fragile and we had to use a hair dryer
to soften the glue. Insert a plastic pick between the screen and the back cover and move
it along the edge. Pull the LCD from the back cover. Place the screen on the keyboard
and remove remaining adhesive strip of glue.
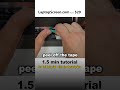
Using plastic pick and fingers peel of a clear tape securing a video connector.
Open the connectors bracket. Disconnect the video cable. Discard the old screen.
Place the new screen on the keyboard. Reconnect the video cable. Close the
connector’s bracket and secure it with clear tape.
CAUTION! It is very important not to force any connectors. Also
make sure not to twist or slant the connector when plugging it in.
Now we can test the new screen. Lift the screen up and lean it against the back cover.
Turn the screen on. The screen is working and we can finish the installation process.
We are going to use a set of adhesive strips to reattach the screen to the back cover.
You can buy a set of adhesive strips on our site: Laptopscreen.com.
Видео Lenovo ThinkBook 145-IWL screen replacement канала LaptopScreen.com
https://www.laptopscreen.com/
https://www.laptopscreen.com/English/model/Lenovo/THINKBOOK~14S-IWL/
Turn the laptop off and disconnect the power cord.
Start removing the bezel. Insert a plastic pick between the bezel and the LCD.
Move it along the perimeter. Put the bezel aside.
The screen is held in place with adhesive strips with the loose pads in the upper corners.
Using tweezzers pick up the tab at the top right corner. Roll the adhesive strip up on a
screwdriver. Pull it up to releasing the right side of the screen.
The adhesive strip on the left side of the laptop was fragile and we had to use a hair dryer
to soften the glue. Insert a plastic pick between the screen and the back cover and move
it along the edge. Pull the LCD from the back cover. Place the screen on the keyboard
and remove remaining adhesive strip of glue.
Using plastic pick and fingers peel of a clear tape securing a video connector.
Open the connectors bracket. Disconnect the video cable. Discard the old screen.
Place the new screen on the keyboard. Reconnect the video cable. Close the
connector’s bracket and secure it with clear tape.
CAUTION! It is very important not to force any connectors. Also
make sure not to twist or slant the connector when plugging it in.
Now we can test the new screen. Lift the screen up and lean it against the back cover.
Turn the screen on. The screen is working and we can finish the installation process.
We are going to use a set of adhesive strips to reattach the screen to the back cover.
You can buy a set of adhesive strips on our site: Laptopscreen.com.
Видео Lenovo ThinkBook 145-IWL screen replacement канала LaptopScreen.com
Lenovo ThinkBook 14s IWL screen replacement ThinkBook 14s IWL display repair Lenovo 14s IWL screen install Replace screen Lenovo ThinkBook 14s Lenovo ThinkBook 14s broken screen fix laptop screen replacement how to replace laptop screen diy laptop screen repair laptop display fix replace cracked laptop screen Lenovo screen replacement Lenovo laptop repair Lenovo ThinkBook repair Lenovo ThinkBook screen ThinkBook screen fix tech repair tutorial
Комментарии отсутствуют
Информация о видео
23 июля 2025 г. 0:19:35
00:01:56
Другие видео канала
![Laptop screen replacement / LCD repair [HP Stream 13]](https://i.ytimg.com/vi/T4BRKtcbktU/default.jpg)


![Laptop screen replacement / LCD repair [Samsung QX411]](https://i.ytimg.com/vi/STdBF1nyt4s/default.jpg)