New headlight sealant how to apply
Want to close your headlight with a new sealing? Removed permaseal from your headlight? This is the product you need!
https://retrofitlab.com/products/butyl-rubber-sealant
Check out our new Facebook group: https://www.facebook.com/groups/EuropeanHeadlightCommunity/
With the softer types of headlight kit, it's usually not necessary to remove the old and apply new headlight sealant. Normally there's more then enough sealing inside the channel of the headlight to close up properly again after baking the headlight open. In some cases it is necessary, for example with headlights that use a permanent kit (permaseal) which doesn't get soft when heated. This material is perfect for the job.
Applying this sealant is easy. Apply the strip in the channel of the headlight housing. At room temperature it's soft and can be stretched easily to reach the thickness you need. Push lens back on to the housing, and heat the headlight again in an oven to soften the kit. Squeeze the lens on the housing and make sure that any excisting clips are snapped back into place. Watch our video for applying instructions.
It's a roll of 9,5mm wide and 4,5 meters long. That's more than enough to seal 2 headlights back up against moisture.
Questions about the Butyl rubber sealant? Contact us today!
http://www.retrofitlab.com/info/10/contact.html
These products are not ECE-approved and must not be used on public roads in any exterior application. Use on public roads will invalidate both the operating license and insurance coverage.
Видео New headlight sealant how to apply канала Retrofitlab.com
Показать
Комментарии отсутствуют
Информация о видео
Другие видео канала
 Opening & Resealing Automotive Headlights using Morimoto Retro Rubber
 TRS Tips: Resealing Headlights with OCI Butyl Rubber Glue
 How to Fix a Headlight with Water or Moisture in it
 How to Reseal Your Headlight Using Butyl Headlamp Sealant | Diode Dynamics
 BUTYL RESIDUE QUICK REMOVAL FROM HEADLIGHT LENS
 Resealing Headlights with Retro Rubber
 How To RESEAL Custom Headlights
 HOW TO RETRO-FIT INFINITI G37 IPL HEADLIGHTS
 Fixing Bad Custom Headlights
 How Broken Headlight Repair || Headlight Cover Changing || Headlight Fixing
 How to PROPERLY Seal Headlights from Moisture & Condensation
 Common problems with HID headlight & how to fix it
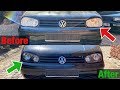 How To Blackout Your Headlights ( MK4 Joey Mod ) TDI Wagon Project
 Сборка фары CHEVROLET LACETTI
 How to Separate Headlight or Fog Light Lenses (without Oven, EASY)
 CLK Bi Xenon Projector Modification HD 720p
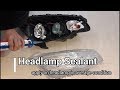 Headlights open & reseal tutorial
 Foggy headlights restoration || Headlights Cleaning & Repairing ||
 Del sol projector headlight retrofit.