- Популярные видео
- Авто
- Видео-блоги
- ДТП, аварии
- Для маленьких
- Еда, напитки
- Животные
- Закон и право
- Знаменитости
- Игры
- Искусство
- Комедии
- Красота, мода
- Кулинария, рецепты
- Люди
- Мото
- Музыка
- Мультфильмы
- Наука, технологии
- Новости
- Образование
- Политика
- Праздники
- Приколы
- Природа
- Происшествия
- Путешествия
- Развлечения
- Ржач
- Семья
- Сериалы
- Спорт
- Стиль жизни
- ТВ передачи
- Танцы
- Технологии
- Товары
- Ужасы
- Фильмы
- Шоу-бизнес
- Юмор
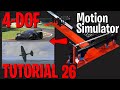
This Lateral Traction Loss Upgrade TRANSFORMS Your DIY Motion Sim!
🔥 Building a proper lateral traction loss axis is one of the biggest upgrades you can make to a DIY motion simulator — and in this episode, I take you step‑by‑step through the exact parts, measurements, and fabrication needed to build a rock‑solid traction loss axle for the Dr ADHD rig.
We start with the core materials:
40mm × 40mm × 3mm × 800mm RHS box steel
4× heavy‑duty bearing‑insert castor wheels
1× 280kg‑rated pivot castor
5mm thick flat steel plates
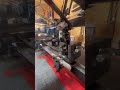
From there, I show you how to measure, mark, cut, and drill everything you need to create a set of precision joining plates. These plates allow the traction loss axle to bolt cleanly to the mid frame — and more importantly, give you fine‑tuned height adjustment so the axle sits perfectly level and aligned.
You’ll see exactly how to:
Measure and design the adjustable joining plates
Mark and drill both plates so they act as perfect stencils
Ensure every adjustment hole lines up with absolute accuracy
Prep the steel for drilling and assembly
Locate and mount the plates to the mid frame with confidence
If you’re building your own DIY motion simulator or upgrading your traction loss system, this guide gives you the clarity and precision you need to get it right the first time.
How to build a 4DOF Motion Sim Pt 1: https://youtu.be/Ng3Nw-PGpkk?si=zB_XDRb-Po9Hb_Ux
Together we build motion sims discord server: discord.gg/Zx6KzWEyVZ
Видео This Lateral Traction Loss Upgrade TRANSFORMS Your DIY Motion Sim! канала Dr ADHD Motion Sim Lab
We start with the core materials:
40mm × 40mm × 3mm × 800mm RHS box steel
4× heavy‑duty bearing‑insert castor wheels
1× 280kg‑rated pivot castor
5mm thick flat steel plates
From there, I show you how to measure, mark, cut, and drill everything you need to create a set of precision joining plates. These plates allow the traction loss axle to bolt cleanly to the mid frame — and more importantly, give you fine‑tuned height adjustment so the axle sits perfectly level and aligned.
You’ll see exactly how to:
Measure and design the adjustable joining plates
Mark and drill both plates so they act as perfect stencils
Ensure every adjustment hole lines up with absolute accuracy
Prep the steel for drilling and assembly
Locate and mount the plates to the mid frame with confidence
If you’re building your own DIY motion simulator or upgrading your traction loss system, this guide gives you the clarity and precision you need to get it right the first time.
How to build a 4DOF Motion Sim Pt 1: https://youtu.be/Ng3Nw-PGpkk?si=zB_XDRb-Po9Hb_Ux
Together we build motion sims discord server: discord.gg/Zx6KzWEyVZ
Видео This Lateral Traction Loss Upgrade TRANSFORMS Your DIY Motion Sim! канала Dr ADHD Motion Sim Lab
Комментарии отсутствуют
Информация о видео
30 декабря 2025 г. 14:18:46
00:16:55
Другие видео канала