How to Upgrade to a Smart Thermostat with Four Wires | This Old House: Live
Ask This Old House home technology expert Ross Trethewey demonstrates how to install a new smart thermostat without an existing common wire.
This video is part of This Old House: Live [https://bit.ly/TOHLive]—an initiative providing daily programming and opportunities to connect with our experts during these challenging times.
#ThisOldHouse #AskTOH
SUBSCRIBE to This Old House: http://bit.ly/SubscribeThisOldHouse
Cost: $150
Time: 1 hour
Difficulty: Easy
Shopping List:
Google Nest Smart Thermostat [https://amzn.to/3ePM8US]
Tools:
Phillips head screwdriver [https://amzn.to/3cIbbHv]
Small flathead screwdriver [https://amzn.to/2RYIKgr]
Steps for Installing a Smart Thermostat:
1. Shut the power off and disconnect the old thermostat using the small flathead screwdriver. Ross suggests taking a picture of the wiring configuration to keep track of which wire goes where.
Remove the wall screws holding up the thermostat before disconnecting the wiring to prevent the wires from falling into the wall.
2. Mount the baseplate of the smart thermostat to the wall using the provided screws.
Wire the smart thermostat to the correct terminals.
a. In general, the heating wire (often white), goes into the “W” port, the cooling wire (often yellow), goes into the “Y” port, the wire that sends power from the HVAC system to the thermostat (often red), goes into the “R” port, the fan wire (often green), goes into the “G” port, and the common wire (often blue), which should go into the “C” port.
b. If you don’t have a common wire, Ross recommends wiring the G wire into the common port instead. Most people don’t use the “fan only” mode, so while you’d give up control over the fan in the system, you’d gain constant power to the smart thermostat. You’ll also have to change the wire at the furnace from G to C.
5. Connect the thermostat to the baseplate.
6. Configure the thermostat following the manufacturer’s settings.
Resources:
Ross installed a Google Nest Thermostat E [https://amzn.to/3ePM8US]. The kit comes with the baseplate, thermostat, and required screws to secure it to the wall.
About This Old House: Live
In these challenging times with so many people at home seeking ways to pass the time productively, This Old House is launching “This Old House: Live” — daily programing and opportunities to connect with our experts.
Follow This Old House and Ask This Old House:
Facebook: http://bit.ly/ThisOldHouseFB
Twitter: http://bit.ly/ThisOldHouseTwitter
http://bit.ly/AskTOHTwitter
Pinterest: http://bit.ly/ThisOldHousePinterest
Instagram: http://bit.ly/ThisOldHouseIG
Tumblr: http://bit.ly/ThisOldHouseTumblr
Keywords:
This Old House, Ask This Old House, DIY, Home Improvement, DIY Ideas, Renovation, Renovation Ideas, How To Fix, How To Install, How To Build, Ross Trethewey, smart thermostat, heating, electrical
How to Upgrade to a Smart Thermostat with Four Wires | This Old House: Live
https://www.youtube.com/user/thisoldhouse/
Видео How to Upgrade to a Smart Thermostat with Four Wires | This Old House: Live канала This Old House
Показать
Комментарии отсутствуют
Информация о видео
Другие видео канала
 Fix Nest Thermostat Issues by Installing a C Wire
 How to Upgrade to a Smart Thermostat without Changing the Wiring | Ask This Old House
 How To Install A Wifi Thermostat With Out And With C Wire
 How To Replace an Old Thermostat | The Home Depot
 Nest Thermostat No C Wire Problem and Solutions
 Nest Wiring Diagram: Full Explanation!
 How to Install a Smart Home Wi-Fi Thermostat | The Home Depot
 Upgrading from a 4 Wire Thermostat to a 5 Wire Thermostat
 Thermostat Wiring Explained!
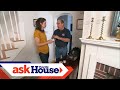 How to Install a Smart Thermostat | Ask This Old House
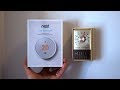 Nest Thermostat Install (Replacing old 2 wire thermostat) - FAQ in Description
 How To Install Ecobee SmartThermostat 2021 With 4 Wires, No C Wire
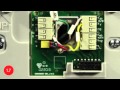 Substitute G-Wire for C-Wire -- Install the Honeywell Wi-Fi smart thermostat with this video.
 Mistakes made when hooking up a thermostat Avoid them watch
 Basic Thermostat Wiring
 How to Install a Nest Power Connector for Your Nest Thermostat
 Nest Wiring Diagram 4 Wires
 New Nest Thermostat $129! Budget vs Premium
 Nest Common Wire Hack!!! - Nest Low Power Fixed
 How to Replace HVAC Thermostat (How to Install Nest Thermostat)