Gelli Printing Adding Multiple Layers Step by Step | Creative Foundations
Gelli printing in multiple layers gives amazing results but there are some tricks to getting it right. This video focuses on how to add additional layers to your monoprints. This is a continuation of my previous video Gelli Plate Printing Basics. In this video I will show you how to add additional paint to your prints without covering up too much of the original image. Using negative space and stencils, bubble wrap, stamps and embossing folders you can add interest to your prints to get terrific results.
To see the previous video Gelli Plate Printing Basics using Stencils, Stamps and Mark Making Tools, please visit: https://youtu.be/tDjlDFU1_Eg
To see the full article on How to Make Gelli Prints, please visit: https://hopalongstudio.com/?p=1520
FIND ME ONLINE
Website: https://hopalongstudio.com/
Facebook: https://www.facebook.com/hopalongstudio/
Instagram: https://www.instagram.com/hopalongstudio/
Please subscribe to my channel at https://www.youtube.com/channel/UCgmCSl-8dJn-rEvAdQF_1HA/featured for more self-care content, art journaling videos and creative inspiration to help in your journey of self-care through artistic expression.
Prefer to get creative inspiration and self-care content delivered straight to your e-mail inbox? Subscribe to my free newsletter at https://hopalongstudio.com/
Credits
Videography: Nadine Milton on a Panasonic Lumix G85 camera, Panasonic Lumix G 20mm f/1.7 lens, Rhode SmartLav+ Microphone.
Editing Software: DaVinci Resolve
Видео Gelli Printing Adding Multiple Layers Step by Step | Creative Foundations канала Hop-A-Long Studio
Показать
Комментарии отсутствуют
Информация о видео
Другие видео канала
 Gelli Plate Printing Basics using Stencils, Stamps and Mark Making Tools | Creative Foundations
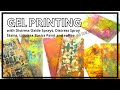 Gel Printing with Distress Oxide Sprays, Distress Sprays Stains, Liquitex Paint and Coffee
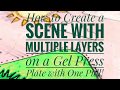 How to Create a Scene with Multiple Layers on a Gel Plate with 1 Pull
 Gelli Printing ~ Venetian Plaster Fortuny-like Backgrounds
 my SECRETS to perfectly LAYERED GEL PRINTS
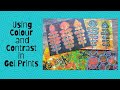 Using Colour and Constrast in Gel Prints
 Gelli Arts® Facebook Live - Crayon Resist Technique
 Distress Oxide and Spray Inks on the Gelli® Plate
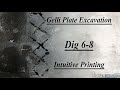 Gelli Plate Excavation - Dig 6-8 - Intuitive Gelli Printing
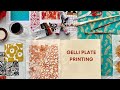 How to Create Beautiful Collage Papers With a Simple Gelli Plate Printing Technique.
 Gelli Plate Play|Advanced Techniques
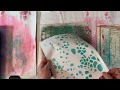 Mixed Media Mayhem! - Gelli Printing
 Segmenting with the GelliArts Gell Printing Plate
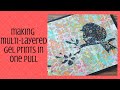 Making Multi Layered Gel Prints in One Pull
 Gelli Printing with Resist
 Gelli Printing with Found Objects
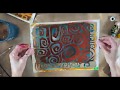 Gel Plate and Stencils–Tutorial Tidbits
 Magazine Resist Technique for the Gelli® Printing Plate
 Gelli Arts® FaceBook Live - Printing and assembling tag books
 Gelli Plate Printing