- Популярные видео
- Авто
- Видео-блоги
- ДТП, аварии
- Для маленьких
- Еда, напитки
- Животные
- Закон и право
- Знаменитости
- Игры
- Искусство
- Комедии
- Красота, мода
- Кулинария, рецепты
- Люди
- Мото
- Музыка
- Мультфильмы
- Наука, технологии
- Новости
- Образование
- Политика
- Праздники
- Приколы
- Природа
- Происшествия
- Путешествия
- Развлечения
- Ржач
- Семья
- Сериалы
- Спорт
- Стиль жизни
- ТВ передачи
- Танцы
- Технологии
- Товары
- Ужасы
- Фильмы
- Шоу-бизнес
- Юмор
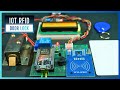
IoT Smart Energy Meter Using ESP8266 & PZEM-004T Module | Voltage & Current Protection
Build a complete IoT Smart Energy Meter Using ESP8266 and PZEM‑004T v3.0 with professional voltage/current protections, automatic relay cut‑off, dual 20×4 I2C LCD pages, and a beautiful violet/dark animated Web UI. Learn wiring, code, thresholds (OV/UV/OC), JSON API, and how to fix LCD “random characters” and stale readings by full‑line rendering and safe NaN handling. Perfect for home and lab monitoring.
📌 Written Tutorial: https://circuitdiagrams.in/iot-smart-energy-meter-esp8266-pzem004t
📌 Code & Circuit Diagram: https://circuitdiagrams.in/shop/smart-iot-energy-meter-esp8266-pzem004t
What you’ll learn:
✅ Hardware: ESP8266 (NodeMCU), PZEM‑004T v3.0, low‑trigger SSR, 20×4 I2C LCD, page button
✅ Protections: Over Voltage, Under Voltage, Over Current with auto relay cut (manual/auto modes, latching)
✅ Web Dashboard: Live readings, manual controls, thresholds with persistence, animated AC mains indicator
✅ Code Quality: Two‑decimal formatting, units after values, null-safe JSON, robust LCD padding to prevent artifacts
✅Troubleshooting: Clear stale values on mains loss, fix LCD artifacts, avoid NaN in JSON
🔧 Components Used:
ESP8266 NodeMCU Board: https://amzn.to/4nOcl8w
DC to DC Step Down Module: https://amzn.to/4425jWm
20x4LCD Display (I2C Module): https://amzn.to/4hWrtiK
PZEM-004T Sensor: https://amzn.to/3WOyiZX
5V Relay Module: https://amzn.to/4qXIBc8
Veroboard: https://amzn.to/487liF6
📸 Gear Used:
Camera: Sony Alpha ZV-E10M2K (16-50mm Power Zoom Lens) [https://amzn.to/4rePypn]
Tripod: DIGITEK DPTR 895VD [https://amzn.to/42y7Cjd]
📌 Chapters
00:00 – Intro & demo
00:37 – Custom Project
00:54 – Components Required
02:58 – Wiring (ESP8266, PZEM‑004T, SSR, LCD)
07:03 – Testing Our System
10:09 – Protections (OV/UV/OC) and auto cut logic
12:50 – High Load Testing
14:03 – Outro
👉 If you enjoy IoT, ESP32, and Arduino projects, don’t forget to Like 👍, Share ↗️, and Subscribe 🔔 to Circuit Diagrams for more tutorials!
📱 Connect & Follow:
🌐 Website: https://www.circuitdiagrams.in
🐙 GitHub: https://github.com/tanmoykundu80
📘 Facebook: https://www.facebook.com/circuitdiagrams.in
📸 Instagram: https://www.instagram.com/circuitdiagrams
📌 Pinterest: https://in.pinterest.com/creativescanner8481
✉️ Email: info@circuitdiagrams.in
📌Hashtags:
#ESP8266 #PZEM004T #SmartIoTEnergyMeter #IoTACEnergyMeter #IoTEnergyMeter #EnergyMeter #IOTProjects #ArduinoIDE #SmartHome #ElectronicsProjects #DIYElectronics #ESP32Projects #overvoltageprotection #undervoltageprotection #overcurrentprotection #voltagecurrentprotectionsystem
Видео IoT Smart Energy Meter Using ESP8266 & PZEM-004T Module | Voltage & Current Protection канала Circuit Diagrams
smart energy monitoring system iot energy meter iot projects energy meter monitoring over iot smart energy meter project Low Cost IoT Projects Wireless Energy Monitor Smart Home Projects IoT for Students Engineering Final Year Projects PZEM004T v3.0 ESP8266 projects IoT energy monitoring DIY smart energy meter Arduino IDE ESP8266 project ESP32 PZEM004T tutorial WiFi energy meter DIY measure electricity consumption DIY ESP8266 PZEM004T energy monitoring
Комментарии отсутствуют
Информация о видео
11 ноября 2025 г. 11:30:31
00:14:12
Другие видео канала
![IoT Smart Energy Meter Using ESP32 & Blynk 2.0 [Blynk Notification]](https://i.ytimg.com/vi/sX1rWyPpycE/default.jpg)