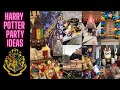
My Harry Potter Themed 18th Birthday Party
As it turns out, there is a limit to the amount of words you can have in a description box hahaha (oops) I'll fit as much in as I can but if there's something missing that you'd really like to know then feel free to leave a comment or DM me on Instagram (@gowithflick) and I can answer you personally :)
Thank you for watching!
→ House Banners
You will need:
- 1 metre of each coloured fabric (yellow, red, green, blue and black (if you want to make Hogwarts banners as well)
- Hot glue
- Scissors
- House crests, one for each banner (printed off google onto paper)
- Something to mount them to the wall
To make them:
1. Cut the fabric into even sized rectangles in whatever size you'd like
2. Fold the bottom corners into the middle to create a point/triangle along the bottom (if you look at one of mine this should make sense)
3. Hot glue the point in place. Fold over and glue down the rough edges around the whole outside edge of the banner. This can also be sewn on but hot glue works wonders for temporary purposes.
4. If you wish to add a trim, cut out 1cm wide strips of felt and hot glue them around the edge of the banner.
5. Cut out the house crest and hot glue it to the centre.
→ Floating candles:
You will need:
- A LOT of hot glue (I got a pack of 50 and it was barely enough)
- white paper or card
- Scissors
- Something to poke a hole with (pen or exacto-knife)
- LED tea light candles
- Clear fishing line
- Command hooks (or something to hang them with)
To make them:
1. Cut the paper or card to size and roll it into a cylinder that is big enough to fit an LED candle inside. Glue in place.
2. Hold the tip of the glue gun to the edge of the cylinder and pull the trigger. Let the glue ball up and melt naturally down the side of the cylinder. Continue around the entire cylinder (candle wax never melts the same way and it often looks quite messy so don't try to make anything look too exact or symmetrical).
3. Once the glue has dried, measure roughly an inch down the side of the top of the candle and poke a hole. Do the same on the opposite side.
4. Cut a long strip of fishing line and thread it through the holes.
5. Use small command hooks (or whatever equivalent you prefer) to hang the candles from the ceiling. I find they look best hanging at different heights.
5. Switch the LED tea light candle on and nestle it in the paper cylinder. The fishing line should be enough to stop it from slipping through.
→ Platform 9 3/4:
You will need:
- light coloured plastic tablecloth (or bed sheet)
- 2 rectangular sponges
- red shade of paint
- brown shade of paint
- Printable Platform 9 3/4 sign (easy to find on google)
- something to mount it with
- scissors
To make it:
1. Squeeze the paint into two separate containers and lay the tablecloth flat. (Designate a sponge for each colour to make your life a lot easier).
2. Press the paint covered sponges onto the tablecloth in an alternating pattern. The more random it looks, the better.
3. Once the paint has dried, hang the tablecloth over a doorway and use scissors to cut an opening down the middle for people to walk through.
4. Alternatively, you can hang the tablecloth on the wall and leave it in one piece to use as a photo backdrop.
5. Attach Platform 9 3/4 sign to the wall beside it
→ Bloody mirror design:
You will need:
- A mirror
- Red lipstick
- Fake blood
- Small paint brush
To create it:
1. Draw out the rough words; "The Chamber of Secrets has been opened. Enemies of the heir, beware." using the lipstick.
2. When you're satisfied with how it looks, go over the lipstick with the paint brush dipped in fake blood. Let the blood drip and roll down the mirror.
3. To remove it, use paper towel and water.
Those were the main projects I worked on that were showcased in the video! I hope these instructions are straight forward enough - everything is super easy to make and mostly just takes patience and trial and error.
If you'd like me to make a tutorial video on how I created these and some more HP decorations, let me know and I can make it happen sometime in the future!
Thanks for watching and thank you again for the birthday wishes xx
→ You might also like to know:
Camera - iPhone 7 plus
Edited with - Final Cut Pro X
Edited by - Yours truly :)
→ Email Address: felicity.jackson24@icloud.com
→ PO Box:
Felicity Jackson
PO Box 765
Gosford 2250
NSW Australia
Other places to find me on the internet:
→ Instagram: (@gowithflick) http://instagram.com/gowithflick
→ Twitter: (@gowithflick) https://twitter.com/GoWithFlick
→ Pinterest: (@gowithflick) http://www.pinterest.com/GoWithFlick
→ Goodreads: https://www.goodreads.com/gowithflick
Thank you for watching!
Видео My Harry Potter Themed 18th Birthday Party канала gowithflick
Thank you for watching!
→ House Banners
You will need:
- 1 metre of each coloured fabric (yellow, red, green, blue and black (if you want to make Hogwarts banners as well)
- Hot glue
- Scissors
- House crests, one for each banner (printed off google onto paper)
- Something to mount them to the wall
To make them:
1. Cut the fabric into even sized rectangles in whatever size you'd like
2. Fold the bottom corners into the middle to create a point/triangle along the bottom (if you look at one of mine this should make sense)
3. Hot glue the point in place. Fold over and glue down the rough edges around the whole outside edge of the banner. This can also be sewn on but hot glue works wonders for temporary purposes.
4. If you wish to add a trim, cut out 1cm wide strips of felt and hot glue them around the edge of the banner.
5. Cut out the house crest and hot glue it to the centre.
→ Floating candles:
You will need:
- A LOT of hot glue (I got a pack of 50 and it was barely enough)
- white paper or card
- Scissors
- Something to poke a hole with (pen or exacto-knife)
- LED tea light candles
- Clear fishing line
- Command hooks (or something to hang them with)
To make them:
1. Cut the paper or card to size and roll it into a cylinder that is big enough to fit an LED candle inside. Glue in place.
2. Hold the tip of the glue gun to the edge of the cylinder and pull the trigger. Let the glue ball up and melt naturally down the side of the cylinder. Continue around the entire cylinder (candle wax never melts the same way and it often looks quite messy so don't try to make anything look too exact or symmetrical).
3. Once the glue has dried, measure roughly an inch down the side of the top of the candle and poke a hole. Do the same on the opposite side.
4. Cut a long strip of fishing line and thread it through the holes.
5. Use small command hooks (or whatever equivalent you prefer) to hang the candles from the ceiling. I find they look best hanging at different heights.
5. Switch the LED tea light candle on and nestle it in the paper cylinder. The fishing line should be enough to stop it from slipping through.
→ Platform 9 3/4:
You will need:
- light coloured plastic tablecloth (or bed sheet)
- 2 rectangular sponges
- red shade of paint
- brown shade of paint
- Printable Platform 9 3/4 sign (easy to find on google)
- something to mount it with
- scissors
To make it:
1. Squeeze the paint into two separate containers and lay the tablecloth flat. (Designate a sponge for each colour to make your life a lot easier).
2. Press the paint covered sponges onto the tablecloth in an alternating pattern. The more random it looks, the better.
3. Once the paint has dried, hang the tablecloth over a doorway and use scissors to cut an opening down the middle for people to walk through.
4. Alternatively, you can hang the tablecloth on the wall and leave it in one piece to use as a photo backdrop.
5. Attach Platform 9 3/4 sign to the wall beside it
→ Bloody mirror design:
You will need:
- A mirror
- Red lipstick
- Fake blood
- Small paint brush
To create it:
1. Draw out the rough words; "The Chamber of Secrets has been opened. Enemies of the heir, beware." using the lipstick.
2. When you're satisfied with how it looks, go over the lipstick with the paint brush dipped in fake blood. Let the blood drip and roll down the mirror.
3. To remove it, use paper towel and water.
Those were the main projects I worked on that were showcased in the video! I hope these instructions are straight forward enough - everything is super easy to make and mostly just takes patience and trial and error.
If you'd like me to make a tutorial video on how I created these and some more HP decorations, let me know and I can make it happen sometime in the future!
Thanks for watching and thank you again for the birthday wishes xx
→ You might also like to know:
Camera - iPhone 7 plus
Edited with - Final Cut Pro X
Edited by - Yours truly :)
→ Email Address: felicity.jackson24@icloud.com
→ PO Box:
Felicity Jackson
PO Box 765
Gosford 2250
NSW Australia
Other places to find me on the internet:
→ Instagram: (@gowithflick) http://instagram.com/gowithflick
→ Twitter: (@gowithflick) https://twitter.com/GoWithFlick
→ Pinterest: (@gowithflick) http://www.pinterest.com/GoWithFlick
→ Goodreads: https://www.goodreads.com/gowithflick
Thank you for watching!
Видео My Harry Potter Themed 18th Birthday Party канала gowithflick
Показать
Комментарии отсутствуют
Информация о видео
Другие видео канала
 Harry Potter Party Ideas ⚡ TikTok Compilation
 NYC Book Haul - Barnes & Noble and The Strand Bookstore!
 16 Magical Harry Potter DIY Crafts
 A Spontaneous Kmart Adventure | #The12DaysofFlickmas DAY 2
 DIY Harry Potter Party IDEAS! ϟ Decor, Gifts & Treats
 HOW TO ATTEND A SCHOOL OF WIZARDRY | England
 ❤ My 1 Year Old Harry Potter Theme Party ❤ We Turned The Place Into HOGWARTS!
 NaNoWriMo vlog 2017 + my experience :)
 Harry Potter Trivia
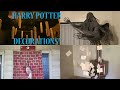 How to Make The Best Harry Potter Decorations - Party Ideas!
 THE ULTIMATE HARRY POTTER PARTY pt. 1
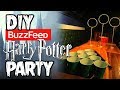 I Tried BUZZFEED's Harry Potter Party (SPOILER ALERT, IT'S AWESOME)
 We turned our loft into HOGWARTS!
 Turning my house into Hogwarts | Harry Potter Party
 DIY Harry Potter Room Decor
 Fairyloot Unboxing | June 2017
 Christmas Day in the City (vlog) | #The12DaysofFlickmas DAY 12
 NaNoWriMo 2017
 How to Throw an Easy Cheap Harry Potter Party! | DIY | Thania's Birthday