Making a casted aluminum safe case. Part 2 of 2
This is the second part of aluminum safe case casting. I’ll make the second part of the case, sand and finish it. In the end I’ll make a short durability test to be certain that it’s really safe!
To prepare aluminum I’ll melt aluminum cans, some tubes and other scrap. The casting technology is the same as it was in the first part. It’s lost-foam casting with using a flask and green sand.
My melting furnace worked perfect and it took me less than 30 minutes to melt all the aluminum I had prepared.
Aluminum pouring was practically perfect.
The next step was to drill holes and to fix case latches and case hinges. Finally, I glued polyethylene foam to improve the case interior and thin plastic sheets to make the nice case exterior.
In addition, I tested the first defected case part to find out if it was durable. It passed the test. It didn’t get any damages after fallen of 3 meters (9.8 ft) high.
Making a casted aluminum safe case. Part 2 of 2: https://youtu.be/Y0G9tKRuI-w
Please, watch my other videos:
Making a casted aluminum safe case. Part 1 of 2: https://youtu.be/QFj_dmqxUiQ
Aluminum balls lost-foam casting (using ping-pong balls): https://youtu.be/A9Ov1H_TIi4
Ancient money - Kievan Grivna. Casting brass ingot: https://youtu.be/clpwnS1zj8A
Casting Aluminum. A Saucer: https://youtu.be/AvezTmFQTa4
Aluminum casting - Clothes Hook: https://youtu.be/NNy8G_Ti2p4
Видео Making a casted aluminum safe case. Part 2 of 2 канала Dural Metalurg
Показать
Комментарии отсутствуют
Информация о видео
Другие видео канала
 Smelly alloy. Metals mix melting. Carbide
 Mini Nuke 3D printing with dual extruder. Storage container in Fallout style
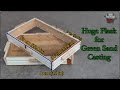 Huge Flask for Green Sand Casting (DIY)
 Leather protective clothing for home metals melting for 17$
 Unexpected results during fire resistance test (part 2)
 Casting lead into a match box and a paper tube
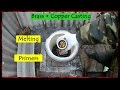 Melting used Shotgun Primers. Brass + Copper Casting
 Cast Brass Door Number. Lost foam casting
 Making the strongest Manganese Bronze. Casting Manganese Bronze ingots
 Casting Aluminum. A Saucer
 Casting an Aluminum Bald Eagle. The Great Seal
 Making Tin Bronze. DIY bronze. Classic bronze
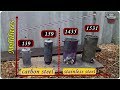 Making a Stainless Steel Crucible and my Crucibles Collection Review
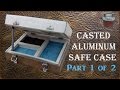 Making a casted aluminum safe case. Part 1 of 2
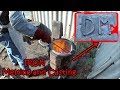 Iron melting and casting. Casting iron plaque
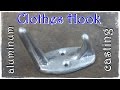 Aluminum casting - Clothes Hook
 Which alloy is the hardest? Hardness test of 10 metals
 Bronze sword casting. Legionary. Aluminum bronze casting
 Etching of a Brass Ingot. House Stark sigil
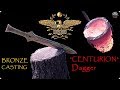 Casting Bronze Dagger. Centurion. Aluminum bronze