Battery Reconditioning -- All Steps in 1 by Walt Barrett Made in USA
Go to http://www.batterychem.biz/ to purchase -- MADE IN THE USA - SOLE DISTRIBUTORSHIPS NOW AVAILABLE WORLDWIDE. OUR BATTERY MANUALS ARE FREE. WRITE TO BATTERYCHEM@AOL.COM
Distributors wanted worldwide. Now Shipping World-Wide.
Contact wbarrett1@aol.com for samples.
MADE IN THE USA
Transcript:
Battery Reconditioning Tools
Safety glasses, a plastic funnel, a battery hydrometer, a battery post cleaner, a common screwdriver, a voltmeter with probes on it, a battery load tester, and the chemicals to add.
Step 1. Clean the terminals
Battery post cleaner with wire brushes up inside it. Place it on the post, turn it several times, remove it, and then go to the next post, push it on, turn it several times, and remove it. That gets rid of the corrosion and dirt off the sides of the post.
Step 2. Check the voltage
Check the voltage of the battery before you do anything else. If the battery doesn’t read at least 12 volts, you’ve got a problem with one of your cells. Check the cells to see if one of them is dead.
Step 3. Test the cells.
Remove the battery caps. Use a common screwdriver, catch it under the edge, pry up, and put them aside. Now proceed with the cell test.
Testing the cells: We have these probes that we've made from coat hanger wire. They're expendable - when they get corroded out you just throw them away and make new ones.
Clip them on to your voltmeter. Start with the positive terminal, and put your cable on it. Go to the first cell and get a reading of two volts. Go with the positive cable to the first cell, and then to the second cell, and you should get a reading of two volts. Keep going down the battery, positive/negative. You must get a reading of at least 2 volts for each cell, or you've got a weak or a bad cell.
Step 4. Battery load test.
It's important how you hook this up to the battery. You always hook up the positive lead first and the negative lead last, so you won't make any sparks and have an explosion.
There's a switch on the bottom of the load tester that puts a load on the battery. It heats up a heating coil, behind the grill. When I put this switch on, you're going to see the meter drop. Now you're going to see the meter drop. Count 10 seconds by going 1001, 1002, etc. until you get to 1010 very slowly. You feel the heat coming out of the grill here. And then when you let go of the switch, well, there are two things you want to know.
Second is, when we let it go, it goes right back up to about 13 volts again. The battery is really in very good shape, Always take off the ground first – so you won't make any sparks.
Step 5. Hydrometer test.
The battery hydrometer is a glass tube with a suction bulb on it that draws the electrolyte from the battery up into the glass tube until the float inside begins to float. Now when the float is floating, it has markings on it. You can see a red strip from there to there, a narrow white strip and then a little wider green strip. If it floats up and it's in the green, that means the battery's in pretty good shape.
The more that the float sticks up out of the electrolyte - in other words, if it's down in here somewhere - the stronger the battery is. If it only floats up into the white, that means the battery is only in fair shape. And if it goes up into the red then it really needs a charge.
So what we're going to do now is we're going to do a couple of sample tests so that you can see how this works. This is the actual test:
You place the hydrometer down in the cell so it touches the top of the plates. You squeeze the bulb, as hard as you can. Get all the air out of it. Then draw the electrolyte up into the glass cylinder.
Now you see the float is floating already, so you can stop right there, hold it level, and let it float. It’s just at the top of the green into the white. So obviously that's an indication that the battery needs some charging, because the specific gravity of the electrolyte is low.
Now remember, this fluid is called electrolyte. It's very dangerous - you don't want to get it on your clothing.
Now we put it all back in the cell.. There's more of the green showing. So we put that one back if it still needs a charge. This also is a good way to test a cell.
The hydrometer is another way to see what condition your cells are in.
While you're doing this you should also check the level of the
electrolyte inside the battery, and that level should be at least an eighth of an inch above the top of the lead plates.
Step 6. Adding the chemical.
Once we determine that this battery is available for reconditioning, it's time to add the China Depot battery reconditioning chemicals.
We take a plastic funnel, and a tablespoon, and we get a heaping spoon, and we start with the first cell. Add it's very dry so it goes in easily.
Charge the battery for about 24 hours, and we should have another perfectly reconditioned battery.
Видео Battery Reconditioning -- All Steps in 1 by Walt Barrett Made in USA канала Walt Barrett
Показать
Комментарии отсутствуют
Информация о видео
Другие видео канала
 How to Fix a Car Battery, Don't Change Your Battery Refurbish it for another 3 Years
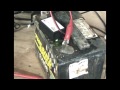 14 year old tractor battery repair wizbang wizbangplus desulfator
 Does Epsom Salt Revive a Battery?
 Respiration How to Repair Dead Dry Battery at home Repairing Lead Acid Battery
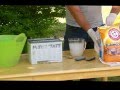 Reconditioning a 12 Volt Car Battery part #1
 Easy way to repair 12v lead acid battery step by step , Awesome project that can help you
 DIY How to bring back a dead car battery back to life
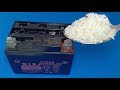 How to repair dead dry battery at home , Lead acid battery repairation
 200th Video!!! Fixing / Reviving Batteries With Epsom Salt
 Battery restoration with epsom salts.
 How to Recondition your Car 🚗 Battery 🔋
 Car battery dead cell repair
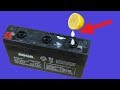 Super easy battery Repair, dry batteries repair at home diy project
 Restoring Car Batteries with Epsom Salts - Does it Work?
 Acid Lead battery restoration recovery 2 of 3 INCLUDES UPDATE 2018
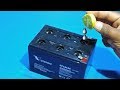 how to repair dry battery at home repair old dead dry battery acid battery repairation
 Battery Reconditioning- Battery Companies PRAY You Never See This Revealing Video
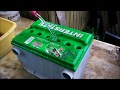 A trick to rejuvenate a car battery
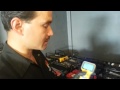 Battery Refurbished
 The Secrets To Servicing Sealed Lead Acid Batteries with hidden service plugs by Walt Barrett