Making a Marking Gauge
In the middle of another project I realised I needed a marking guage so I had a root around my workshop and found a few pieces of reclaimed mahogany, some ash, a piece of round stock mild steel and a washer and got to work. Its is a fairly common style of marking guage I choose to go with using a round marking wheel at the top as its easily changed or resharpened when needed. When glueing my pieces of wood I used a dab of CA glue and activator in the center this was to stop the pieces sliding around when clamping together. I also made sure to to have the grain of the ash going in opposite direction to the grain of the mahogany to prevent splitting and then added some splines on the back to give to some more strenght as its under tension when being clamped from the other side.
Tip Jar http://paypal.me/FrontierlesCraftsman
Facebook https://www.facebook.com/frontierlesscraftsman/?ref=bookmarks
Видео Making a Marking Gauge канала Frontierless Craftsman
Tip Jar http://paypal.me/FrontierlesCraftsman
Facebook https://www.facebook.com/frontierlesscraftsman/?ref=bookmarks
Видео Making a Marking Gauge канала Frontierless Craftsman
Показать
Комментарии отсутствуют
Информация о видео
Другие видео канала
 I made this marking gauge
 Making amazing Dowel jigs:No drill required!!
 🔴 ➡️MUY UTIL y FACIL➡️ Como hacer un GRAMIL de madera CASERO para carpinteria | Ruler Marking Gauge
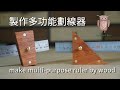 木工DIY 木工工具 | 自製多功能劃線器 | make multi-purpose ruler by wood | woodworking #037
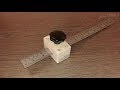 Streichmaß
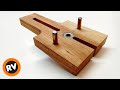 ⭕ GUÍA para TARUGOS de MADERA 👉 Plantilla para CENTRAR y HACER UNIONES con TARUGOS || DOWEL JIG DIY
 Marking Gauge and Beam Compass 2-in-1
 Homemade height gauge for circular saws and routers
 Homemade Bar Clamp
 Make ruler mark gauge/Ruler stop gauge/눈금자 마킹 게이지
 Making an awl
 Handmade Skeleton Knife
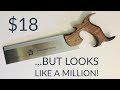 $500* Beautiful Dovetail Saw from $18 Gents Saw | Hand Tool Woodworking
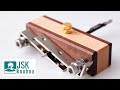 How to make a reliable center finder
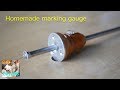 Economical DIY marking gauge
![[Woodworking] Make a marking gauge/Homemade Ruler Marking Gauge](https://i.ytimg.com/vi/MNIYm0sBNfA/default.jpg) [Woodworking] Make a marking gauge/Homemade Ruler Marking Gauge
[Woodworking] Make a marking gauge/Homemade Ruler Marking Gauge Making wooden clamps クランプ作りPinza de madera
 How to Use a Marking Gauge CORRECTLY
 Making a Roundover Plane - Scrapwood Challenge Ep36
 How To Make a Ruler Marking Gauge / 그무게 마킹게이지 만들기