Howto Flush and Clean a Clogging Printhead Demonstrated
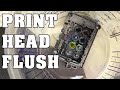
In this video it is discussed how to clean the printhead of your machine using a method called flushing to prevent clogging. It is demonstrated on an EPSON DX7 head but the method works on any printhead.
We use a liquid called F-ECO/CLEAN AM.CO.ZA FastCOLOUR Solvent Ink, and Pigment Ink Cleaning Solution. Which can be found here:
http://ecosolventink.co.za/F-ECO/CLEAN
To flush out the various parts of the printhead, all you will need is a syringe, and a small tube attached to the syringe tightly that can also attach to the printhead. When you have all your parts together you can take your syringe with the tube attached and fill the syringe. When that is done you can attach it to one of the holes on the printhead – make sure it is secure. Then inject the liquid into the printhead and you should see some colored water coming out of the other side of the printhead. You repeat this process with all the holes for the colors until there is no more color coming out of the printhead and just clear liquid.
Make sure that the place where you connect the cable is always facing up so you don’t get any liquid in the electronic components.
Afterwards you can wrap it in foil or cling wrap - still keeping the connection side up - to make sure you catch any liquid still inside, to prevent a mess.
For the liquid solution and other products be sure to visit AM.CO.ZA.
http://sortit.co.za/video/202498579
Видео Howto Flush and Clean a Clogging Printhead Demonstrated канала Achievement Matters
Показать
Комментарии отсутствуют
Информация о видео
Другие видео канала
 PRINT HEAD FLUSH - WATERFALL - REVERSE FLUSH - DTG / EPSON PRINTERS
 How to Perform a Head Soak for the Roland® VersaCAMM®
 Guide of Epson DX8 Printhead Cleaning
 Restoring Missing Nozzles
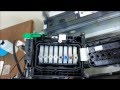 Printhead Removal and Flush
 Part 2 : How to repair DX5 DX7 Epson Printhead
 clean print head
 Roland VersaCAMM Damper Replacement
 Mimaki JV33-130 fixing print head 2015
 dx5 and dx7 head repair by new liquids
 Printhead DX7 Roland GOLD HEAD Unclogging Recover Repair Consertar Desentupir Cabeça Impressão
 Epson DX5 DX7 Print head repairs and maintenance
 manually clean printhead nozzles XP600
 Print Head Clogs What to do!
 How To EASILY Unclog Ink Jet Print Heads
 Unclog Your Printer Heads with No Head Cleanings!
 How to flush an XP600 print head using UV cleaner and a syringe
 Should we use Ultrasonic Cleaner to Unclog Printheads?
 manual for head cleaning machine
 Introduce New RustOff Laser Cleaning System, Easy to Use and Cost Effective Fiber Laser Cleaner