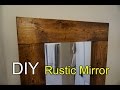
How to Make a Full Length Mirror
Learn how to make a full length mirror, I'll teach you how to build one for under $100! They go great in any space and are easy and fun to make.
The custom sign shown halfway through this video was made by Personally Yours Home Furnishings. They make great products, check them out here: https://www.etsy.com/shop/PYHF
For more info, project photos, and downloadable plans check out:
http://www.diypete.com/Mirror
Download Plans: http://gumroad.com/l/Mirror
Cut the Lengths on the Miter Saw
Once your boards are cleaned up, we can head over to the miter saw to cut them to size. You can use a circular saw here if you do not own a miter saw. Cut the frame’s boards, referring to the cut list above. Then cut the back support frame’s pieces, referring to the cut list in the downloadable plans. That’s all the cuts we’ll need to make – you should have 8 pieces now cut to length!
Plane it Down
If you’re using reclaimed wood that needs to be planed down, now is the time. I just barely took any thickness off of the boards, just wanted to clean the boards up. I also hand planed the sides of the boards.
Kreg Jig Pocket Holes and Assemble the Frame
Grab your Kreg Jig and make pocket holes in the top and bottom boards. I did three pocket holes on each end. Start with one corner, true it up, glue it up, and Kreg screw it together. Read more in the downloadable plans.
Attach the Mirror Back Support Frame
Next, we’ll add the back support frame that the mirror sits in. Measure and mark the spot for this frame or if it’s easier, place the mirror into place. Glue and staple/nail the back support frame into place. Since the boards are a thin ¼”, I wouldn’t recommend screwing this into place, as there is a high chance of cracking.
Sand and Finish The Frame
Before the mirror goes in, it’s a good time to sand the frame down and add your finish of choice. Sand the whole frame down to 220 grit or so to prep for finishing. Since I loved the look of these redwood boards, I simply added a clear coat finish to make the colors pop and to seal the boards. I let the first coat cure, then added a second coat for extra protection, coverage, and gloss.
Install The Mirror
Almost done, we just need to install the mirror and backing! Add 100% silicone along the back of the frame where the mirror will fit. Be sure to keep the silicone bead clean so it won’t bleed out onto the mirror. Refer to the downloadable plans for more info here. Let the silicone cure for the manufacturers recommended time and then you’re mirror is done! The mirror can lean against a wall, or you can easily hang it by finding the studs in the wall and attaching it with long screws.
----
Looking for more DIY videos? Be sure to check out our channel and subscribe for updates! We post a weekly tutorial every Thursday.
Looking for woodworking, concrete working, and other DIY projects plans to follow? You can download plans for free at http://gumroad.com/DIYPETE
Facebook: http://facebook.com/DiyProjectsWithPete
Instagram: http://instagram.com/diypete
Pete Sveen
1627 W Main Street Suite 182
Bozeman, Montana 59715
Видео How to Make a Full Length Mirror канала DIY PETE
Показать
Комментарии отсутствуют
Информация о видео
Другие видео канала
 Rustic Floor Mirror DIY - Easy Project
 DIY Rustic Mirror - Kraftmade
 DIY | GLAM MIRROR | FULL LENGTH BEAUTY BLING MIRROR
 i try to dupe expensive West Elm floor mirrors for half the cost! | Can I Make It For Cheaper?! EP1
 How to make your own "ANTIQUE" Picture Frames
 How To Frame A Mirror Using Salvage Wood
 How to make a Nightstand | DIY Nightstand | Concrete Nightstand
 How To Make A Picture Frame - 5 Different Techniques
 Mud Kitchen With Working Sink!
 How to make a DIY Smart Mirror
 DIY | GLAM MIRROR | FULL LENGTH MIRROR
 DIY OVERSIZED MIRROR FRAME | AFFORDABLE HOME DECOR DIYs | THRIFT FLIP
 DIY Kitchen Island Cart with a Concrete Top
 how to make a LARGE floor mirror frame | DIY WOOD FRAME
 DIY Corner Entertainment Center | Floating Corner Shelves
 EASY DIY LARGE LEANING MIRROR | SILVER, BLACK & WHITE Accent Mirror
 Framing A Bathroom Mirror With Custom Fit Designer Quality Frame Kits
 RUSTIC MIRROR FRAME | FARMHOUSE DIY DECOR | Momma From Scratch
 How to build a door out of REAL wood - DIY woodworking project
 How to Frame a Large Mirror