V-Carve Inlays - Detailed How To
Let's get up close and personal with inlay settings in V-Carve. Its an easy process if you know what all the settings control. My personal notes are below:
Tools (affiliate links to amazon)
60 DEGREE V-BIT - http://amzn.to/2vkOZ3k
1/4" SPIRAL COMPRESSION BIT - http://amzn.to/2funEq1
1/8" SPIRAL DOWNCUT BIT - http://amzn.to/2vGwBmf
3/4" RESAW BLADE FOR BANDSAW - http://amzn.to/2fudJRh
For the Inlay (Plug)...
1. Mirror the vectors in your graphic so you have a mirror image.
Set your "Start Depth" to .1. This ensures you have .1" of material that sits down into the pocket.
2. Set the "Flat Depth" to .1". The .1" here adds to the .1" of start depth, so the emboss will be .2" deep. Since .1" will go INTO the pocket. This will leave a .1" gap between the pieces for the band saw to pass through after the glue up.
On the CNC router...
Carve the inlay (plug) normally starting with the V-bit (60 degree preferably)
Pocket...
1. The v-carve is business as usual except, set the flat depth to .2 inches and use an 1/8 end mill for the flats. (this makes sure the v-bit only goes .2" into the work as that is the maximum cutting height for a 60 degree, 1/4" bit.
On the CNC router...
Zero the machine at the Origin.
If you want some sanding allowance, Add .01" to the Z height. (This will cheat the pocket to be .21" deep. This will allow the inlay to go in slightly deeper so you'll have .01" to be able to sand the surface to the right depth for the graphic's detail.)
Follow me on social media
Facebook - http://facebook.com/gregsgaragekc
Twitter - http://twitter.com/steelsplinters
Instagram - http://instagram.com/gregsgaragekc
Видео V-Carve Inlays - Detailed How To канала Greg's Garage
Показать
Комментарии отсутствуют
Информация о видео
Другие видео канала
 CNC Tips: How To Make A VCarve Inlay
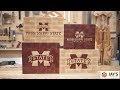 Inlay End Grain Boards - Lessons Learned
 Carbide Create Gets a New Toolpath: "Advanced Vcarve"
 D07 - VCarve Inlay Technique
 Making a Box with a CNC | Michael Tylers FREE Project of the Month | Vectric
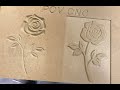 VCarving
 Tips & Tricks | VCarve Inlays | Vectric
 How to VCarve Extreme Detail and New Paint Method
 X Carve and Vectric Aspire Tutorial - Coat of Arms Cribbage Board
 X-CARVE Chicago Cubs with Colored Epoxy Project
 VCarve inlay - CNCnutz Episode 59
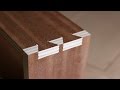 Vectric Dove Tail Gadget Tutorial
 How To Setup A 3D Carving Project in Vectric VCarve Pro/Desktop
 Deep inlays VCarving detailed tutorial with Vectric VCarve
 Koi fish cutting board / butcher block. Zieba board #3. Cnc inlay. Wood inlay 4k video.
 VCarve Sign Tutorial: From Design to CNC
 Woodworking: Making an End-grain Inlay Cutting Board
 Machining parts longer than your machine - CNCnutz Episode 63
 Why are 3D CNC Router Carvings So Expensive?!!