DIY Rustic Live Edge Clock
This live edge clock is one of my favourite projects yet! To make this rustic wall clock I used an old bicycle rim for the frame, an old slab of live edge maple for the face, and some clock parts I ordered off amazon (https://amzn.to/3f6YiJ3). This project is great for beginner-intermediate woodworkers.
Click here so you don't miss a video! https://bit.ly/2Xe639L
JOIN ME ONLINE:
Facebook: https://www.facebook.com/timberandtea/
Instagram: https://www.instagram.com/timberandtea_
Website: https://www.muskokafolk.com
Clock parts: https://amzn.to/3f6YiJ3
***********
Music: https://www.bensound.com
The first thing I did was go on facebook to spread the word that I was on the look out for an old bike!
Once I got the bike, I pushed a nail into the tire valve to release the air and then worked my way through til all that was left was the rim.
Turns out the best way to get the tire off is to grab a flathead screwdriver, digit underneath the lip and drag it all the way around.
Next I took out all of the screws that were holding the spokes in place.
Once I got it unassembled, I used 600 grit sandpaper and gave the whole rim a light sand.
Then I cleaned it with a de-greaser. I used Acetone, but you could also use paint thinner or dish soap. I spray painted mine black, but you could do it any colour or just leave it raw aluminum.
Next I cut my wood inlay. I used a piece if live edge cherry that had laying in the garage. I cut it a couple inches wider than my bike rim.
I decided to hand scrape my piece to keep some of the character, but you could also plane it, or sand it with a belt or orbital sander.
Once I got it sanded down to my liking I traced on the rim and cut it using my bandsaw. Since I traced the largest part of the rim, I cut just inside the lines. You might have to tweek the edges a tiny bit by sanding or trimming to make sure you get a perfect fit. Remember that it’s better to cut it too big and have to trim it down than to cut it too small and have to re make it.
Next I measured the center of my wood piece and traced on the battery box. I routered out a spot for it to sit in but since this is only the second time I’ve used a router, I practiced a few times first! You just want it deep enough so that the threaded rod that attaches the battery box to the hands will reach through.
Then I drilled a hole in the center of my routered box all the way through from the back to the front.
Then I stained and varathaned my pieces.
Be caeful if you are varathaning the bark. If there are thick globs of white varathane, they may not dry crystal clear. Just dab any really thick parts with a q tip or paper towel.
Now its time to assemble your piece. Your wood piece should fit snug in your rim. To secure it, I drilled 2 holes in either end and used ½” screws. I taped my drill bit to make sure I didn’t go to deep.
Then I attached a sawtooth hanger on the back and attached the clock parts which I ordered off amazon.
#woodclock #rusticwallclock #wallclock #liveedgewallclock #homedecor #bicycleclock #howtomakeaclock #clock #liveedgeclock #rusticclock #diywallclock #diyclock
Видео DIY Rustic Live Edge Clock канала Timber & Tea
Показать
Комментарии отсутствуют
Информация о видео
Другие видео канала
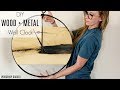 DIY Modern Industrial Wood + Metal Wall Clock
 Bicycle Wheel Clock with LEDs
 How to Make a Shelf Out of a Bicycle Rim!!
 Huge Rustic Industrial Clock - Forme Industrious
 Live Edge Console Table with Faux Steel Legs
 Wood Bowl (no lathe, no problem!)
 Building my Kitchen Island | 30
 Ring Bearers natural edge log box
 DIY WOOD CLOCK / Led Wand Uhr Tutorial Anleitung
 DIY: Domino Clock From Pallet Wood
 How to Make an Industrial Pipe Shelf
 DIY Handmade wall clock | Wall decor handcraft | Cardboard craft
 From stump to clock
 How to make Bicycle wheel Clock/ diy wheel clock /simple work/Time/ MRRK/ mrrk
 DOLLAR TREE DIY |FARMHOUSE FAUX WALL CLOCK |2018
 I Make a RIVER CLOCK
 How To Make A Clock From Pallet Wood Blocks
 Decorative Wood Box // First Box DIY Woodworking
 DIY Modern Live Edge Wall Clock // How To - Woodworking