DIY Adjustable Constant Load (Current & Power)
Special $2 for 10 PCBs(100*100mm): https://jlcpcb.com
Previous video: https://youtu.be/SIo_Gv7K7Fo
Constant Current Load video: https://youtu.be/8uBcywBUTkw
Cocktail Machine video: https://youtu.be/Z7GkGeZrb2Y
Motorized Camera Slider video: https://youtu.be/XtpOl8FpkB8
Facebook: https://www.facebook.com/greatscottlab
Twitter: https://twitter.com/GreatScottLab
Support me for more videos: https://www.patreon.com/GreatScott?ty=h
More project information (schematic, parts list, pictures,.....) on Instructables: https://www.instructables.com/id/DIY-Adjustable-Constant-Load-Current-Power/
Parts list (incomplete, see Instructables for more, affiliate links):
Aliexpress:
1x Arduino Nano: https://s.click.aliexpress.com/e/_dULoNXh
1x 16x2 I2C LCD: https://s.click.aliexpress.com/e/_dSjOzdW
1x Rotary Encoder: https://s.click.aliexpress.com/e/_dZs9jUb
1x TC4420 MOSFET Driver: https://s.click.aliexpress.com/e/_d9epnMB
1x IRFZ44N MOSFET: https://s.click.aliexpress.com/e/_dUJRtAg
1x ACS712 Current Sensor: https://s.click.aliexpress.com/e/_dSKBwNK
1x Fuse Holder: https://s.click.aliexpress.com/e/_dU3K3jS
1x 20A Fuse: https://s.click.aliexpress.com/e/_dTjqvC4
2x Binding Post: https://s.click.aliexpress.com/e/_d9ke5na
In this project I will show you how I combined an Arduino Nano, a current sensor, an LCD, a rotary encoder and a couple of other complementary components in order to create an adjustable constant load. It features a constant current and power mode and can handle a maximum of 30V and 20A if your heatsink design can handle it. Let's get started!
Thanks to JLCPCB for sponsoring this video
Visit https://jlcpcb.com to get professional PCBs for low prices
Music:
2011 Lookalike by Bartlebeats
Killing Time, Kevin MacLeod
(incompetech.com)
Видео DIY Adjustable Constant Load (Current & Power) канала GreatScott!
Показать
Комментарии отсутствуют
Информация о видео
Другие видео канала
 Build your own Variable Lab Bench Power Supply
 Homemade Digital Electronic Load | Multiple Modes
 Here is why MOSFET drivers are sometimes essential! || MOSFET Driver Part 1 (Driver, Bootstrapping)
 You can now PRINT PCBs! Creating a homemade PCB with the Voltera V-One PCB Printer!
 EEVblog #102 - DIY Constant Current Dummy Load for Power Supply and Battery Testing
 Essential Electronics Components that you will need for creating projects!
 Electronic Basics #28: IGBT and when to use them
 Quick and Powerful IGBT Electronic Load
 How to choose the right capacitor type for a circuit?! || Film vs. Ceramic vs. Electrolytic
 Li-Ion Capacity Test || DIY constant current load
 Function/Waveform Generator || DIY or Buy
 HOW TO MAKE A BENCH TOP POWER SUPPLY | MADE FROM A COMPUTER ATX POWER SUPPLY
 How to Solder properly || Through-hole (THT) & Surface-mount (SMD)
 MakerHawk Low cost Electronic Load
 Solar Battery Charger (LiPo/Li-Ion) || DIY or Buy
 Essential Tools that you will need for creating electronics projects!
 The most Dangerous, yet Cheapest Mains Power Supply?! || Building a Capacitive Dropper Circuit!
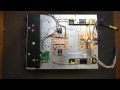 A 400W (1kW Peak) 100A Electronic Load Using Linear MOSFETs
 Electronic Basics #36: SPI and how to use it
 DIY Soldering Station