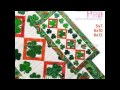
How to Add Borders To A Quilt
All Sweet Pea Links: https://linktr.ee/swpea.machineembroiderydesigns
Learn how to add borders to a quilt with this quick and easy tutorial by Sweet Pea
If you would like to shop this design click here"
https://swpea.com/products/floral-burst-block-and-quilt-4x4-5x5-6x6-7x7-8x8
If you would like borders, first of all decide how wide you would like them (we made ours 8cm (3”) wide).
Measure one end of the quilt.
Cut two strips of border fabric the length you just measured. Then cut two pieces of batting to match.
Next, we are going to secure the batting to the border fabric. This can be done in two ways. The first option is to place the border fabric right side up on top of the batting, and with a long basting stitch, sew ¼” from the edge. Basting the long edges together will prevent them from moving. (Use a bobbin thread that will stand out for this step). The second option is to lightly spray temporary adhesive to the batting and then lay your fabric right side up on the batting.
Place the quilt on top of the border fabric (with the attached batting), right sides together. Pin together.
Stitch together with a half inch seam. (Pinning and stitching on the wrong side of the runner means you can make sure you are stitching inside the borderline on the front of the runner. This will ensure this line of stitching will not show on the front).
If you used basting stitches on your borders, go ahead and remove them now. Trim back the batting from the seam allowance.
Fold over and iron the side border down neatly.
OPTIONAL: Topstitch the border for a neat flat finish.
Repeat for the opposite border.
If needed, trim the borders to make them even.
Now measure one of the side edges without a border (including the new border width in your measurement).
Cut two strips of border fabric the length you just measured. Then cut two pieces of batting to match. Repeat the basting stitch method or the use the temporary adhesive spray that we did for the first two borders.
Place the quilt on top of the border fabric (with the attached batting), right sides together. Pin and stitch a ½ inch seam from the edge.
If you used basting stitches on your borders, go ahead and remove them now. Trim back the batting from the seam allowance.
Fold over and iron the side border down neatly.
OPTIONAL: Topstitch the border for a neat flat finish.
Repeat for the opposite border.
If needed, trim the borders to make them even.
Full Instructions available with every purchase.
Видео How to Add Borders To A Quilt канала Sweet Pea Machine Embroidery Designs
Показать
Комментарии отсутствуют
Информация о видео
6 июля 2021 г. 4:35:05
00:03:25
Другие видео канала
 shamrock table runner made in the hoop machine embroidery
 Huge 30% Off Christmas in July Sale!
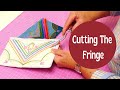 How to cut fringing 'in the hoop - Sweet Pea's Fringe Backpack
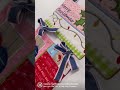 Spread joy and love, it's the Jolly season💗
 Road sign seatbelt wrap 6x10 and 7x12 in the hoop machine embroidery design
 North American Wildlife Runner
 How To Download Machine Embroidery Files? Swpea.com to USB - How to Start Machine Embroidery EP 2
 Here we come Puyallup! The NW Quilt, Craft & Sewing Festival!
 Cross Body Pack 2023 Sew Along Winners Second Month
 You should try these fun Sweet Pea Sew-Along's!
 Haunted Halloween Quilt Winners Video 2022 Sweet Pea Sew Along
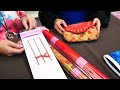 Droplet Clutch Bag Supply Kit
 Ethereal Grove Quilt - Mystery BOM Quilt Design
 How to Use Machine Embroidery Rulers?
 Sweet Pea Supplies Show Room - Christmas
 Felt flowers made in the hoop, machine embroidery design
 NOEL Wall Hanger 'Keeping It Simple Sew-Along' Winners!
 Massive Hardware Sale! Mylar-Scissors-Cork
 Craft Your Own Personalized Cushion with Our Reverse Applique Memories KISS Tutorial!
 Sweet Pea Goes UK :-)