Arduino IoT Cloud 2021 - Getting Started with Arduino & ESP32
Learn to use Arduino's and ESP32 with the updated Arduino IoT Cloud.
Article with code: https://dronebotworkshop.com/arduino-iot-cloud
More articles and tutorials: https://dronebotworkshop.com
Join the conversation on the forum: https://forum.dronebotworkshop.com
Subscribe to the newsletter and stay in touch: https://dronebotworkshop.com/subscribe/
Talk on the forum about this video: https://forum.dronebotworkshop.com/2021/arduino-iot-cloud-2021-getting-started-with-arduino-esp32/
The Internet of Things (IoT) can add a lot of convenience to our lives, with a myriad of connected devices available from hundreds of manufacturers. But it’s even more versatile when you can build your own IoT devices.
There are a few products that can assist you in creating your own IoT devices, like Blynk and IBM Node-Red. Today we will look at another one of these products, the Arduino IoT Cloud.
The Arduino IoT Cloud has actually been around for a couple of years now, but recently it was given a “facelift”. In addition, Arduino has updated its cloud plans, there are now four tiers including a free one.
One of the big improvements is that ESP32 and ESP8266 support is now included in the free plan!
Today we will see how to get started with the Arduino IoT Cloud. I’ll show you how to select a plan and set up your workstation with the Arduino Create agent. Then we will build a few cloud devices using an Arduino Nano 33 IoT board, and Arduino Nano RP2040 Connect board and an ESP32 WROVER module.
Here is what we are covering today:
00:00 - Introduction
02:18 - The Arduino IoT Cloud
06:09 - Selecting a Cloud Plan
09:41 - Installing the Arduino Create Agent
11:21 - Building your first Thing & Dashboard
25:25 - Adding a DHT22 to your Thing
32:36 - Two Things with no Dashboard
41:25 - Using an ESP32
49:47 - Conclusion
I also will show you a few “bugs” in the current implementation of the Arduino IoT Cloud, as the product is constantly being updated some of these may be resolved by the time you view this video.
And although I subscribe to the “Maker” plan, the experiments we are doing today can all be done with the free plan. So it won’t cost you anything to get started.
Видео Arduino IoT Cloud 2021 - Getting Started with Arduino & ESP32 канала DroneBot Workshop
Показать
Комментарии отсутствуют
Информация о видео
Другие видео канала
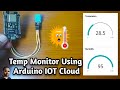 Temperature and Humidity Monitor using Arduino IOT Cloud and ESP8266
 Introduction to ESP32 - Getting Started
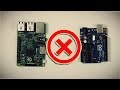 What's the difference? Arduino vs Raspberry Pi
 Arduino IoT Cloud ESP8266 NodeMCU Alexa Home Automation system | Internet of Things projects 2021
 ESP8266 + Arduino + database - Control Anything from Anywhere
 Top 10 IoT(Internet Of Things) Projects Of All Time | 2021
 GPS Modules with Arduino and Raspberry Pi
 Using Arduino IoT Cloud with ESP32 | Is it better than New Blynk 🤔
 Cheap Wi-Fi IP Surveillance Camera (Very little DIY needed)
 Getting Started with LIDAR
 000 - ESP32 MicroPython: How to Get Started with MicroPython
 Arduino Tutorial 1: Setting Up and Programming the Arduino for Absolute Beginners
 You can learn Arduino in 15 minutes.
 Power For Your Electronics Projects - Voltage Regulators and Converters
 How to add WiFi Control to any project || ESP32 Beginner's Guide
 IOT avec ESP 8266-01
 Control AC Devices with Arduino SAFELY - Relays & Solid State Switches
 Using Arduino IoT Cloud with ESP8266 || Setup & Complete Guide
 Arduino IDE 2.0 - Testing Release Candidate 3
 ESP32 CAM - 10 Dollar Camera for IoT Projects