Canvas Tent Reconditioning
In this video, we will look at all the steps necessary to fully recondition a canvas tent. We will remove stains in the tent, wash it, patch holes and tears in the canvas, re-waterproof replace a grommet, set it up and for the grand finale we will fold the tent in less than two minutes.
In preparing for this project, I called two tent manufactures to gather information and watched countless YouTube videos. After hours of research, I decided to make this video so all the information would be in one place and other people would not have to do the extensive research I did to gather simple information.
When I first started this project I thought, "It'll be a quick task: wash, patch and waterproof. A simple afternoon project". We spent an hour a day, over the course of several days, to complete this project. Some of the delays were necessary: to let the tent dry after washing, to let the adhesive on the patches dry and to let the waterproofing chemical dry/gas off. Some of the delays were also a lack of information: does the glue really work, does the waterproofing agent work and we decided to soak the tent overnight. Additionally, because the lack of available information and my lack of confidence in the limited information, we set the tent up between each step and inspected the progress. I hope that I can save you some research time and project time so you can spend more time out adventuring.
For this project we used a product named Tear Mender to patch the canvas and a product named Canvak to waterproof and fire retard the canvas.
Видео Canvas Tent Reconditioning канала Raised in Alaska
Показать
Комментарии отсутствуют
Информация о видео
Другие видео канала
 How to Waterproof Canvas
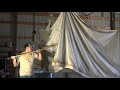 Care & Maintenance of Your Wall Tent
 Canvas Tent Maintenance | Routine Cleaning | CanvasCamp
 Kodiak Canvas Cabin Tent Elk Camp
 How To Wax Canvas/ Tutorial
 Waterproofing your Boat canvas and tent canvas
 The Last Wall Tent You'll Ever Buy | ADVISOR INSIGHTS: White Duck Alpha Wall Tent
 CANVAS WALL TENT CLEANING AND SETUP | WITH NO HELPING HANDS
 2022 Bronco Inspection
 Easy and Affordable Way To Waterproof A Canvas Tarp
 Treating a Canvas Tent with Mould & Mildew | Glawning: the glam awning
 Canvas Tent Pros and Cons
 Homestead Swag - Single & Twin
 Iron Dog 2022: Patriotic Start
 How to Patch Holes in Canvas
 Lindseed Oil Canvas Tarp
 How to make Extremely Affordable Waterproofing - DIY Step by Step Instructions-Leather, Canvas, Etc.
 Wow Best ever Bubble wrap double dipper on Round canvas and a spare 🤩
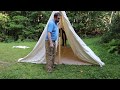 Wall Tent Setup
 Recycled Bedsheets Make The Best Waterproof Tarps