Ep. 19 | Procreate Layers Pt.2 Alpha Lock, Masks, Clipping Masks & Reference |Procreate Basic Series
Layers pt.2 -
Intro 00:00
1. Alpha Lock 00:40
2. Masks 02:17
3. Copy & pasting masks 04:30
4. Clipping Masks 06:25
5. Reference Layer 07:39
OK, for the part two of the layers tutorial, launch procreate,
and I have a project ready for us to discuss and learn how to use layers.
Now you can see here I have a sketch ready alreadyand the sketch is right here.
So now I want to begin coloring this portrait.
So the first thing that I want to do is to paint the fingers,
just the fingers with this one color.
And once I'm done, I have something like this.
So now I can quickly move on to coloring this hand here.
But if I paint on this hand now,
I'll keep going out of the boundaries and paint outside of the hand
and then later on, I have to erase them
and waste a lot of time just cleaning up.
So what do I do?I actually turn on the alpha mode for the hand,
so I'm going to tap on the hand and turn on alpha lock.
Alternatively, you can just swipe down 3 fingers and turn on Alpha Lock here.
So if your alpha lock is turned on, it will actually tell you here.
If there's a check sign here, it means that your alpha lock has turned on.
Another way to turn on the alpha lock is to swipe 2 fingers right.
And now you can see that the check icon is already heresaying that alpha lock has already been turned onSo once your alpha lock has turned on,
when you paint, you won't go out of the boundaries anymore
and you can just paint within the hand itself.
So this way you can quickly work within one confined area of your painting
and you will keep your edges neat as you work.
So once I'm done, I will have something like this.
And the painting is still confined within this areaand I can quickly build up the painting itself by dropping in more colors
and locking the alpha mode for each layerwhile I work on the painting itself
so that I can quickly build up my painting this way.
So now the hair has been done already.
But I need to hide them away from the hand.
So how do I do that?
I'm just going to tap on the hair that is hiding the hand
I tap on it and I create something that is called a mask.
So once you tap on that, the layer mask will be created for you and it's in white.
Now you see that no matter what color you choose,
there will be no colors visible in your color picker anymore.
And there will only be gray tones no matter what colors you pick.
So you have to work with your greyscale in this mode.So let's just drag it out and I'm going to just get black.
Using the black, I can paint on this layer mask.
Let's make sure that the layer mask is selected and not the hair.If you tap on the hair layer, you'll be painting on the hair layer itself
and you have like color information and everything.
But we want to work in the layer mask.
So tap on the layer mask, make sure black is selected
and you can see that I'm actually erasing away the layer.
So this means that, white means show,black means hide.
It's simple really.And I can even paint the whole thing black first.
I don't really worry about the edges at all.
And then after, that I'll go back in with my white to clean up.
But I don't lose any information
because I'm working on a separate layer called the mask layer.
Everything is still there in the hair layer.
I'm just deciding like what shows and what doesn't show.
So once I finish cleaning up, I will have something that is very clean like this
and I'll be able to turn off and on the layer mask
to still see and have everything I still want in my hair layer.
Now look what happens if we use other colors
since we can't use any color at all, we have to work with grey tones.
We know that white means show, black means hide.
But what about grey?
If I tap on grey and I paint, it actually creates a transparent layer.So the brighter we go, the more it's going to show.
And white means it's going to show completely.
The darker we go, it's going to show a little bit only.
It's going to get more and more and more and more transparent and to the point where you get to black,
everything is just gone.
So this is the basic of how to use mask in Procreate.
And now I'm going to show you this situation.
So right here, I have this pink layer here set to screen
and then I have a layer mask on top that decides only this triangle here is not showing the pink layer.
And now I have a purple layer on top
💖Subscribe to my channel - http://bit.ly/23aJY9z
🖌️ OFFICIAL BRUSHES & ART STORES
⚔️ elsewhere is pirated ⚔️
WEBSITE - purchase my art & brushes via http://hazelong.com
GUMROAD - https://gumroad.com/hazelong
SPRING - https://haze-longs-store.creator-spring.com
BUY ME A COFFEE - https://www.buymeacoffee.com/hazelong
#procreatewithhaze
Have fun!
~Haze
❤️❤️OTHER PLACES YOU CAN FIND MY FACE & ART❤️❤️
YOUTUBE - http://bit.ly/23aJY9z
FACEBOOK - http://facebook.com/HazeLongFineArt
INSTAGRAM - http://instagram.com/hazelong
SPEED PAINTING - http://hazelongspeedpainter.com
NFTs, Others - https://linkpop.com/hazelong
Видео Ep. 19 | Procreate Layers Pt.2 Alpha Lock, Masks, Clipping Masks & Reference |Procreate Basic Series канала Haze Long
Показать
Комментарии отсутствуют
Информация о видео
Другие видео канала
 Painting murals with Haze Long
 Craft the shape first. Worry about colors later
 Happyvalentines💘 #shorts #valentines #speedpainting #painting #valentinesday #creative #inspiration
 Highlights from #YTFESTMY presented an award to @carsome_malaysia with @BandenTCY
 Guided Class by Haze Long is now available! ANNOUNCEMENT
 Horse or Frog Illusion Speed Painting Performance by Haze Long
 Ep. 22 | Procreate Layers Pt. 5 | 5 Layers setup for Portrait | Procreate Basic Series by Haze Long
 Brush Lettering on the wall!! Typography Mural by Haze Long
 It’s day 2!! Color with me #procreatewithhaze
 This app is just ridiculous!! Watch the full review of this app in my channel! #rebelle7
 I finally finish this coloring page in #procreate 🏆 #procreatewithhaze
 Oil Rig Sunset Speed Painting by Haze Long
 🌟 Mastering Light: 10 Pro Techniques for Luminous Portraits in Procreate 🎨✨
 Random Color Palette Portrait Challenge : Procreate Madness by Haze Long
 Ep. 5 | Procreate Gestures | Procreate Basic Series by Haze Long
 R2d2 oil painting time lapse by Haze Long
 Haze Long X Rohnie Tan Speed Painting Performance w/ Violin Cover of Rather Be by Clean Bandits
 "Glow in the dark" UV Speed Painting Performance by Haze Long
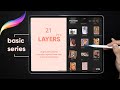 Ep. 21 | Procreate Layers Pt. 4 What if you do not have enough layers | Procreate Basic Series
 Be good my colors. Be kind my textures. Be courageous my lines. #procreate #procreatewithhaze