The Perfect Shabby Rag Bow Tutorial
In this video, I share 2 techniques for making shabby rag bows. We will start with the tails first, before making the looped bow portion. For the cream bow, I used ivory colored cotton muslin, and drop cloth fabric. Both were 100% cotton, and cut into 19" long by 8" wide sections. The sections were then snipped and ripped to form rags for the tails of the bow. I also used 5, 19" long pieces of lace to create the tails. You will need to set aside 2 of the rag tail pieces to tie off each part of the bow, and also cut 2 more 19" pieces of lace to add to the looped portion of the bow. For the looped portion of the bow, I used approximately 2-1/4 yards of wired ribbon. I also used hot glue, a glue gun, and a button to accent the center of the bow. I used the same procedure for the checked bow, but cut my fabric sections one inch longer. I would love to hear how you plan on using your shabby bows in your decor! I hope you enjoy the video and take a moment to subscribe to my channel. Thank you for watching!
Bow makers can be purchased on Amazon, if you don't have scrap wood in your garage and a Mr. Shabby to put it together!
Link to Book Page Wreath Tutorial:
https://youtu.be/IH42siYufIE
Kinda Shabby is also on Facebook!
#kindashabby #bowtutorial #crafts #shabbychicdecor
Видео The Perfect Shabby Rag Bow Tutorial канала Kinda Shabby
Показать
Комментарии отсутствуют
Информация о видео
Другие видео канала
 4 Shabby Farmhouse Thrift Store Makeovers | Brass Candlestick | Shutter | Lampshade | Cabinet Door
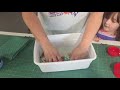 How to Starch fabric.
 Trash to Treasure | Thrift Store Makeover | Painted Silver Serving Pieces
 Fun with Decoupage / Using Crackle Glaze / Applying Decals / Iron Orchid Designs Stamps
 Summer Patio Makeover | Re-cover Chair Seats | Paint Furniture | Sew Pillow Covers | Add Plants
 Coffee Filter Flowers "DIY"
 Dollar Tree Ribbon Bow Tutorial DIY | Bestie Bow | BEAUTIFUL & EASY BOW!! 🎀
 5 Easy To Make Embellishments | Burlap Flowers | Book Page Roses | Shabby Tassel | Messy Bow
 How to Make an Easy Rag Bow
 How to: Faux Cement Tile | 3 DIY Projects | Fireplace Makeover | Farmhouse Decor | IOD Cubano Stamp
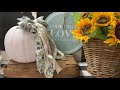 5 EASY & SIMPLE WAYS TO MAKE FRENCH COUNTRY SHABBY CHIC FARMHOUSE BOWS! DIY RAG MESSY BOW! (186)
 EZ Bow Maker Bow Tutorial
 Rag Wreaths DIY
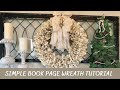 Simple Book Page Wreath Tutorial
 Easy Projects Using Your Printer | Shabby Chic Bookstack | Print on Fabric | Avery Iron On Transfer
 Designer Wreath Look for Less using a Christmas Tree | High End Look on a Budget | Easy Door Decor
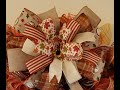 How to make a Terri bow on a bowdabra/Terri bow tutorial/bowdabra tutorial/How to make a bow
 Shabby Chic Craft Room Projects \ Memo Board DIY \ Easy Lace Organization \ Ribbon Storage Boards
 5 HOME DECOR DIY PROJECTS! CHIC FRENCH COUNTRY FARMHOUSE DECOR FOR YOUR HOME
 Shabby Chic Picture Frame Makeovers | Shabby Flower Tutorials | Message Board DIY