- Популярные видео
- Авто
- Видео-блоги
- ДТП, аварии
- Для маленьких
- Еда, напитки
- Животные
- Закон и право
- Знаменитости
- Игры
- Искусство
- Комедии
- Красота, мода
- Кулинария, рецепты
- Люди
- Мото
- Музыка
- Мультфильмы
- Наука, технологии
- Новости
- Образование
- Политика
- Праздники
- Приколы
- Природа
- Происшествия
- Путешествия
- Развлечения
- Ржач
- Семья
- Сериалы
- Спорт
- Стиль жизни
- ТВ передачи
- Танцы
- Технологии
- Товары
- Ужасы
- Фильмы
- Шоу-бизнес
- Юмор
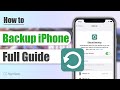
Import Music to iPhone With iTunes or Not —100% Work, Add Your Own Music to iPhone from Any Computer
To import music to iPhone without iTunes overwriting, this AppGeeker iPhone Data Transfer offers a reliable and efficient way — it allows seamless music transfer to iPhone with simple drag-n-drop, no data erasing.
Import music to iPhone without data loss: https://www.appgeeker.com/iphone-data-transfer.html
#applemusic #iphonemusic #itunes
Timestamp:
00:00 Intro
00:25 Import music to iPhone with iTunes
02:33 Drag and drop music to iPhone via iPhone Data Transfer
Way 1. Use iTunes — via Sync Music
When using Apple’s official tool – iTunes, to import music to an iPhone, you’ll first add your music files or folders to the iTunes Library. From the top-left menu, select File and choose Add File to Library or Add Folder to Library.
Next, connect your iPhone to your computer using a USB cable. When prompted, tap Trust on your device and enter your passcode. Once the device icon appears in iTunes, click it and open the Music tab in the left sidebar.
Then, enable Sync Music, and choose whether you want to sync your entire library or only selected playlists, albums, artists, or genres. Finally, click Apply or Sync at the bottom. The selected music will be transferred to your iPhone and appear in your Music app.
However, keep in mind that syncing music with iTunes will overwrite all existing music on your iPhone. After the sync, only the newly imported tracks will remain.
Way 2. Use Appgeeker iPhone Data Transfer — via Drag-n-drop
If you want to import music without losing what’s already on your device, AppGeeker iPhone Data Transfer is a safer, more flexible solution.
Compatible with both Windows and macOS, AppGeeker iPhone Data Transfer lets you drag and drop music files directly onto your iPhone – no data erasure, no library overwriting.
Simply connect your iPhone, open the software, and go to the Music tab. Browse and select the songs you want from your computer, then drag and drop them into the transfer window.
Your selected tracks will be added to your iPhone’s Music app and appear in Library instantly, while everything already on your device remains untouched.
If you’re interested, simply check: https://www.appgeeker.com/iphone-data-transfer.html
For more info, please follow:
AppGeeker Official: http://www.appgeeker.com
YouTube Channel: https://www.youtube.com/c/Appgeeker
Facebook: https://www.facebook.com/Appgeeker-103587901958477/
Twitter: https://twitter.com/appgeeker
Vimeo: https://vimeo.com/appgeeker
Видео Import Music to iPhone With iTunes or Not —100% Work, Add Your Own Music to iPhone from Any Computer канала HigoSpot
how to import music to iphone import music to iphone with itunes add music to iphone with itunes import music to iphone without itunes apple music itunes iphone music transfer import music from itunes to iphone import music from computer to iphone import songs to iphone music add songs to apple music on iphone import songs to iphone with itunes add songs to iphone without itunes iphone music ios add music to iphone transfer music to iphone
Комментарии отсутствуют
Информация о видео
25 ноября 2025 г. 7:31:26
00:05:16
Другие видео канала
![[Latest] How to Remove iPhone Passcode without iTunes](https://i.ytimg.com/vi/-ibMZEjDRbM/default.jpg)

![How to Screen Record Windows 10 with Audio| Best Screen Recorder on Windows 10 [Easy Steps]](https://i.ytimg.com/vi/jDlvs18kO0w/default.jpg)