How to use LOCTITE HY 4070 for car smart repairs?
See how to use LOCTITE HY 4070 for automotive smart repairs, if you are interested in more, explore our Collision Repair portfolio here: https://www.henkel-adhesives.com/ae/en/spotlights/all-spotlights/new-developments/made-for-professionals.html?utm_source=youtube&utm_medium=organic-social&utm_campaign=collision_repair
0:00 Intro
0:10 Preparing the surface
Bonding surfaces have to be cleaned from oil, grease, dust and any other contaminations. Clean the bonding surfaces with cleaner TEROSON® VR 10 using a lint-free cloth. In case of cleaning, it's important to move the cloth always into the same direction to avoid spreading the dirt back to the surface.
0:42 Preparing the cartridge and adhesive
Insert the plunger into the LOCTITE® HY 4070 and press gently on the plunger to “bump” the cartridge of LOCTITE® HY 4070. Attach the nozzle onto LOCTITE® HY 4070
noting the alignment notch, then Dispense 5 cm (2 in) of adhesive (approx. a nozzle length) onto a lint-free cloth / aluminium dish. This ensures that the two components are mixed together well, before you apply the adhesive onto your application.
TIP: Always use protective gear (gloves, a mask).
TIP 2: After using LOCTITE HY 4070, leave the mixer on for storage and replace with a new one before the next usage. This ensures that the product doesn't cure in the tip of the main package.
LinkedIn: https://www.linkedin.com/showcase/henkel-adhesives/
Website: https://www.henkel-adhesives.com/ae/en/industries/automotive.html
#Automotive #AutomotiveAftermarket #LOCTITE #TEROSON #Henkel
Видео How to use LOCTITE HY 4070 for car smart repairs? канала LOCTITE & TEROSON Europe
Показать
Комментарии отсутствуют
Информация о видео
Другие видео канала
 LOCTITE Storie di Successo - Berg Propulsion
 Henkel Adhesives eshop pre partnerov
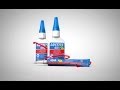 Adesivo istantaneo LOCTITE
 Journée technique sur les équipements LOCTITE chez ADTP
 BRABUS x TEROSON MS 9320 - Herstelling van wielkasten en underbodies van Young Timers
 LOCTITE Pulse Smart Steam Trap - Easy Installation and Monitoring overview
 LOCTITE Storie di Successo - Herrenknecht
 Predictive maintenance with LOCTITE Pulse customer Shell
 Teroson Bond 60 True Primerless - Αντικατάσταση Παρμπρίζ
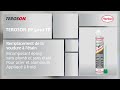 Réparation de panneau latéral avec TEROSON EP 5010 TR
 TEROSON - La gara è iniziata!
 Maintenance et Réparation (MRO)
 Webinar TEROSON - Riparazione plastiche per i professionisti: come riparare un paraurti danneggiato
 Comment reconstruire les joints d’origine brossés avec TEROSON MS 9320 SF ?
 Application Video LOCTITE 5188
 Application Video LOCTITE 2400
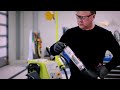 Výmena zadného panela TEROSON EP 5055
 LOCTITE 402™, ultraskuteczny klej błyskawiczny - Śruby vs. Klejenie
 NOUVEAU LOCTITE 402 ! Pour un collage instantané à hautes températures
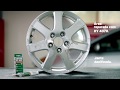 Reparação de uma jante de liga com o Adesivo Universal LOCTITE HY 4070.
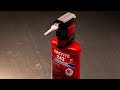 The NEW LOCTITE® PRO PUMP Hand Held Dispenser