- Популярные видео
- Авто
- Видео-блоги
- ДТП, аварии
- Для маленьких
- Еда, напитки
- Животные
- Закон и право
- Знаменитости
- Игры
- Искусство
- Комедии
- Красота, мода
- Кулинария, рецепты
- Люди
- Мото
- Музыка
- Мультфильмы
- Наука, технологии
- Новости
- Образование
- Политика
- Праздники
- Приколы
- Природа
- Происшествия
- Путешествия
- Развлечения
- Ржач
- Семья
- Сериалы
- Спорт
- Стиль жизни
- ТВ передачи
- Танцы
- Технологии
- Товары
- Ужасы
- Фильмы
- Шоу-бизнес
- Юмор
Control Raspberry Pi Pico W from ANYWHERE (No Coding Required!) | Complete IoT Tutorial
# Control Raspberry Pi Pico W Remotely (No Coding Required!)
**🔗 FREE Platform: https://www.oceanremote.net**
## 🚀 What makes this different?
✅ **NO CODING REQUIRED** - Generate ready-to-use code in seconds
✅ Control your Pico W from ANYWHERE (phone, laptop, tablet)
✅ No port forwarding, no static IP, no cloud subscription
✅ Control 5 relays + monitor DHT22/DS18B20/NTC sensors
✅ Works with Arduino IDE or MicroPython (your choice!)
## ⏱️ 15-Minute Setup:
0:00 - Demo: Controlling Pico W from 1000 miles away
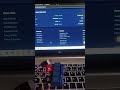
1:30 - Create free OceanRemote account
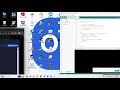
3:00 - Configure your Pico W (relays, sensors, WiFi)
5:00 - Generate firmware code (ZERO coding!)
7:00 - Install Arduino IDE + Pico W board support
9:00 - Flash firmware to Pico W (drag & drop UF2 file)
11:00 - Wiring: Connect relays & sensors
13:00 - Test remote control from your phone!
15:00 - Bonus: Real-time temperature monitoring
## 📦 What You Need:
- Raspberry Pi Pico W ($6-8)
- USB-C cable (data capable)
- Relay module (1-5 channels, optional)
- DHT22/DS18B20/NTC sensor (optional)
- Free OceanRemote account
## 🔥 Why Pico W?
✅ Cheaper than ESP32 ($6 vs $10+)
✅ More GPIO pins (26 vs 17 on ESP8266)
✅ 5V tolerant inputs
✅ Official Raspberry Pi quality
✅ Dual-core Cortex-M0+ processor
✅ 264KB RAM + 2MB flash
## 💡 What People Are Building with Pico W:
- "Smart garden irrigation controller" - Remote watering
- "Garage door monitor" - Check if door is open
- "Aquarium temperature alert" - Get notified if temp drops
- "Home lighting control" - 5 relays = 5 lights
- "Greenhouse climate monitor" - Temp + humidity logging
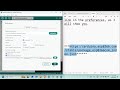
## 🔗 Get Started (No Coding):
👉 https://www.oceanremote.net/pico-w
## ❓ How Does "No Coding" Work?
1. Select "Raspberry Pi Pico W" on OceanRemote
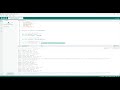
2. Click your relay names & sensor type
3. Click "Generate Code" → Complete Arduino code appears
4. Copy → Paste into Arduino IDE → Upload to Pico W
5. That's it. No C++ knowledge needed.
## 🔧 Wiring Guide (Quick Reference):
**Relays (5V logic):**
- Relay 1 → GP1
- Relay 2 → GP2
- Relay 3 → GP3
- Relay 4 → GP4
- Relay 5 → GP5
**Sensors:**
- DHT22 → GP6 + 10k pull-up
- DS18B20 → GP7 + 4.7k pull-up
- NTC Thermistor → GP26 (ADC0) + voltage divider
## ⚠️ Pico W vs Pico (Important!)
- ✅ **Pico W** = HAS WiFi (use this!)
- ❌ **Pico** = NO WiFi (doesn't work with OceanRemote)
- Make sure you have the **Pico W** version
## 🆘 Common Pico W Issues:
❌ "Board not found" → Put Pico W in BOOTSEL mode (hold button while connecting USB)
❌ "Upload failed" → Release BOOTSEL after drive appears
❌ "WiFi not connecting" → Check 2.4GHz network (Pico W doesn't support 5GHz)
❌ "No sensor data" → Check pull-up resistors (required!)
## 📚 More Pico W Tutorials:
- How to wire 5 relays to Pico W
- DHT22 temperature + humidity logging
- DS18B20 waterproof sensor for aquariums
- NTC thermistor for high-temp monitoring
## 🔗 Social & Support:
- Platform: https://www.oceanremote.net
- Twitter: https://x.com/ORemote1480
- GitHub: https://github.com/supportOceanremote
- Email: support@oceanremote.net
## 📊 Pico W Specs vs Competitors:
| Feature | Pico W | ESP8266 | ESP32 |
|---------|--------|---------|-------|
| Price | $6 | $5 | $10 |
| GPIO | 26 | 11 | 19 |
| RAM | 264KB | 80KB | 520KB |
| WiFi | ✅ | ✅ | ✅ |
| Bluetooth | ❌ | ❌ | ✅ |
| 5V tolerant | ✅ | ❌ | ❌ |
#RaspberryPiPicoW #PicoW #IoT #NoCoding #HomeAutomation #RaspberryPi #PicoWTutorial #BeginnerIoT #OceanRemote #PicoWProjects
---
👍 **LIKE** if you're building something with Pico W
🔔 **SUBSCRIBE** for weekly IoT tutorials
💬 **COMMENT**: What sensor will YOU connect to your Pico W?
Видео Control Raspberry Pi Pico W from ANYWHERE (No Coding Required!) | Complete IoT Tutorial канала OceanRemote
**🔗 FREE Platform: https://www.oceanremote.net**
## 🚀 What makes this different?
✅ **NO CODING REQUIRED** - Generate ready-to-use code in seconds
✅ Control your Pico W from ANYWHERE (phone, laptop, tablet)
✅ No port forwarding, no static IP, no cloud subscription
✅ Control 5 relays + monitor DHT22/DS18B20/NTC sensors
✅ Works with Arduino IDE or MicroPython (your choice!)
## ⏱️ 15-Minute Setup:
0:00 - Demo: Controlling Pico W from 1000 miles away
1:30 - Create free OceanRemote account
3:00 - Configure your Pico W (relays, sensors, WiFi)
5:00 - Generate firmware code (ZERO coding!)
7:00 - Install Arduino IDE + Pico W board support
9:00 - Flash firmware to Pico W (drag & drop UF2 file)
11:00 - Wiring: Connect relays & sensors
13:00 - Test remote control from your phone!
15:00 - Bonus: Real-time temperature monitoring
## 📦 What You Need:
- Raspberry Pi Pico W ($6-8)
- USB-C cable (data capable)
- Relay module (1-5 channels, optional)
- DHT22/DS18B20/NTC sensor (optional)
- Free OceanRemote account
## 🔥 Why Pico W?
✅ Cheaper than ESP32 ($6 vs $10+)
✅ More GPIO pins (26 vs 17 on ESP8266)
✅ 5V tolerant inputs
✅ Official Raspberry Pi quality
✅ Dual-core Cortex-M0+ processor
✅ 264KB RAM + 2MB flash
## 💡 What People Are Building with Pico W:
- "Smart garden irrigation controller" - Remote watering
- "Garage door monitor" - Check if door is open
- "Aquarium temperature alert" - Get notified if temp drops
- "Home lighting control" - 5 relays = 5 lights
- "Greenhouse climate monitor" - Temp + humidity logging
## 🔗 Get Started (No Coding):
👉 https://www.oceanremote.net/pico-w
## ❓ How Does "No Coding" Work?
1. Select "Raspberry Pi Pico W" on OceanRemote
2. Click your relay names & sensor type
3. Click "Generate Code" → Complete Arduino code appears
4. Copy → Paste into Arduino IDE → Upload to Pico W
5. That's it. No C++ knowledge needed.
## 🔧 Wiring Guide (Quick Reference):
**Relays (5V logic):**
- Relay 1 → GP1
- Relay 2 → GP2
- Relay 3 → GP3
- Relay 4 → GP4
- Relay 5 → GP5
**Sensors:**
- DHT22 → GP6 + 10k pull-up
- DS18B20 → GP7 + 4.7k pull-up
- NTC Thermistor → GP26 (ADC0) + voltage divider
## ⚠️ Pico W vs Pico (Important!)
- ✅ **Pico W** = HAS WiFi (use this!)
- ❌ **Pico** = NO WiFi (doesn't work with OceanRemote)
- Make sure you have the **Pico W** version
## 🆘 Common Pico W Issues:
❌ "Board not found" → Put Pico W in BOOTSEL mode (hold button while connecting USB)
❌ "Upload failed" → Release BOOTSEL after drive appears
❌ "WiFi not connecting" → Check 2.4GHz network (Pico W doesn't support 5GHz)
❌ "No sensor data" → Check pull-up resistors (required!)
## 📚 More Pico W Tutorials:
- How to wire 5 relays to Pico W
- DHT22 temperature + humidity logging
- DS18B20 waterproof sensor for aquariums
- NTC thermistor for high-temp monitoring
## 🔗 Social & Support:
- Platform: https://www.oceanremote.net
- Twitter: https://x.com/ORemote1480
- GitHub: https://github.com/supportOceanremote
- Email: support@oceanremote.net
## 📊 Pico W Specs vs Competitors:
| Feature | Pico W | ESP8266 | ESP32 |
|---------|--------|---------|-------|
| Price | $6 | $5 | $10 |
| GPIO | 26 | 11 | 19 |
| RAM | 264KB | 80KB | 520KB |
| WiFi | ✅ | ✅ | ✅ |
| Bluetooth | ❌ | ❌ | ✅ |
| 5V tolerant | ✅ | ❌ | ❌ |
#RaspberryPiPicoW #PicoW #IoT #NoCoding #HomeAutomation #RaspberryPi #PicoWTutorial #BeginnerIoT #OceanRemote #PicoWProjects
---
👍 **LIKE** if you're building something with Pico W
🔔 **SUBSCRIBE** for weekly IoT tutorials
💬 **COMMENT**: What sensor will YOU connect to your Pico W?
Видео Control Raspberry Pi Pico W from ANYWHERE (No Coding Required!) | Complete IoT Tutorial канала OceanRemote
Комментарии отсутствуют
Информация о видео
11 апреля 2026 г. 4:44:29
00:02:04
Другие видео канала