Drop-down lists in Word: Insert, modify, use a format to style contents
Drop-down lists in Word: How to insert a drop-down list box, modify a drop-down list's items and use a format to style its contents to match surrounding text or make them stand out.
You are probably familiar with drop-down lists from the web. A drop-down list restricts users to a number of predefined options that they can choose from; using a drop-down box and you can use a drop-down list box in your word documents.
It’s a great way to create a questionnaire in Word if you would like to conduct a survey or in any other setting that you would like to restrict and control input options.
In this video we will go over how you can create and insert a drop-down list box and then modify it to match the style of the rest of your document or the style of its surrounding text. We are using Word 2010, but the same process applies for other versions of Microsoft Word.
First, we need to make visible the Developer Tab in our ribbon and we can do that from the File Menu, Options, Customize Ribbon and checking the developer tab from the Main Tabs list.
Now that we can see the developer tab, from the Controls section click on Drop-Down List Content Control in order to insert a drop-down list box. In order to define the items in our list we need to click on Properties from the Controls Section.
The title of our drop-down list content control is the text that will appear right above our drop-down box on the right of our drop-down list.
Now we can create our list by adding each item to our list. Click on Add and add each item of our list using a value and display name. Once all items have been added to our drop-down list is ready.
In order to modify an item in our drop-down list in Word, select the list item and click on Modify and you can change its value from the pop-up box. You can also delete a list item by selecting it and clicking remove and you can change the order of the items in our list by selecting a list item and clicking “Move up” or “Move-down”.
It is quite easy to insert and modify a drop-down list in Word and especially Word 2010.
Now let’s see how we can use a style to format our drop-down list’s contents to either make them match the font size and color of the surrounding text or make our drop-down list’s items and our user’s selection from the list stand out.
Once again, from the “Controls” Section click on Properties and from “Content Control Properties” dialog box check “Use a style to format contents”. You can use a predefined style to format the contents of your drop-down list or create a new one by clicking on “New Style”. From there you can set the font, font size, make text bold, underline text and format the list items that you would like to use for your drop-down list.
By clicking on the “Format” button at the bottom and selecting font you will have even more options to use in your new style to format the contents of your drop-down list by selecting a font, font size and even font color, as well as underline, bold, strikethrough, use small caps. All the other text-formatting options that you normally have are now available to set a style to format the contents of your drop-down list.
That was it. In this video we went over drop-down lists in Word 2010 and how you can insert a drop-down list box, modify a drop-down list's items and use a format to style a drop-down list’s contents in Word to match the surrounding text or make your drop-down list’s items stand out.
If you have any questions, let me know in the comments.
This video applies to Word 2007, Word 2010, Word 2013 and Word 2016.
Видео Drop-down lists in Word: Insert, modify, use a format to style contents канала WinOffice
Показать
Комментарии отсутствуют
Информация о видео
Другие видео канала
 How To Link Text or Images To A Drop-Down List Selection in MS Word - Create Fillable Forms
 How to insert date fields and dropdown lists in Word documents. Date pickers and dropdown lists
 How to make Fillable Form in Microsoft Word
 Create Multiple Dependent Drop-Down Lists in Excel (on Every Row)
 Creating a Form in Word - Adding Content Controls in a Microsoft Word Form
 Create Dependent Drop-Down List in Word - Fillable Forms Microsoft Word
 How to Create Excel Drop Down List
 Word Advanced Tutorial
 Create Multiple Level Dependent Drop-Down Lists in Word - Fillable Forms with 3 Cascading Levels
 🔎 How to Create Searchable Drop Down List in Excel
 Make Fillable Forms in MS Word - Content Control Form Fields Part 2
 How to Create a Template in Word: Creating Templates in Word
 How to Add a Drop-Down List to a Word Document
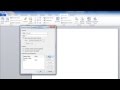 How to Create a Drop Down List in Word
 How To Auto Populate Text From A Drop-Down List Selection in MS Excel - Create Fillable Forms
 How to Change Drop Down Width and Font Size in Excel
 How To Create Multiple Dependent Drop Down Lists In Excel
 Create Fillable Forms in Word | Digital and Printable Forms
 Microsoft Word Tutorial - Beginners Level 1
 How to Add a Drop-Down List in Word | Create a Drop-Down Box | Insert a Drop-Down Menu (UPDATED)