- Популярные видео
- Авто
- Видео-блоги
- ДТП, аварии
- Для маленьких
- Еда, напитки
- Животные
- Закон и право
- Знаменитости
- Игры
- Искусство
- Комедии
- Красота, мода
- Кулинария, рецепты
- Люди
- Мото
- Музыка
- Мультфильмы
- Наука, технологии
- Новости
- Образование
- Политика
- Праздники
- Приколы
- Природа
- Происшествия
- Путешествия
- Развлечения
- Ржач
- Семья
- Сериалы
- Спорт
- Стиль жизни
- ТВ передачи
- Танцы
- Технологии
- Товары
- Ужасы
- Фильмы
- Шоу-бизнес
- Юмор
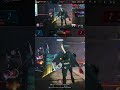
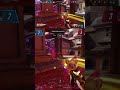
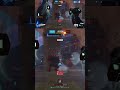
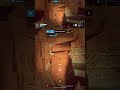
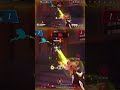
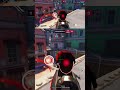
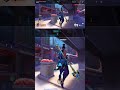
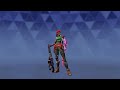
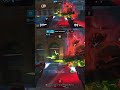
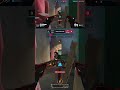
Why Throwing My Bomb at Orisa Cost Me a Genji Kill #Overwatch2 #Gameplay #Fail
In this intense Overwatch 2 gameplay moment, I make a crucial targeting error that costs our team a key pick. Instead of securing the elimination on the enemy Genji, I mistakenly throw my bomb at the Orisa, allowing the Genji to escape and continue harassing our backline. This clip perfectly illustrates a common mistake in high-pressure situations and serves as a critical lesson in target priority and ability management. Watch as Orisa's presence completely denies my play, and learn how to avoid similar blunders in your own matches to climb the ranks and secure more victories. Understanding the specific interactions between heroes like Orisa, Genji, and damage heroes with explosive abilities is key to improving your gameplay. Orisa's kit, featuring Fortify and Javelin Spin, allows her to absorb or negate projectile-based threats, making her a poor primary target for abilities like Ashe's Dynamite, Junkrat's Concussion Mine, or Tracer's Pulse Bomb. In contrast, Genji's low health pool and reliance on Deflect make him a prime target if you can bait out his cooldowns or catch him off-guard. This clip highlights the importance of tracking enemy tank abilities before committing your own key cooldowns. Orisa's Javelin Spin, for example, destroys incoming projectiles, so waiting for that 1.5-second window to end can ensure your bomb reaches its intended target. Similarly, her Fortify reduces damage and negates knockbacks, further diminishing the value of targeting her. The concept of "peeling" is also demonstrated here, as Orisa, intentionally or not, intercepts the bomb to protect her Genji. As a damage player, you must develop situational awareness to identify when the tank is positioned to peel and either wait for a better angle or coordinate with your team to focus fire on the correct target. Improving your target selection involves constantly assessing the battlefield: prioritize supports and damage heroes over tanks unless the tank is critically low or out of position. Communication and ult economy are also affected by such moments; a missed kill on Genji could mean he builds Dragonblade faster, while your team loses momentum. To elevate your gameplay, practice tracking cooldowns, positioning to bypass tanks, and utilizing high ground for better sightlines. Maps like Ilios, Lijiang Tower, or King's Row offer environmental opportunities, but the core principles of target priority remain consistent across all Overwatch 2 modes. Whether you're playing Ashe, Junkrat, Tracer, or another damage hero, understanding these interactions will significantly boost your impact in team fights. Share your own experiences with Orisa denials and Genji escapes in the comments, and discuss strategies for overcoming these common obstacles. If you found this analysis helpful, please like this video, subscribe to the channel for more Overwatch 2 gameplay insights, tips, and highlights, and hit the notification bell so you never miss an upload. Turning fails into learning opportunities is how you grow as a player, so keep grinding and we'll see you in the next one! #Overwatch2 #Gameplay #Fail
Overwatch2 Gameplay Fail
Видео Why Throwing My Bomb at Orisa Cost Me a Genji Kill #Overwatch2 #Gameplay #Fail канала Feureau Gaming
Overwatch2 Gameplay Fail
Видео Why Throwing My Bomb at Orisa Cost Me a Genji Kill #Overwatch2 #Gameplay #Fail канала Feureau Gaming
Комментарии отсутствуют
Информация о видео
4 апреля 2026 г. 19:36:00
00:00:20
Другие видео канала