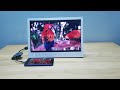
Old Laptop Convert to LED/LCD TV or Monitor || Make LED/LCD TV at Home || Setup TV Panel Make A TV.
If you like the video then you hit the like & share button and let me know Your valuable feedback and comments in the "comments" section.
LED, LCD TV MAIN BOARD SPECIFICATIONS:
1. It can compatible with three-in-one screw holes structure and dam board.
2. TV system support PAL+SECAM/NTSC system, optional full standard system.
3. Max supports FULL HD 1920X1080 resolution TFT-LCD screen.
4. Support 1=AV input 1=VGA interface”support 1920 X 1080 @ 60Hz input.
5. 1=high-definition digital multimedia port=HDMI, HDCP1.2 and DVI 1.0.
6. 1*USB”supports Audio,MP3″Video,AVI, MPEG1,image,JPEG,BMP,PNG,text file,TXT.
7. Dynamically adjust the picture’s color, contrast ratio, definition and so on.
8. Brightness, chroma instantaneous improvement function, black/white level extensions function, color compensation function.
9. Supports control of treble or bass, Stereo input.
10. The rating of Audio loudspeaker output is 2W*2(8ohm).
11. Automatically detect input video format.
USB Updating Firmware.
Step 1: Empty the U disk.
Step 2: Copy the corresponding resolution program (*. Bin file) with the TXT file to U disk.
Step 3: Connect the U disk and TV Mainboard Via USB Interface.
Step 4: Connect the Keyboard and TV Mainboard.
Step 5: Connect the power supply, check keyboard light. If light flashes mean the firmware is being written; until the light turns to Green, work is done.
(If the light is not flashing, please cut off the power supply, then reconnect the USB, then connect the power supply again).
(Note: *During Step 5, the power supply can’t be paused* The same firmware can only be burned once time) After all, done, use the remote control to turn on the tv (after burning the firmware, the mainboard is on standby, the remote can wake up the tv)
SERVICE MODE:
1. Press Menu, then the LCD will have a menu on the screen,
2. Press the number keys 8,8,9,6, a menu appears on the screen,
3. Select SYSTEM SETTING and enter,
4. Select Panel Setting ,tone 1,2,3,4 .. . . . . . . After the screen is ok, press ESC, Done
Factory Settings:
1. Menu–remote control press 8896–factory setting
2. Screen Specification Adjustment: Factory setting–Use the right key to choose–MAP data (LVDS MAP DATA has 16 items totally, it is enough for most of the screen)
BOOT LOGO SETTING:
Step 1: Put your logo into the U disk.
Step 2: Connect your U disk with the mainboard.
Step 3: Find your logo in Multi-media File.
Step 4: Select your logo.
Step 5: Press No.”6 ” on the remote control to change to full-screen play, then press “ok” on the remote control, on the bottom of the option items, there is a ” catch”, choose it. Done.
Mirror Function Setup
1. Press: Menu +8896.
2. Enter into: Factory Setting.
3. Enter into: Panel Control.
4. Select Mirror on /Off.
Please subscribe to my channel and make sure to press the Bell Button to get an instant update.
Thanks for watching Dream Finder videos. Hope you enjoyed watching my video.
SUBSCRIBE FOR MORE HERE: https://www.youtube.com/channel/UCzlOs_RDnMqct6HhmtWC8NQ?sub-confirmation=1
Facebook Page: https://www.facebook.com/All-Rounder-BD-479842619180810/
#how_to_use_old_laptop_screen_as_tv
#china_universal_lcd/led_tv_board_installation_total_tutorial
#universal_board_lcd_led_monitor_12v
#how_to_install_universal_board_any_led_lcd_tv
#universal_tv_kit
#how_to_convert_monitor_into_smart_tv
#how_to_make_led_tv
#how_to_install_universal_board_any_led_lcd_tv
#how_to_make_LED_LCD_TV_using_any_LED_LCD_Display
#Homemade_TV
#Home_made_television
Видео Old Laptop Convert to LED/LCD TV or Monitor || Make LED/LCD TV at Home || Setup TV Panel Make A TV. канала Dream Finder
Показать
Комментарии отсутствуют
Информация о видео
Другие видео канала
 Making an external monitor from a laptop screen - Reuse old lcd panel/old laptop screen
 how to install universal card Laptop LCD | lvds cable match step by step | hindi urdu
 DIY - How to Make Cheapest LED TV at Home
 Make Smart TV Using Broken Display Phone | in Hindi | टूटे हुए फ़ोन से बनाये स्मार्ट टीवी।
 Things you can make from old, dead laptops
 Transform a Damaged Laptop into an ALL-IN-ONE desktop PC
 DIY Transparent Screen
 Install universal board in led/lcd? किसी भी एलसीडी एलइडी में universal board किस प्रकार इंस्टॉल करें
 How To Install Universal Mother Board to Any LED LCD TV step by step in Hindi
 The $50 Recycled Portable Monitor Project
 How to make TV from an old laptop part-01
 TP V56U11 2 BOARD INSTALLATION
 Old laptop Screens on a Raspberry PI... Yes indeed.
 How to make LCD TV from Panel Laptop
 New Version Bord VS T56U11.2 Installation किसी भी पैनल में चाइना LED बोर्ड कैसे लगाये#techgurumaster
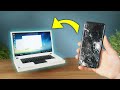 Smartphone to laptop transformation
 How to reuse the old LCD Screen of your broken Laptop
 Convert Computer LCD into TV Urdu Hindi
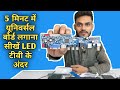 Universal Motherboard install in LED TV in 5 Minute | No Software & No Soldering need
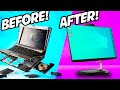 I turned a DEAD LAPTOP into this!