How to Unbox and Set Up the HP Smart Tank 500 and 600 Printer Series | HP Smart Tank | HP
This video is updated to : https://youtu.be/YNjfNMZlZ1U
Learn how to unpack, set up, and install the HP Smart Tank series printer.
To learn more about the first-time printer setup for HP Smart Tank 500, 600 printers, visit our support site, https://support.hp.com/in-en/document/c06263649.
For other helpful videos go to http://hp.com/supportvideos or http://youtube.com/hpsupport.
More support options are available at http://hp.com/support.
Continue the Conversation:
http://hp.care/SupportForums
http://hp.care/FacebookSupport
http://hp.care/TwitterSupport
Follow these steps to unpack, set up, and install the HP Smart Tank series printer:
-Remove all supplies and documentation from the box.
-Set the box on its side, then use the two handles to pull the printer out of the box.
-Remove the Styrofoam, plastic bag, and blue tape.
-Open the scanner and remove the protective sheet.
-Open the front door and remove the blue tape and cardboard.
-Open the printhead access door, remove the tape and cardboard.
-Close the doors, plug in the printer, and turn it on.
-If your model has a touchscreen, select your language and confirm.
-Select your country or region and date and time.
-When prompted, fill the ink tanks.
-Black ink: unscrew the cap, remove and discard the seal, then screw the cap back on.
-Open the front door and open the cap on the black ink tank.
-Flip open the black ink bottle cap, or if you have a screw top bottle, unscrew the cap.
-Set the bottle upside down on the ink tank spout.
-Without squeezing, allow the bottle to drain.
-Discard the empty bottle then close the black ink tank.
-Repeat for yellow, magenta, and cyan.
-If your model doesn't have a touchscreen, close and then reopen the front door.
-Open the printhead access door.
-Wait until the carriage is in the center and silent.
-Rotate the orange plastic support handle clockwise to disengage it.
-Push down on the blue latch, then discard the orange plastic support.
-Remove the Tri-Color printhead from its package, remove the orange plug, then pull the tab to remove the plastic tape.
-Hold the Tri-Color printhead by its sides, then slide it into the left slot until it snaps into place.
-Repeat this process to install the Black printhead in the right slot.
-Push down the blue latch to close.
-Close the doors, lift the input tray, and slide the paper guide out all the way.
-Load plain white paper and adjust the guide.
-Print an alignment page.
-Place the alignment page on the scanner as prompted.
-Touch Scan or press the Start Black Copy button to align the printer.
-Follow the prompts and finish setup at 123.hp.com.
#HP #HPSupport #HPSmartTank
SUBSCRIBE: www.youtube.com/HPSupport
SHOP NOW: http://store.hp.com/us/en/
About HP:
HP Inc. creates technology that makes life better for everyone everywhere - every person, every organization, and every community around the globe. Through our portfolio of printers, PCs, mobile devices, solutions, and services, we engineer experiences that amaze.
Connect with HP:
Visit HP WEBSITE: http://www.hp.com
Like HP on FACEBOOK: https://www.facebook.com/HP
Follow HP on TWITTER: https://twitter.com/HP
Follow HP on INSTAGRAM: https://www.instagram.com/hp
Follow HP on LINKEDIN: https://www.linkedin.com/company/hp
This video was produced by HP.
How to Unbox and Set Up the HP Smart Tank 500 and 600 Printer Series | HP Printers | HP
https://www.youtube.com/user/HP
Видео How to Unbox and Set Up the HP Smart Tank 500 and 600 Printer Series | HP Smart Tank | HP канала HP Support
Показать
Комментарии отсутствуют
Информация о видео
Другие видео канала
 HP Smart Tank 530 AiO Printer unboxing and setup step by step.
 HP Deskjet F2400 CISS - HP 60, 300, 121, 818 Ink, F2420, F2423, F2430, F2476, F2480, F2483, F2488 --
 HP Smart Tank Plus 555 unboxing
 HP Ink Tank Wireless Printer - 419 | All-in-one | 2019 | In-depth Review
 I Broke Into A House And Left $50,000
 How does a blockchain work - Simply Explained
 Epson EccoTank ET-2750 Unboxing and Overview
 Office Jet Pro 8025 Unboxing and Set up
 HP 315 Ink Tank Printer Installation Guide
 Replace the VGA Fan | HP Zbook 15 G3 Mobile Workstation | HP
 Unboxing printer hp 515 indonesia
 Why Printer Ink Is So Expensive | So Expensive
 Unbox/Set Up the HP OfficeJet 8010, 8020, or Officejet Pro 8030 Printer Series | HP OfficeJet | HP
 HP 410 ink tank wireless color printer unboxing, installation, ink filling and Test print
 Hp Deskjet Printer 5075 Unboxing & Review
 Replace the Display Panel Assembly/Top Cover | HP ZBook 15 G3 Mobile Workstation | HP
 Canon TR4550 Unboxing, Setup and Quick Test
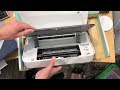 HP Tango X Printer : Unboxing and Initial Setup
 HP Ink Tank 310| 315 |318|319 : Unbox, Fill Ink Tank, Install printheads, Print Scan Alignment page
 HP Envy Photo 7855 | 7864 | 7830 | 7820 printer Unboxing Connect to 5GHz Wireless network