How to block mount an A3 Inkjet Print in 3 minutes!
Using Marrutt Professional PhotoMount - a light-weight, rugged, self-adhesive display system for prints from 5" x 7" right up to 24" x 30" - Stunning hard plastic finished 1" edge in grained wood effect gloss white or gloss black - gives your print a beautiful appearance on the wall or on your table top.
Our NEW Professional PhotoMount Display System gets around three major drawbacks to framing pictures:
1. High cost - These A3+ prints were mounted for £11.95 + VAT!
2. Labour intensive - A PhotoMount Print is completed in minutes!
3. A frame imposes it's character on to the image - Our PhotoMount shows off your image without altering the message conveyed by your composition!
Full spec, sizes, prices and delivery times at:-
http://www.marrutt.com/photomount-pro.html
If you don't see the size / format that you require for your production prints - let us know, we can make them for you, so long as you need them as a regular requirement (delivery for special orders is usually 4 weeks airfreight 8 weeks sea freight)
Note on the video: John shows off his high-speed mounting skills using an A3 print, but he only had an 11" x 14" PhotoMount Pro block to work with - an actual A3 PhotoMount Pro block would be only slightly smaller than 11.69" x 16.54", which is the actual size of an A3 borderless print - The finished A3 mounted print would actually end up to be around 1/2" smaller overall in height and width.
John insists on using the best snap-off knife he can get his hands on (in this case a professional series Stanley knife) and always uses a new blade (snap off a new blade for every new mounting job)
- use a cutting mat, it extends the life of your blades, and guides the blade edge accurately tight to the mounting board edge, giving that all-important crisp square-cut edge to your trimmed print.
He says that if you have any questions about technique / speed / costs - give him a ring directly on +44(0) 1825 764 057 between 9 - 5 GMT - his e-mail skills are limited!
Видео How to block mount an A3 Inkjet Print in 3 minutes! канала marrutt
Показать
Комментарии отсутствуют
Информация о видео
Другие видео канала
 Inkjet Printing Masterclass Lesson 2 Pt 2 - Professional Photographic Ink Essentials - Pt 2
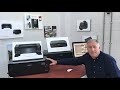 Five steps to high end photo inkjet - Equipment Basics Pt2
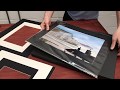 Marrutt Camera Club Competition Card Mounts
 Smartphone WiFi printing for all the family!
 How to fault-find a wide-format inkjet printer - air entering ink system etc Pt 2 of 3
 Media Review Introduction Part 2
 Marrutt Refillable Cartridge System Installation Instructions
 Lyson FAQs 3: CIS Fault-finding - Pt 3
 Magic Bullet Paper Feed Restorer from Specialist Inks
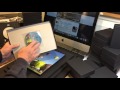 Marrutt Digital PrintBox
 Marrutt Professional Photographic Inkjet Paper - Intro
 Five steps to high end photo inkjet - High-end colour photo inkjet printing Pt1
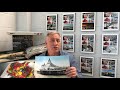 Marrutt 230gsm Archival Matte DS - Double Sided Inkjet Paper
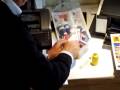 Epson R800/R1800 - Refill Cartridge Ink System from Marrutt
 Inkjet Printing Masterclass Lesson 5 Pt 1 - Colour Printing Masterclass
 Inkjet Printing with Genuine Pixels: Ch 2 - Film Negative vs Camera Sensor Pixels
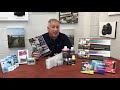 Five steps to high end photo inkjet - Materials Basics Pt1
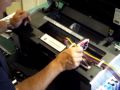 Nine Channel Lyson CIS for Epson R2880 - pt 4
 Inkjet Printing Masterclass: Lesson 3 Pt 1 - Pro Photo Inkjet Paper Essentials Part 1
 Lyson FAQs 2: Bad Nozzle Check Basics - Pt 2
 Contact Sheet Demo for A4 Digital PrintBoxes