etrailer | Rear View Safety Backup Camera System Installation - 2005 Ford Escape
Click for more info and reviews of this Rear View Safety Inc Backup Camera:
https://www.etrailer.com/Backup-Camera/Rear-View-Safety-Inc/RVS-778718N.html
Check out some similar Backup Camera options:
https://www.etrailer.com/dept-pg-Backup_Camera-sf-Backup_Camera_Systems.aspx
Search for other popular Ford Escape parts and accessories:
https://www.etrailer.com/vehicle/2005/Ford/Escape
https://www.etrailer.com
Don’t forget to subscribe!
https://www.youtube.com/user/etrailertv
Full transcript: https://www.etrailer.com/tv-install-rear-view-safety-backup-camera-2005-ford-escape-rvs-778718n.aspx
Today in our 2005 Ford Escape, we'll be installing the rearview safety backup camera system with a mirror monitor and license plate mounted camera. Part #RVS-778718N. We'll turn our key on. The green LED comes on on our mirror, we know we have power. Place our vehicle in reverse and our backup camera comes on with our grid distance warning shown on the display. You can see we have a very clear and large display on our backup camera to show us what's going on in our mirror. We can adjust the brightness on our mirror by pressing the power button here quickly, releasing it to get the desired level that we want. Leave it at 50 because it's right in the middle. If we want to turn the mirror off, we can just hold down the power button and it shuts off.
Hold it back down again, it comes back on. Replace it back in park, we see our image display on the mirror goes away and we have a standard rearview mirror behind us. We place it back in reverse again, our display pops up on the mirror and we have a good idea of what's going on directly behind us. This is perfect if a small child was to be behind us in our driveway and we went to back up. We wouldn't be able to see them in the mirror, but we'd be able to see them on the backup camera. Our mirror even comes with a remote to change various settings. We hit our menu button, we can adjust our brightness, our contrast, our color, night brightness.
You'll want to refer to your instruction manual for all the settings that you can adjust. We're going to back out of our bay now, so you can see what this looks like while you're actually driving. You can see that it does give you a helpful imagine that looks behind you. We're going to back up to a trailer and you can see how helpful the backup camera is for aligning with the trailer. It makes it a lot easier to get your hitch in line with the coupler on the trailer. The rearview safety backup camera with mirror display is an ideal solution if you want to install a backup camera on your vehicle, and don't want to have a second monitor on your dash; you want to utilize an existing location on your vehicle. This works perfectly for that.
It'll allow you to see what's going on behind you while you're backing up a lot easier, so you don't run into any objects. Unlike a lot of rearview mirror system cameras out there, it's a direct replacement for your factory mirror and it looks just like a factory mirror. It's not something that clips on to it; replaces it directly. It's a very clean and professional looking installation once you have it installed. As you can see if someone walks behind your vehicle when you're in a parking lot, you'll be able to see them a lot easier. We'll start our installation at the back of our vehicle. We're working with the license plate right now. We'll remove it.
Depending on your application, your license plate screws may vary; if they've been replaced or if they're the factory original ones. Ours, I believe, are factory originals. They're eight millimeter. You could also use a flat head screwdriver on them. Take our plate off and we'll keep our screws loose for now, and we'll open our hatch on up. With our hatch open, on our hatch panel here you'll find four phillips screws that hold it in place. We'll remove all four of these screws now. With those four screws removed we can grab our hatch panel and pull down on it. We'll close the door slightly, we'll open the glass portion of the hatch now. We need to have the glass portion open in order to raise the panel up all the way. Unhook it from the door, with it unhooked we can close the glass now, open the hatch all the way, take the panel out and set it aside. Right in this general area right here, we'll be drilling a hole through our hatch. There's wires behind it, so we want to get these out of the way so we don't accidentally drill through the wires. We'll unclip our lock actuator here, and then unclip the wires from the door with a trim handle tool. We'll just pry the wires on the backside of lock actuator like that. We'll have plenty of clearance and they won't be in the way now. Right in the middle here, we'll just draw a line straight down and drill a small pilot hole for our wire to pass through once we enlarge the hole. You can see where our pilot hole came through. We'll use a step bit to enlarge our hole. With that enlarged we'll s
Видео etrailer | Rear View Safety Backup Camera System Installation - 2005 Ford Escape канала etrailer.com
Показать
Комментарии отсутствуют
Информация о видео
Другие видео канала
 Wireless Back Up Camera Installation - Ford Escape
 NEW TECH in Audrey's Escape! (Back Up Camera, GPS, Wi-Fi, & More)
 Car Backup Cameras Explained: How To Install On Your Car!
 Powering your backup camera (and how to use that extra wire) | Crutchfield
 Ford Escape: Rear Wiper Motor Repair
 Specchietto retrovisore smart economico 10" con dash cam, telecamera retromarcia e parking monitor
 2005 Ford Escape Misfire Fix 3.0 V6
 Rear view camera installation - 2008 Ford Escape
 Top 5 Problems Ford Escape SUV 1st Generation 2001-07
 Installing New Android Radio With Backup Camera and Navigation on a "2009 Toyota RAV4"
 Cómo acceder a la cámara de reversa para cambiarla - Ford Escape Kuga 2014
 2-Way Dashcam Installation | Easy to follow tutorial | 2019 Honda Brio CVT | Car Bits
 Ford Escape Rear Camera Intermittently Not Working Case Study. #CYA
 como checar fallas de bobinas ford escape 3 0 y multiples fallos
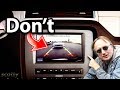 This Backup Camera Will Save Your Life
 How to - Back up Camera Installation
 Mustang Digital LCD Speedometer Install, Feels Like a Super Car!
 Ford Escape Liftgate Glass Hinge Replacement
 Ford Escape Backup Camera Installation to MFT: HOW TO ESCAPE
 2013 Toyota Camry SE Backup Camera Installation